Introduction to Finish Carpenter Tools
Having the right finish carpenter tools is everything – your work is only as good as the tools you bring to the job. You can have decades of experience and the best materials money can buy, but if your miter saw can’t hold a consistent angle or your tape measure is sloppy, your work will show it. The right tools don’t just make the job easier – they make precision possible.
This guide to finish carpenter tools is specifically for finish carpenters – not framers, not general contractors, not weekend DIY warriors. The tools listed here are what you need to install trim, baseboard, crown molding, door casings, window casings, wainscoting, stair components, and cabinetry. Some of them overlap with other trades, but the specific features that matter for finish work are different.
📚 Related Guides
- Finish Carpentry Cheat Sheets and Printable References
- Adjust Exterior Door: 5 Essential Fixes That Actually Work
- Install a Pocket Door: 7 Pro Steps for a Perfect Finish
- How To Install an Exterior Finish Slab Like a Pro
- How to Trim a House Start to Finish Like a Pro
Browse all guides at /learn/
I’ve organized these finish carpenter tools into two priority tiers: “Start With” tools you need from day one, and “Add Later” tools that expand your capabilities as your skills and project complexity grow. Nobody needs to buy everything at once. Build your kit strategically and buy the best quality you can afford in each category – a $400 miter saw you trust beats a $150 one you’re constantly fighting. Family Handyman also covers some great starter tool recommendations.
Every one of these finish carpenter tools has earned its place through thousands of hours of real job-site use. If it’s on this list, it’s because I’ve used it, relied on it, and would buy it again.
Before You Buy Finish Carpenter Tools
Prerequisites
- Basic understanding of finish carpentry tasks (trim, molding, casings)
- Access to a vehicle that can transport long materials and large tools to job sites
- Proper personal protective equipment: safety glasses, hearing protection, dust mask
- Secure tool storage at home and on the job site
What You Need To Know
- Buy the best quality finish carpenter tools you can afford – cheap tools cost more in the long run through replacements and poor results
- Cordless tools have largely replaced corded for finish carpentry – the convenience is worth the investment
- Stick to one battery platform (DeWalt, Milwaukee, Makita) to share batteries across tools
- Pneumatic nail guns still outperform battery-powered ones for production speed, but cordless is catching up fast
- Price ranges listed are for professional-grade tools – there are cheaper options but they won’t last on a job site
Finish Carpenter Tools: Power Tools
Miter Saw – START WITH
This is the single most important of all finish carpenter tools. You’ll use it for every cut on baseboard, casing, crown molding, and most stair components. A sliding compound miter saw with at least a 10-inch blade handles the vast majority of finish work, though a 12-inch gives you more capacity for wider crown and baseboard profiles.
- What it does in finish carpentry: Miter cuts, bevel cuts, compound angles for crown molding, square crosscuts for casing and trim pieces
- Key features to look for: Dual-bevel (tilts both directions so you don’t flip the workpiece), sliding rails for wider crosscut capacity, positive stops at common angles (22.5, 31.6, 45), fine adjustment for micro-angle tuning, laser or shadow line for cut alignment
- Price range: $300-$700 for a quality 10-12 inch sliding compound miter saw
- Recommended blade: 80-tooth fine-finish blade (Diablo or Freud) – the stock blade that comes with most saws is not fine enough for trim work

Table Saw – ADD LATER
A table saw becomes essential when you’re ripping material to width – shimming out jamb extensions, cutting wainscoting panels, sizing baseboard for non-standard heights, or making cabinet components. Get a portable jobsite model, not a full cabinet saw.
- What it does in finish carpentry: Rip cuts to custom widths, sheet goods crosscuts, dado cuts for shelving and joinery
- Key features to look for: Rack-and-pinion fence system for accurate rip width, jobsite portable with folding stand, 15-amp motor minimum, 24.5-inch rip capacity, dust collection port
- Price range: $350-$600 for a quality jobsite table saw
Circular Saw – START WITH
Your backup cutting tool and your go-to for rough cuts, breaking down sheet goods, and cuts that are too long for the miter saw. A compact 6-1/2 inch cordless model is perfect for finish work – lighter and more maneuverable than a full-size 7-1/4 inch.
- What it does in finish carpentry: Breaking down plywood and MDF sheets, rough-cutting material to length before final cuts on miter saw, cutting in place when removal isn’t practical
- Key features to look for: Cordless (matching your battery platform), 6-1/2 inch blade for weight/maneuverability, good sight line to blade, electronic brake
- Price range: $150-$250 (tool only, cordless)
Jigsaw – START WITH
Every finish carpenter needs a jigsaw for curved cuts, notching around obstacles, and cutting openings in installed material. Invaluable for scribe-fitting countertops, cutting around pipes, and trimming door bottoms in place.
- What it does in finish carpentry: Curved cuts, notching, scribe cuts, cutting openings in installed panels, trimming material in place
- Key features to look for: Orbital action settings (0-3), tool-free blade change, cordless, low vibration, dust blower to clear cut line
- Price range: $100-$200 (tool only, cordless)
Random Orbital Sander – START WITH
Essential for smoothing putty-filled nail holes, feathering caulk joints, prepping raw wood for stain, and cleaning up any imperfections before the painter arrives. The random orbital pattern prevents swirl marks that a regular palm sander leaves.
- What it does in finish carpentry: Smoothing filled nail holes, prepping surfaces for paint or stain, feathering joint compound on built-ups, final surface prep
- Key features to look for: 5-inch pad, variable speed, hook-and-loop pad (for quick sandpaper changes), dust collection bag or port, cordless preferred
- Price range: $70-$150 (tool only, cordless)
Router – ADD LATER
A compact trim router handles edge profiling, template routing, hinge mortising, and creating custom molding profiles. The compact/trim size (1-1/4 HP) is all you need for finish work – full-size routers are overkill and harder to control on delicate trim.
- What it does in finish carpentry: Edge profiling (roundover, chamfer, ogee), hinge mortising with a template, flush trimming edge banding, custom molding profiles
- Key features to look for: Compact/trim size, variable speed, both fixed and plunge bases (combo kit), 1/4-inch collet, soft start, cordless or corded (corded routers still have more consistent power)
- Price range: $120-$250 for a trim router combo kit
Oscillating Multi-Tool – START WITH
The problem solver. When you need to undercut a door casing to slide flooring beneath it, flush-cut a nail or screw, trim a shim, or cut an opening in a tight space where no other saw fits, the oscillating multi-tool is your answer. Every finish carpenter should have one within arm’s reach.
- What it does in finish carpentry: Undercutting door casings for flooring, flush-cutting shims and dowels, cutting in tight spaces, removing old caulk and adhesive, detail sanding in corners
- Key features to look for: Cordless, tool-free blade change (Starlock or quick-release), variable speed, compatible with universal blade fitment
- Price range: $100-$200 (tool only, cordless)
Pneumatic/Nail Gun Tools
Air Compressor – START WITH (if using pneumatic guns)
If you go the pneumatic route for your nail guns (which I still recommend for production work), you need a compressor that can keep up with finish nailers. A 6-gallon pancake compressor handles one nailer. For running two guns simultaneously or a framing nailer, step up to an 8-gallon twin-tank.
- What it does in finish carpentry: Powers all pneumatic nail guns – finish nailers, brad nailers, pin nailers, staple guns
- Key features to look for: Oil-free pump (no maintenance), 150 PSI max, 2.6+ CFM at 90 PSI, 6-8 gallon tank, reasonable noise level (some jobsites have noise restrictions)
- Price range: $150-$300
15-Gauge Finish Nailer – START WITH
Your primary fastening tool for finish carpentry. The 15-gauge drives angled nails from 1-inch to 2-1/2-inch that have serious holding power. Use it for door and window casing, baseboard, crown molding, chair rail, and any trim piece that needs to stay put. The 15-gauge nail is thick enough to hold but thin enough not to split most trim materials.
- What it does in finish carpentry: Attaches all major trim pieces – casing, baseboard, crown, chair rail, built-in components
- Key features to look for: Angled magazine (reaches into tight corners), depth adjustment, no-mar tip, dry-fire lockout, tool-free jam clearing
- Price range: $150-$300 (pneumatic) / $250-$400 (cordless)
18-Gauge Brad Nailer – START WITH
The workhorse for lighter trim, small moldings, shoe molding, and tacking pieces in place before the finish nailer locks them down. The 18-gauge brad is thinner than a 15-gauge finish nail, making it less likely to split delicate or narrow trim pieces. Most finish carpenters use the brad nailer more than any other gun on a daily basis.
- What it does in finish carpentry: Shoe molding, small cove and quarter-round, tacking pieces before final nailing, cabinet trim, thin panels, backing pieces
- Key features to look for: Straight magazine, fires 5/8-inch to 2-inch brads, depth adjustment, no-mar tip, lightweight for one-hand operation
- Price range: $80-$200 (pneumatic) / $200-$350 (cordless)
23-Gauge Headless Pin Nailer – ADD LATER
The secret weapon of high-end finish carpentry. The 23-gauge pin is so thin it leaves virtually no visible hole – no filling, no sanding, no touch-up paint over the fill. Use it for stain-grade work, mitered returns, small molding details, and anywhere a visible nail hole would ruin the finish. The pins have almost no holding power on their own – they act as clamps while glue dries.
- What it does in finish carpentry: Stain-grade trim attachment (invisible holes), mitered returns, delicate molding details, newel post trim, applying edge banding
- Key features to look for: Headless pins (not headed micro brads), fires 1/2-inch to 1-inch pins, lightweight, precise tip for exact placement
- Price range: $80-$150 (pneumatic) / $150-$250 (cordless)
Pneumatic Stapler – ADD LATER
Less common in finish carpentry than in upholstery or cabinet work, but a narrow-crown stapler (1/4-inch crown) is useful for attaching cabinet backs, thin panels, and fabric or screen in specialty applications. Not a day-one purchase.
- What it does in finish carpentry: Cabinet back panels, thin plywood attachment, fabric/screen stapling, temporary holds
- Key features to look for: Narrow crown (1/4-inch), fires 1/2-inch to 1-1/2-inch staples, depth adjustment
- Price range: $50-$120 (pneumatic)
Finish Carpenter Tools: Hand Tools
Tape Measure – START WITH
You need at least two: a 25-foot for general measuring and a 16-foot for close-quarters work. In finish carpentry, 1/16-inch accuracy matters. Buy a tape with clear, easy-to-read markings in 1/16-inch increments and a hook that doesn’t have excessive play.
- Key features: 1/16-inch markings (not just 1/8), self-locking blade, magnetic hook (for solo measuring against metal studs or nails), belt clip, standout of at least 7 feet
- Price range: $15-$35 each
Speed Square – START WITH
A 7-inch speed square is your instant 90-degree and 45-degree reference, your saw guide for crosscuts with a circular saw, and your marking tool for layout lines. It lives in your tool pouch and gets used dozens of times a day.
- Key features: Aluminum (not plastic), etched degree markings (not printed – they wear off), lip along one edge for hooking onto material
- Price range: $10-$20
Framing Square – ADD LATER
The large L-shaped square used for checking corners for square, laying out stair stringers, and verifying large panels. Not used as frequently as the speed square in finish work, but essential when you need it.
- Key features: Steel or aluminum, 16-inch x 24-inch, clearly etched markings, stair gauge set (clamps onto the square for repetitive stair layouts)
- Price range: $15-$30
Levels – START WITH
You need multiple levels for finish carpentry. A 4-foot level for door jambs, a 2-foot level for tighter spaces, and a torpedo level (9-inch) for your pouch. Accuracy matters more than features – buy quality levels with vials you trust.
- Key features: 4-foot, 2-foot, and torpedo sizes as a minimum set; aluminum or fiberglass frame; shock-absorbing end caps; accuracy of 0.0005 inches per inch (0.5mm per meter)
- Price range: $30-$80 per level (buy quality – Stabila, Empire, or Kapro)
Utility Knife – START WITH
You’ll use this more than you think – trimming shims, scoring caulk lines, opening material packages, marking cut lines on dark wood, sharpening pencils. Keep fresh blades in it at all times. A dull utility knife is more dangerous than a sharp one.
- Key features: Retractable blade, tool-free blade change, blade storage in handle, solid locking mechanism
- Price range: $5-$15
Chisel Set – START WITH
A set of 3-4 chisels (1/4-inch, 1/2-inch, 3/4-inch, 1-inch) covers all finish carpentry needs. Use them for cleaning hinge mortises, trimming tight joints, paring material for precise fits, and any fine detail work. Keep them sharp – a dull chisel tears wood instead of cutting it.
- Key features: High-carbon or chrome-vanadium steel, bevel-edge design (reaches into corners), comfortable handle for hand pressure, comes with blade guards
- Price range: $30-$80 for a 4-piece set
Coping Saw – START WITH
Essential for cutting inside corner cope joints on baseboard, crown molding, and chair rail. The coping saw cuts the profile of the molding so it butts perfectly against the adjoining piece – a far superior joint to a mitered inside corner. This is a non-negotiable tool for professional trim work.
- Key features: Deep throat (at least 4-3/4 inches for wider moldings), blade tension adjustment, 6-1/2-inch blade length, replacement blades readily available (15-18 TPI for hardwood, 10-12 TPI for softwood)
- Price range: $10-$25
Nail Sets – START WITH
Used to drive finish nail heads below the wood surface so they can be filled and hidden. You need at least three sizes: 1/32-inch for 18-gauge brads, 2/32-inch for 15-gauge finish nails, and 3/32-inch for larger nails. Use them whenever your nailer doesn’t quite sink the nail flush.
- Key features: Knurled grip (doesn’t slip when struck), cupped tip (centers on nail head), hardened steel
- Price range: $5-$15 for a 3-piece set
Pry Bars (Flat Bars) – START WITH
A thin, flat pry bar (often called a “wonder bar” or “mini flat bar”) is critical for removing existing trim without damaging walls, pulling nails, and making fine adjustments to material position. Get a small 6-8 inch for delicate trim removal and a 12-15 inch for general prying.
- Key features: Thin, flat profile (slides behind trim without gouging), nail-pulling slot at both ends, forged steel
- Price range: $8-$20 each
Hammer – START WITH
Even with nail guns, you still need a hammer. Setting nail sets, tapping joints tight, adjusting material position, light demolition – it’s always in your pouch. A 16-ounce smooth-face is the right weight for finish work – heavy enough for nail sets but light enough for precision tapping.
- Key features: 16-ounce, smooth face (no waffle pattern – that’s for framing), comfortable grip, magnetic nail starter (nice to have), good balance
- Price range: $20-$40
Finish Carpenter Tools: Measuring and Layout
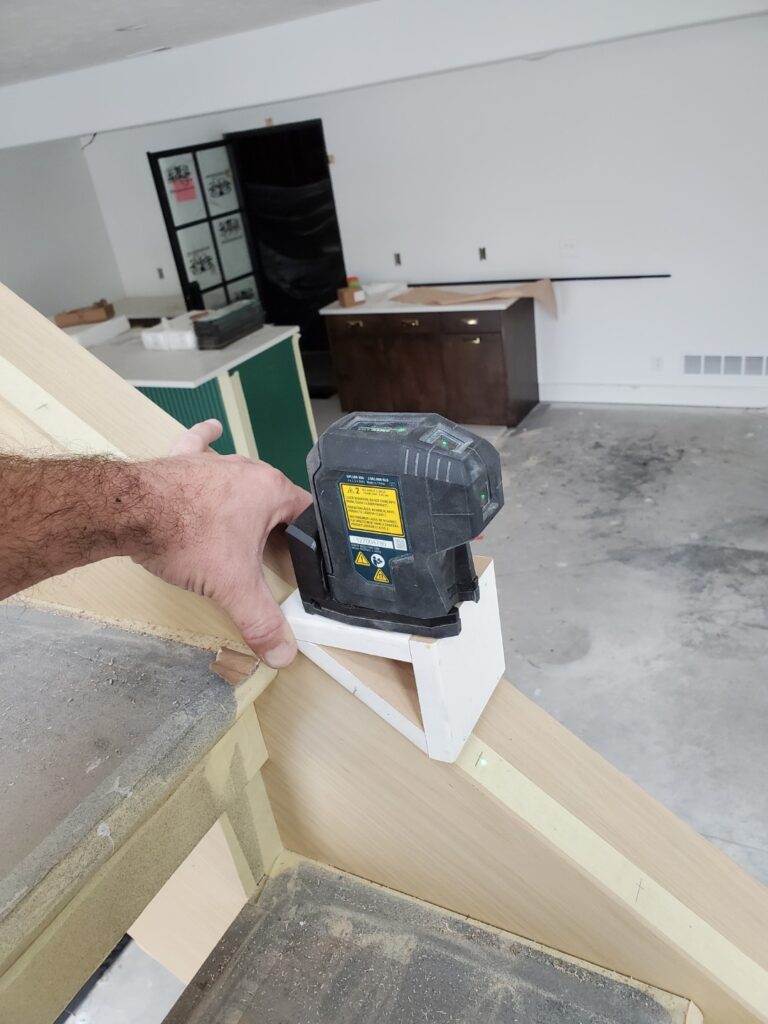
Laser Level – ADD LATER
A self-leveling cross-line laser replaces chalk lines for horizontal layout across long walls. Use it for setting consistent heights on chair rail, picture rail, wainscoting cap, and level baseboard installation references. A game-changer for large rooms.
- What it does in finish carpentry: Level reference lines for trim installation, verifying floor level across a room, aligning cabinet runs, marking consistent reveal lines
- Key features to look for: Self-leveling, cross-line (horizontal and vertical), visible in indoor lighting, tripod mount, rechargeable battery
- Price range: $80-$250 (Bosch, DeWalt, or Pacific Laser Systems)
Stud Finder – START WITH
Every piece of trim that gets nailed needs to hit a stud, or at minimum a bottom plate. An electronic stud finder beats the knock-and-guess method and saves you from blowing nails into empty drywall. Get one that detects edges (not just center) and also senses wiring and pipes.
- Key features: Edge detection (shows both edges of the stud), deep scan mode for thicker walls, AC wire detection, simple LED or screen display
- Price range: $25-$60
Chalk Line – START WITH
For snapping long straight lines on subfloors, walls, and panels. The most common use in finish carpentry is marking stud locations on the floor for baseboard nailing reference, and snapping level lines for wainscoting or chair rail. Blue chalk only – red is permanent and bleeds through paint.
- Key features: Self-retracting, fine-line tip, uses blue chalk (erasable), 100-foot line minimum
- Price range: $8-$15
Combination Square / Tri-Square – START WITH
A 6-inch combination square is the most versatile measuring tool in your pouch. Use it for checking 90-degree and 45-degree angles, marking consistent reveal lines on door jambs, setting consistent trim depth, and measuring short distances. The sliding head locks to any position for repetitive marking.
- Key features: 6-inch rule (12-inch is too big for most finish work), hardened steel rule, positive locking mechanism, built-in level vial (nice to have, but don’t rely on it for precision), scribe tool in handle
- Price range: $15-$35
Finish Carpenter Tools Checklist
Use this checklist to track your finish carpenter tools. Build your collection starting with the “Start With” items, then add “Add Later” tools as your projects demand them.
Day One Essentials
- ✓ Miter saw (10-12 inch sliding compound) with 80-tooth finish blade
- ✓ Circular saw (cordless, 6-1/2 inch)
- ✓ Jigsaw (cordless)
- ✓ Random orbital sander (cordless)
- ✓ Oscillating multi-tool (cordless)
- ✓ Cordless drill/driver
- ✓ Air compressor (if using pneumatic guns)
- ✓ 15-gauge finish nailer
- ✓ 18-gauge brad nailer
- ✓ Tape measures (25-foot and 16-foot)
- ✓ Speed square (7-inch aluminum)
- ✓ Level set (4-foot, 2-foot, torpedo)
- ✓ Utility knife with spare blades
- ✓ Chisel set (1/4, 1/2, 3/4, 1 inch)
- ✓ Coping saw with spare blades
- ✓ Nail set trio (1/32, 2/32, 3/32)
- ✓ Flat pry bars (small and medium)
- ✓ 16-oz smooth-face hammer
- ✓ Stud finder
- ✓ Chalk line (blue chalk)
- ✓ Combination square (6-inch)
Add As You Grow
- ✓ Table saw (jobsite portable)
- ✓ Router (compact/trim, combo kit)
- ✓ 23-gauge headless pin nailer
- ✓ Pneumatic stapler (narrow crown)
- ✓ Laser level (self-leveling cross-line)
- ✓ Framing square with stair gauges
- ✓ Biscuit joiner (for panel glue-ups and alignment)
- ✓ Track saw (for precise sheet goods cuts)
Common Finish Carpenter Tools Mistakes
Mistake: Using a Framing Blade on the Miter Saw for Trim
Why it matters: The 24-tooth framing blade that comes stock on most miter saws tears through trim materials, leaving rough, splintered edges that no amount of sanding will fix. Swap it for an 80-tooth finish blade immediately – it’s the single best improvement you can make to your cut quality.
Mistake: Buying Cheap Levels
Why it matters: A $12 level from a big box store may be off by 1/8 inch over 4 feet. That doesn’t sound like much until your door casing reveals are visibly uneven. Invest in Stabila, Empire, or Kapro levels – they’re accurate out of the box and stay accurate after being dropped.
Mistake: Mixing Battery Platforms
Why it matters: If your drill is DeWalt, your jigsaw is Milwaukee, and your multi-tool is Makita, you’re carrying three sets of chargers, three sets of batteries, and none of them are interchangeable. Pick one platform and commit. Each brand’s top-tier tools are competitive – the convenience of shared batteries matters more than marginal performance differences.
Mistake: Neglecting Blade and Bit Maintenance
Why it matters: A dull miter saw blade burns wood and creates poor joints. Dull chisels tear instead of cutting. A worn drill bit wanders and strips screws. Clean your saw blades with blade cleaner every few weeks, sharpen chisels regularly (or get them professionally sharpened), and replace drill bits when they stop biting cleanly.
Mistake: Using a Brad Nailer Where a Finish Nailer Is Needed
Why it matters: An 18-gauge brad doesn’t have the shear strength of a 15-gauge finish nail. Baseboard attached with only brads will eventually pull away from the wall, especially if the wall has any bow. Use the 15-gauge for structural attachment and the 18-gauge for supplemental or light-duty applications.
Mistake: Not Calibrating Your Miter Saw
Why it matters: Every miter saw needs to be calibrated out of the box. The fence may not be perfectly square to the blade, and the angle detents may be off by a fraction of a degree. Use a known-square reference piece and a combination square to verify 0 and 45 degrees. Adjust the detent bolts until both angles are dead-on. Re-check after transporting the saw to job sites.
Related Guides
- How to Trim a House Start to Finish – Put your tools to work on a complete trim-out project
- Finish Trim Carpentry Overview – Understand the scope of finish carpentry work
- How to Install Baseboard Like a Pro – One of the first skills every finish carpenter masters