📖 Read the Core Guide First #
This is a supplemental guide covering only what changes for handrail installation on garage or patio steps. The complete 9-step process is in the core guide: Build Garage Steps. Read that first, then return here for the specific modifications.
Introduction #
A garage step handrail is required by building code for stairs with 4 or more risers and is a smart safety addition even when not required. This is a supplemental guide for installing a handrail on garage or patio steps. The stair-building process itself is covered in our core guide: Build Garage Steps. Read that guide first. Everything below assumes your stairs are already built and focuses on when a handrail is required, what materials to use, and how to install it.
📷 Photo Needed
Completed install a garage step handrail — finished result showing professional quality
When a Garage Step Handrail Is Required #
Building codes vary by jurisdiction, but the most common thresholds are:
- 4 or more risers: A handrail is required on at least one side (IRC R311.7.8 — most US jurisdictions)
- 3 or more risers: Required in some jurisdictions (check your local code)
- 1–2 risers: Not required by most codes, but recommended for safety — especially for elderly users, uneven surfaces, or wet conditions
Even when not code-required, a garage step handrail is a low-cost safety improvement. If anyone using the stairs has mobility concerns or if the steps can get wet or icy, install one.
📷 Photo Needed
When a Handrail Is Required — photo illustrating this section
Building Code for Your Garage Step Handrail #
These are the key IRC residential code requirements. Your local jurisdiction may amend these, so check before you build:
- Height: 34″ to 38″ measured vertically from the stair nosing (front edge of each tread) to the top of the handrail. Consistent height on every tread
- Graspability: You must be able to wrap your hand around the rail. Acceptable profiles:
- Circular cross-section: 1-1/4″ to 2″ diameter
- Non-circular (oval, rectangular with eased edges): perimeter 4″ to 6-1/4″, max cross-section 2-1/4″
- Continuity: The rail must be continuous from the top riser nosing to the bottom riser nosing — no breaks or interruptions
- Extensions: The rail must extend horizontally at least 12″ beyond the top riser, and return to the wall or post (no open ends that can catch clothing)
- Clearance: At least 1-1/2″ between the rail and the wall (if wall-mounted)
- Structural: Must resist a 200 lb concentrated load applied in any direction at any point
📷 Photo Needed
Code Requirements for Handrails — photo illustrating this section
Garage Step Handrail Materials #
- Handrail: Pre-shaped wood handrail (available at any building supply store in 6’, 8’, and 12’ lengths) or metal handrail kit. For garage/utility stairs, a metal bracket-mount kit is the simplest option
- Handrail brackets: Wall-mount style — these bolt to the wall and cradle the rail. You need a minimum of 3: one near the top, one near the bottom, and one at mid-span. For rails over 8’, add a bracket every 4’
- Fasteners: 3″ or 3-1/2″ lag screws (for mounting into studs or framing) with washers. Each bracket needs 2 lag screws
- Wall anchors (if no studs): Heavy-duty toggle bolts rated for 200+ lbs if you cannot hit studs at every bracket location
- End returns or wall returns: Pre-made fittings that curve the rail end back to the wall. Required by code to prevent open ends
📷 Photo Needed
Tools and materials laid out for installing a garage step handrail — everything needed before starting
Garage Step Handrail Installation Process #
Step 1: Determine Rail Position #
Decide which side of the stairs gets the handrail. If one side is against a wall (garage wall, foundation wall), mount the handrail on that side — it’s structurally stronger and doesn’t reduce the stair width. If both sides are open, choose the side that gets the most use (typically the right side ascending, but either is acceptable).
📷 Photo Needed
Determine Rail Position — showing the key action and what the result should look like
Step 2: Mark Handrail Height #
- At the bottom step, measure up from the front edge (nosing) of the tread and mark the wall at 36″ (middle of the 34–38″ code range). This gives you room for minor adjustments
- At the top step, repeat — measure up from the nosing and mark 36″
- Snap a chalk line between the two marks. This line represents the top of the handrail and should follow the slope of the stairs
- Verify: the chalk line should be parallel to the stair nosing line. Measure at mid-point — it should also be 36″ from the nosing. If not, adjust
📷 Photo Needed
Mark Handrail Height — showing the key action and what the result should look like
Step 3: Locate Studs or Framing #
Handrail brackets must anchor into solid framing — not just drywall or siding:
- Use a stud finder to mark stud locations along the chalk line
- Studs are typically 16″ on center, but in garages they may be 24″ OC
- If mounting to a concrete or block wall (common in garages), use concrete anchors (3/8″ sleeve anchors or 1/4″ Tapcon screws)
- Mark each bracket location. Ideally, every bracket hits a stud. If a bracket must go between studs, use heavy-duty toggle bolts rated for the load
📷 Photo Needed
Locate Studs or Framing — showing the key action and what the result should look like
Step 4: Mount Brackets #
- Position the first bracket near the bottom of the stairs, 4–6″ from the bottom nosing
- Position the last bracket near the top, 4–6″ from the top nosing (or at the start of the 12″ horizontal extension)
- Space remaining brackets evenly between the first and last — 4’ maximum spacing
- Hold each bracket with the cradle aligned to your chalk line. The top of the handrail will sit on (or in) the cradle at the chalk line height
- Pre-drill pilot holes into the stud (or use appropriate anchor), then drive lag screws with washers. Snug but don’t overtighten — you can crack the stud or strip drywall anchors
- Check that each bracket is plumb (the cradle faces straight up, not angled)
📷 Photo Needed
Mount Brackets — showing the key action and what the result should look like
Step 5: Cut and Install Handrail #
- Measure the distance from the bottom bracket to the top bracket, then add 12″ for the horizontal top extension (code-required)
- At the bottom end, the rail should extend horizontally or return to the wall — add length accordingly
- Cut the handrail to length. For wood rails, use a miter saw for clean ends
- Set the rail into the bracket cradles. The rail should sit level in each cradle at the correct height
- Secure the rail to each bracket using the set screws or through-bolts provided with the brackets
- Install end returns: pre-made fittings that curve the rail end back toward the wall. Glue and screw. Code requires this to prevent clothing from catching on open rail ends
📷 Photo Needed
Cut and Install Handrail — showing the key action and what the result should look like
Step 6: Final Verification #
- Height check: Measure from every tread nosing to the top of the rail. Must be 34–38″ at every point, and consistent (no more than 3/8″ variation)
- Grip test: Wrap your hand around the rail at several points. Your fingers should close around it comfortably
- Load test: Grip the rail and apply your full body weight downward and laterally. No movement, no looseness, no creaking. The code requirement is 200 lbs — if there’s any give, reinforce the bracket anchoring
- Clearance: Verify 1-1/2″ minimum between the rail and the wall at all bracket locations
- Continuity: Run your hand along the full length — no breaks, no sharp edges, no protruding screws
- End returns: Both ends return to the wall (or a post). No open ends that could catch clothing or bags
📷 Photo Needed
Final Verification — showing the key action and what the result should look like
Quality Check: Garage Step Handrail #
- Rail height is 34–38″ from every tread nosing (consistent)
- All brackets secured into studs or heavy-duty anchors — no drywall-only mounts
- Rail is continuous with no breaks
- End returns installed at both ends
- 1-1/2″ clearance from wall maintained
- 200 lb load test passed (full body weight, no movement)
- Graspable profile — hand closes around rail
- No sharp edges, protruding fasteners, or rough spots
📷 Photo Needed
Completed install a garage step handrail — close-up detail shots showing quality criteria being met
Troubleshooting Your Garage Step Handrail #
No studs at the right locations: Common in garages with concrete block or wide stud spacing. For concrete/block walls, switch to concrete anchors (Tapcon screws or sleeve anchors — pre-drill with a hammer drill and masonry bit). For frame walls with wide spacing, use heavy-duty toggle bolts (rated 200+ lbs) between studs, and ensure at least 2 of your brackets hit actual studs.
Rail wobbles after installation: Re-check every bracket. The most common cause is one bracket that didn’t catch the stud. Remove, re-drill (you may need to move 1/4″ to find the stud center), and re-mount. If the bracket is sound, the rail may not be seated fully in the cradle — check set screws.
Height is inconsistent (varies more than 3/8″ from tread to tread): The brackets may not be precisely on the chalk line, or the stair treads have inconsistent rise. Adjust individual bracket heights by shimming or by using slotted screw holes. If the treads themselves are uneven (irregular rise), fix the treads first.
Handrail extends past wall at bottom: If the stairs don’t end against a wall, the rail needs a post (newel post) at the bottom instead of a wall return. This is a more involved installation — the post must be bolted through the bottom tread and kicker plate for structural support.
External Resources #
- IRC R311.7 — Stairway Code Requirements — residential building code for stairs, handrails, treads, and guardrails
- Simpson Strong-Tie LSC Stair Stringer Connector — connector hardware for attaching stringers to headers and ledger boards
All Garage Steps Guides #
- Build Garage Steps — Core guide — 2 stringers, open risers (start here)
- Garage Steps with a Landing — Build a landing platform for higher drops
- Garage Steps with 3 Stringers — Add a center stringer for stairs wider than 36″
- Garage Steps with Closed Risers — Add riser boards for a finished look
- 3 Stringer Garage Steps with Closed Risers — Wide stairs + finished look (combines both modifications)
- → You are here: Garage Step Handrail — When and how to install a code-compliant handrail
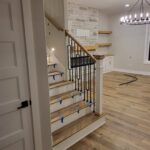
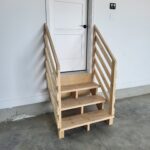
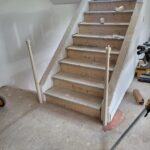
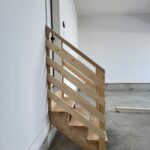
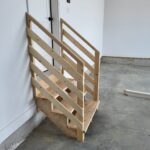
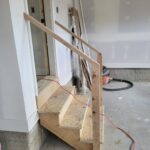
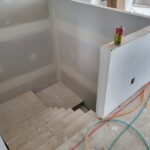
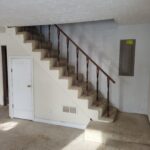
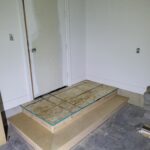
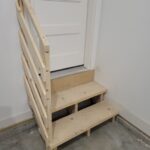
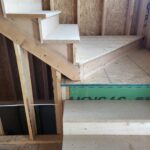
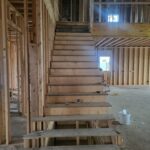
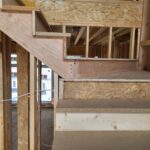
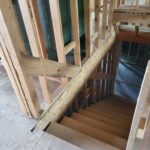
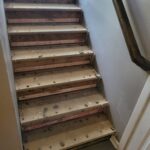
Reference Photos #
The following photos show examples of this type of work completed in the field. These serve as visual references for quality standards, proper installation techniques, and finished results.
Showing 16 of 16 photos