On this page
Introduction: How to Build Garage Steps #
Garage steps are one of the simplest stair builds. Most jobs are 1 to 3 risers (a riser is the vertical part of one step) going down from the house entry to the garage floor, with no landing platform in between. Simple does not mean sloppy - the same stair math and building rules still apply. This is often the first stair job a new carpenter builds, and it teaches every skill you will use on bigger staircases later: measuring the total rise, figuring each riser height, laying out the stringers (the zigzag boards that carry the treads, the flat parts you step on, and the risers), making the “drop” adjustment, and locking the stairs in place, glued to the slab and screwed to the house framing, so they cannot move.
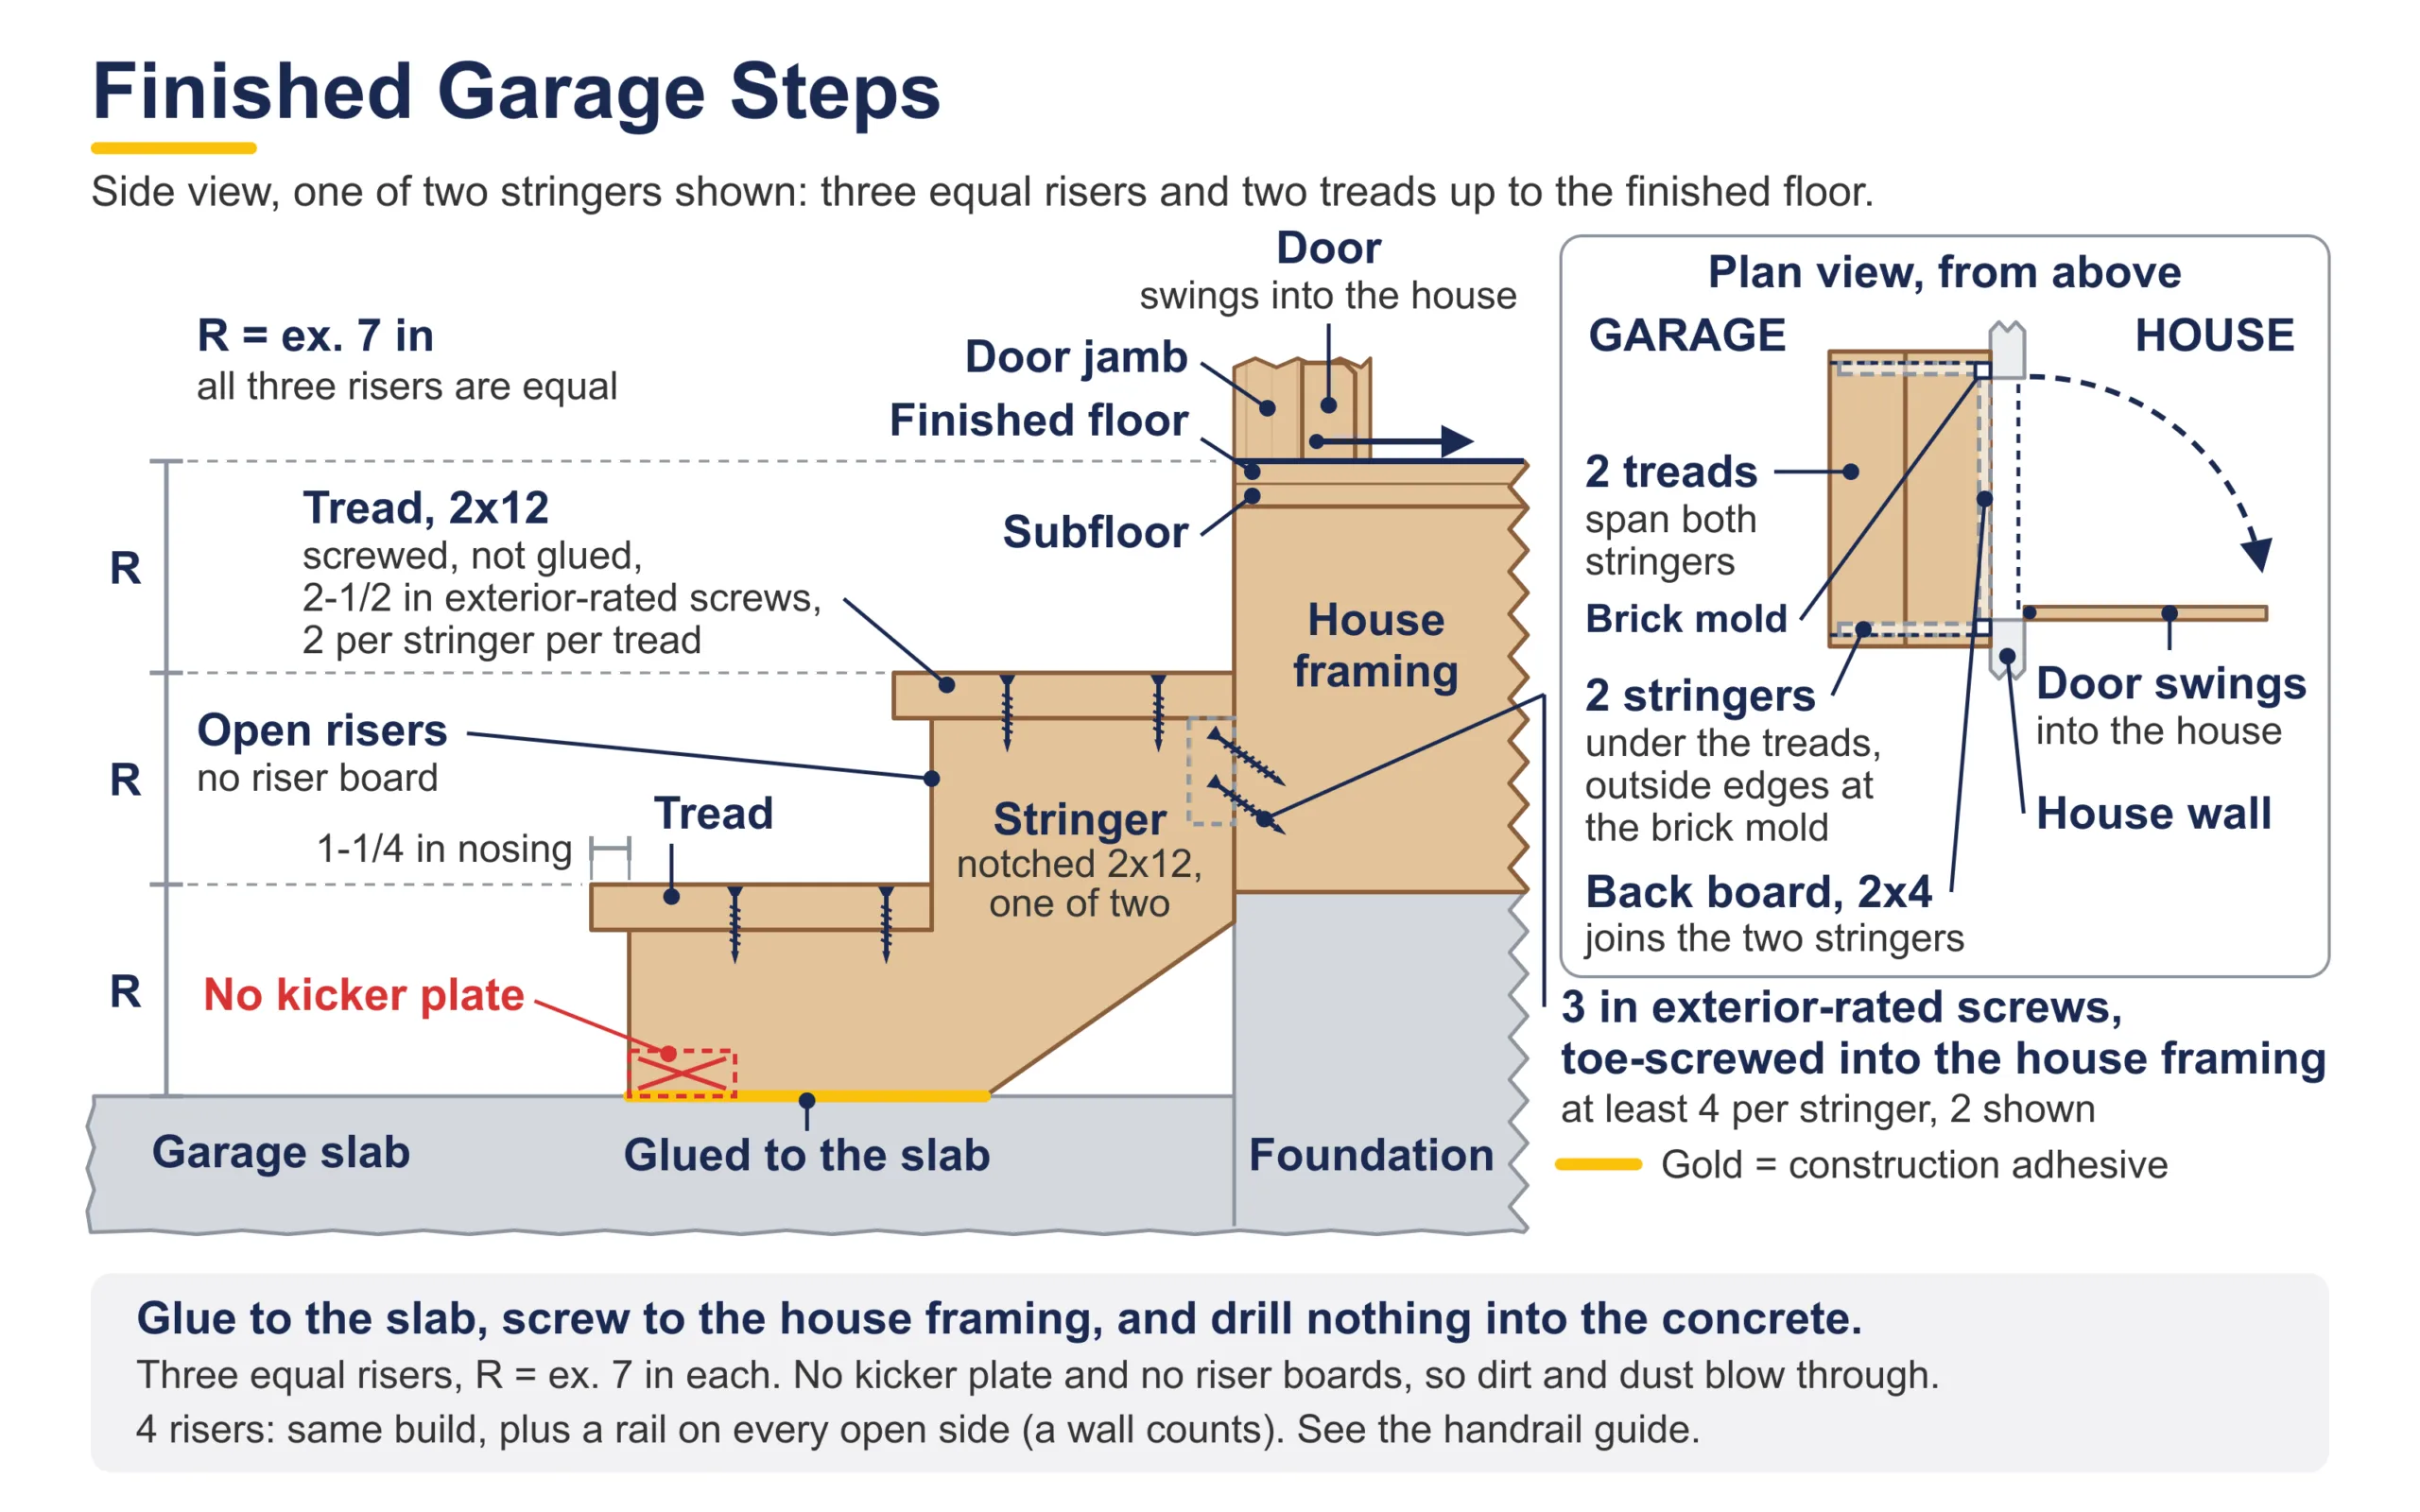
Garage steps usually cover a small height difference between the house floor and the garage floor, up to about 22-7/8″ (three risers). That is the build this guide shows. At 4 risers (over 22-7/8″, up to 30-1/2″) you build the same steps and add a rail on every open side. Over 30-1/2″ of total rise, or if a door swings outward over the stairs, you need a landing (a flat platform at the door) instead - see the companion guide for steps with a landing.
This guide covers the basic setup: 2 stringers with open risers (no boards covering the vertical gap under each tread). If you need a wider stair with a third stringer, a closed-riser finish, or a handrail, see the supplemental guides at the bottom of this page.
Even with just 2 or 3 risers, every riser needs to be the same height. This matters for safety. Your feet notice tiny differences - even a 1/4″ difference between two risers can make you stumble. Building code allows only 3/8″ of variance between the tallest and shortest riser, because uneven risers are a leading cause of falls on stairs. The most common mistake is to treat a short set of garage steps as “just a couple of steps” and guess at the measurements instead of doing the math.
Garage steps face a few problems other stairs don’t. They sit right on a concrete slab, so moisture is a real risk. The concrete floor is often not level; garages are built with a slope toward the door so water drains out, so your bottom measurements need to account for that slope. And because garage steps take heavy daily traffic - groceries, kids, dogs, muddy boots - they need to be built solid.
Which guide do I need?
- Open risers up to 36 inches wide at the brick mold, 2 stringers, up to 30-1/2 inches of rise (1 to 4 risers): this guide
- Closed risers for a finished, visible look, 2 stringers up to 48 inches wide: How to Build Garage Steps with Closed Risers
- Open risers 36 to 48 inches wide at the brick mold, 3 stringers: How to Build Garage Steps with 3 Stringers (Open Risers)
- Over 30-1/2 inches of rise, or a door that swings out over the steps: How to Build Garage Steps with a Landing
Before You Begin #
Prerequisites #
- House framing at the door is complete and inspected
- Garage slab or patio surface is poured and cured
Tools Required to Build Garage Steps #
Power Tools #
- Circular saw (7-1/4″ blade minimum - you need this size to cut through 2×12 stringers)
- Drill/driver (for driving screws)
- Jigsaw (optional - helpful for finishing inside corner cuts that the circular saw can’t reach)
Hand Tools #
- Framing square (the most important tool for this job - buy a quality steel one, not aluminum)
- Stair gauges (small brass clamps that attach to the framing square - they make layout repeatable and foolproof)
- Tape measure (25-foot minimum)
- Pencil (carpenter’s pencil - flat so it won’t roll off the stringer)
- Speed square (for marking 90° cut lines on treads and risers)
- 4-foot level (for checking treads for level after installation)
- Handsaw or jigsaw (for finishing the inside corners where the circular saw blade can’t reach)
Supplies #
- 3″ exterior-rated framing screws or lag screws (to fasten the stringer frame to solid house framing)
- 2-1/2″ exterior-rated wood screws (for attaching treads to stringers - #8 or #10 gauge)
- Construction adhesive - PL Premium or a similar polyurethane construction adhesive (bonds the stringers to the concrete floor and keeps them from sliding; on these open-riser steps the treads are screwed, not glued)
- Shims for leveling the stringer during layout and dry-fit - they help you scribe an accurate cut line, not part of the finished stairs
Materials #
- 2×12 lumber (for stringers): Pick structural-grade, kiln-dried lumber - regular pine or cedar is fine, the stringers do not need to be pressure-treated. Check each board for straightness, crown (a slight bow along its length), and large knots in the areas that will become tread and riser cuts - a knot right at a cut weakens the stringer. You need at least 2 stringers, or 3 for stairs wider than 36″. A 3-riser stringer takes about 2-1/2 feet of 2×12, and a 4-riser stringer about 3-1/2 feet
- Tread material: 2×12 lumber, the same stock as the stringers. 11-1/4″ wide gives a 10″ tread with a 1-1/4″ overhang. Use regular pine or cedar, not pressure-treated.
How to Build Garage Steps: 8-Step Process #
Step 1: Measure Total Rise Accurately #
This is the most important measurement in the whole job. Get it wrong here, and every riser will be wrong too.
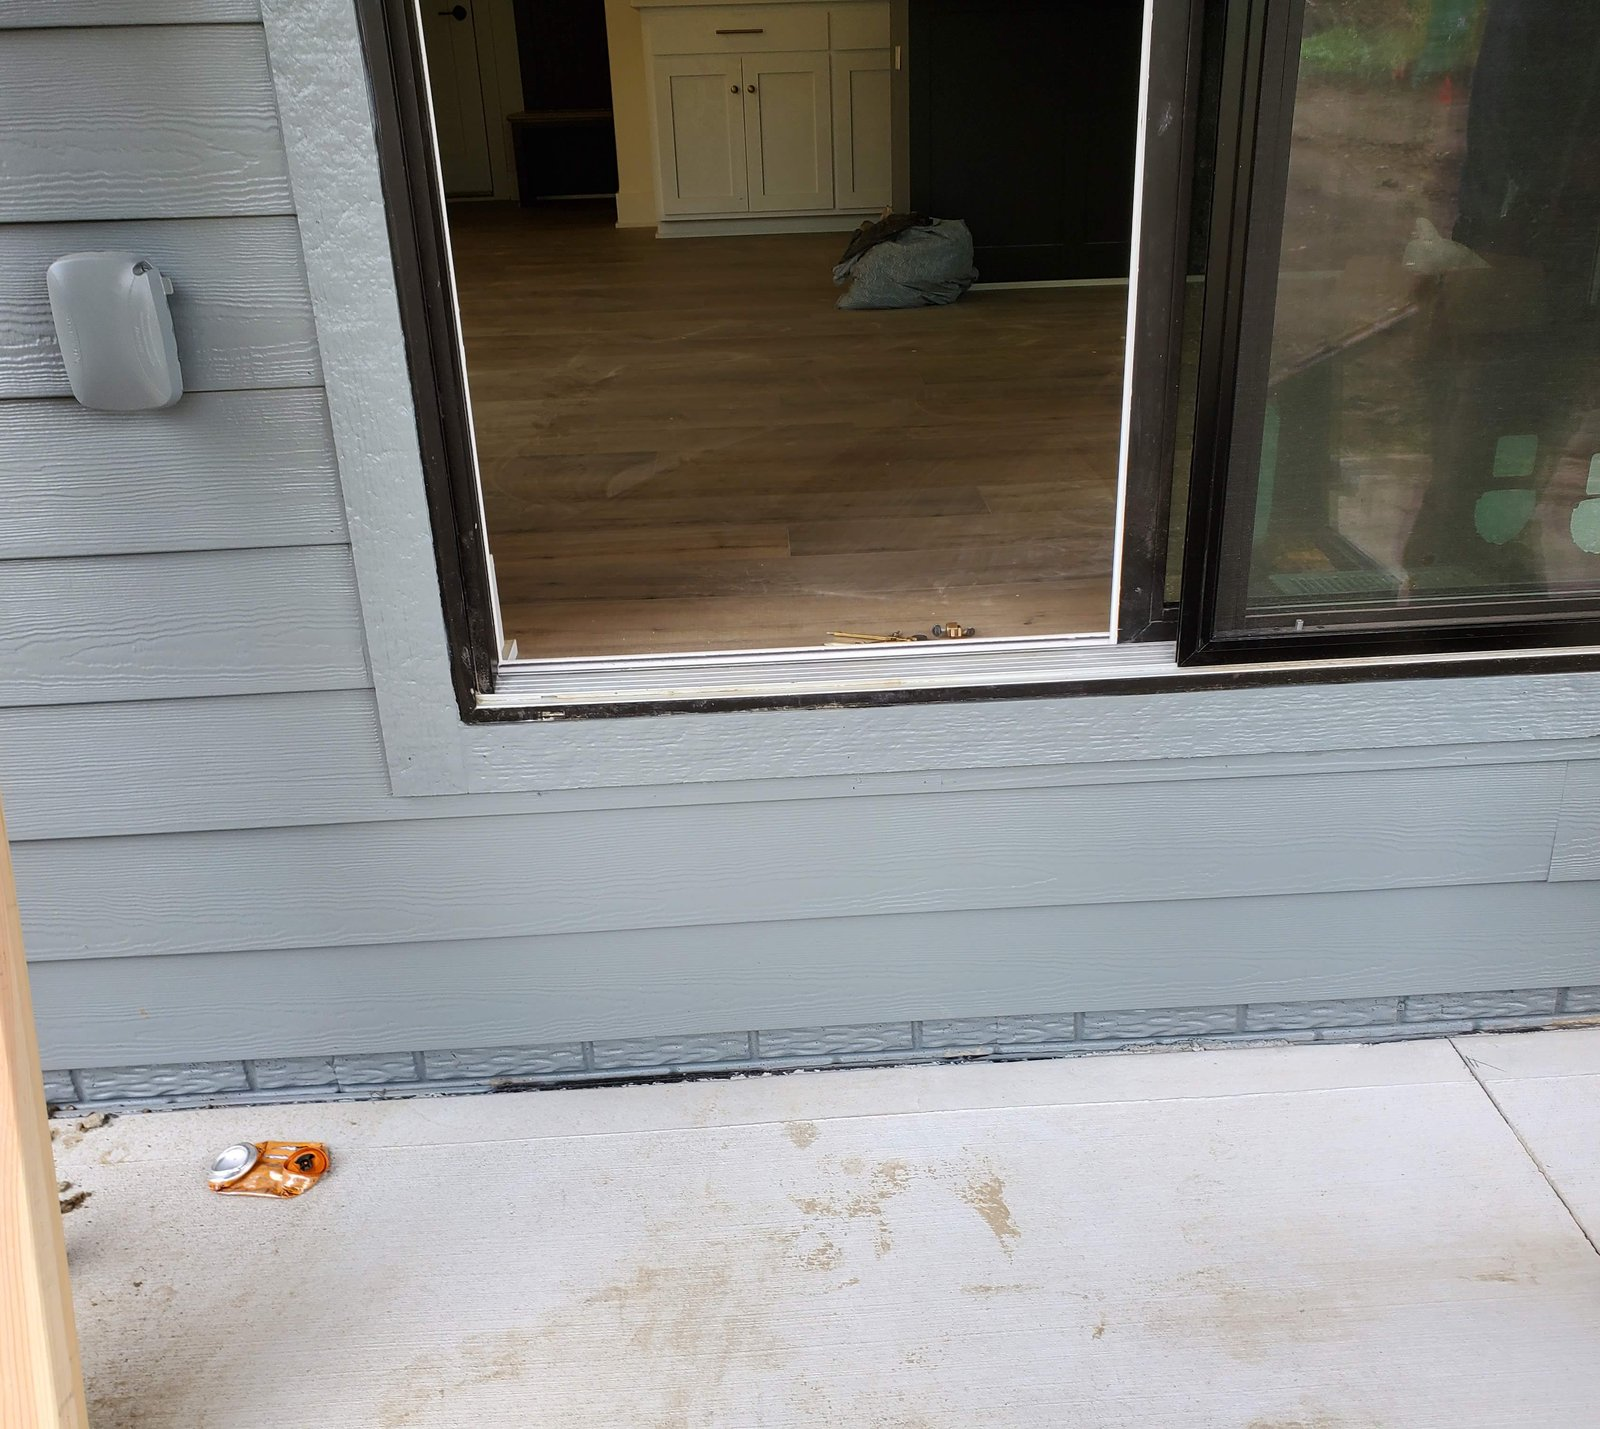
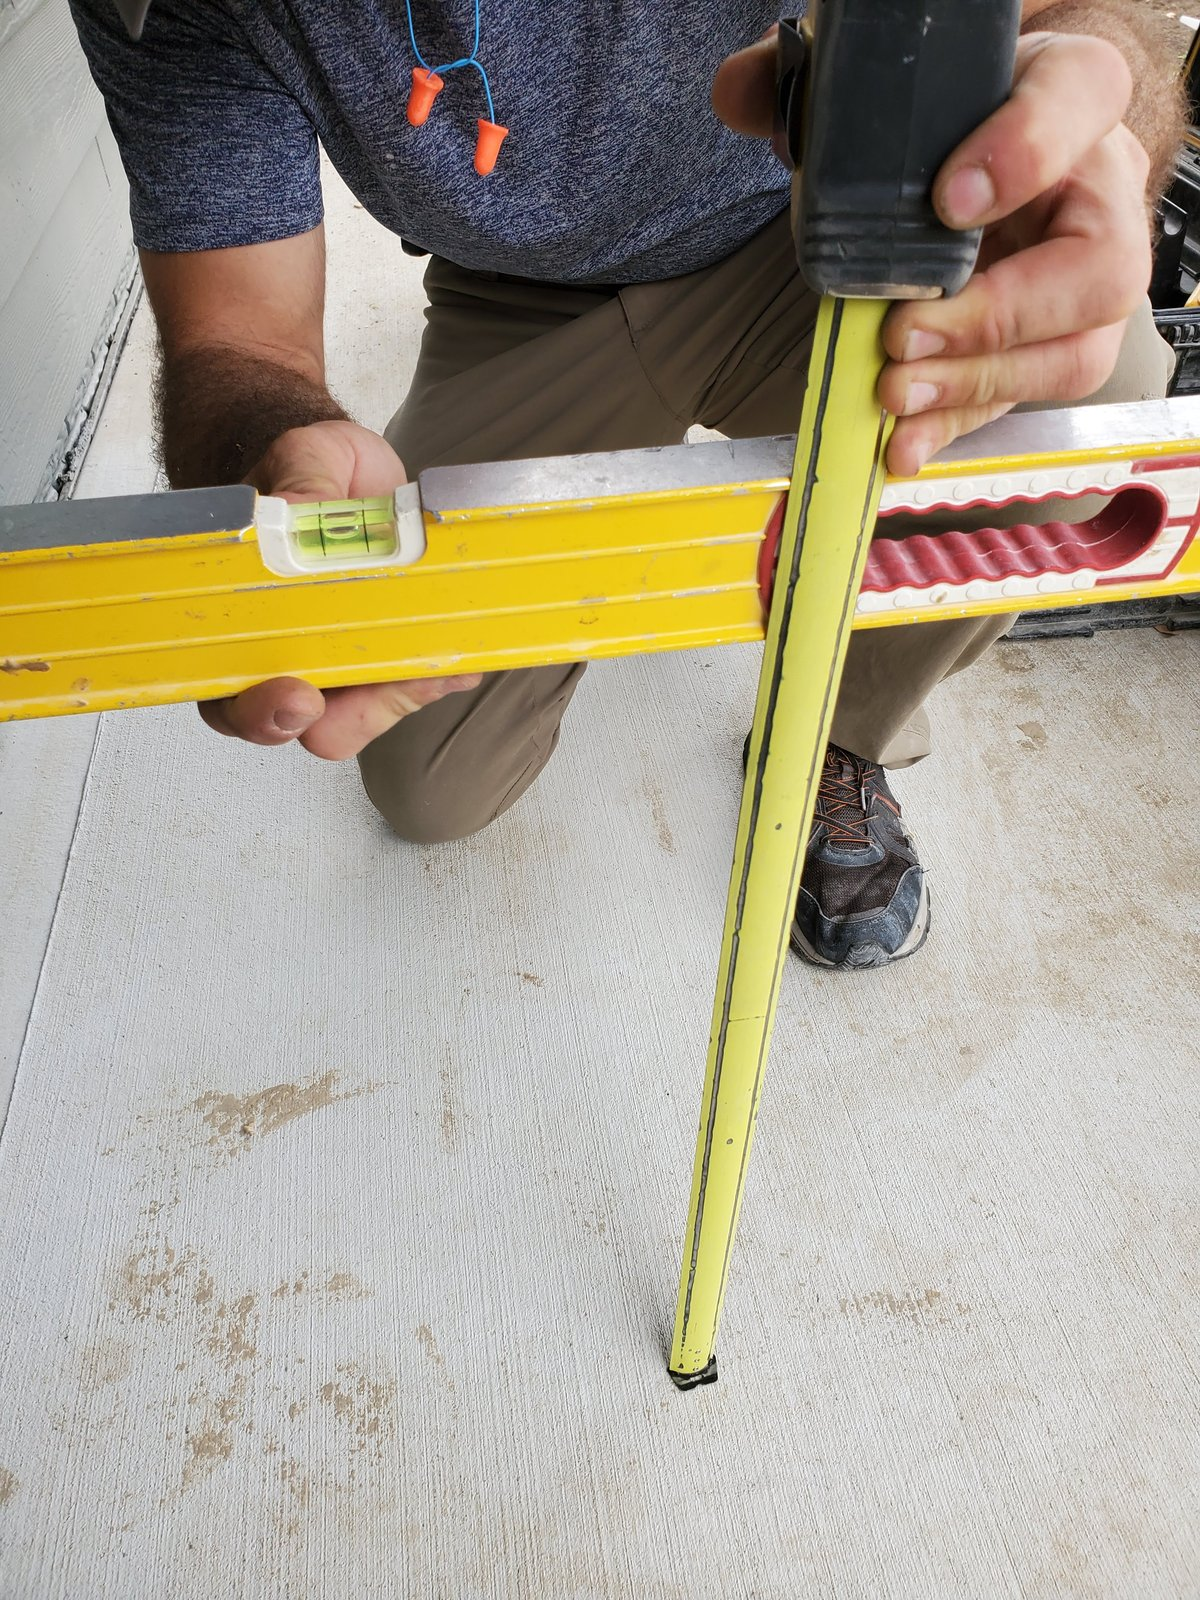
Place a straight 2×4 on the house floor at the doorway and extend it out over the garage floor. Level it with a 4-foot level. Measure DOWN from the bottom of the leveled 2×4 to the garage slab directly below, at the point where the stringers will actually land - not at the door threshold. Garage floors slope (typically 1/4″ per foot toward the garage door for drainage), so a reading taken at the threshold instead of the stringer location will be wrong. This is your total rise: from the slab where the stringers land, up to the top of the finished floor at the door. The top of the finished floor is the bottom of the door threshold, since the door sits on the finished floor. Gretna is the exception: there the inspector measures from the top of the metal part of the sloped threshold, so measure to that line.
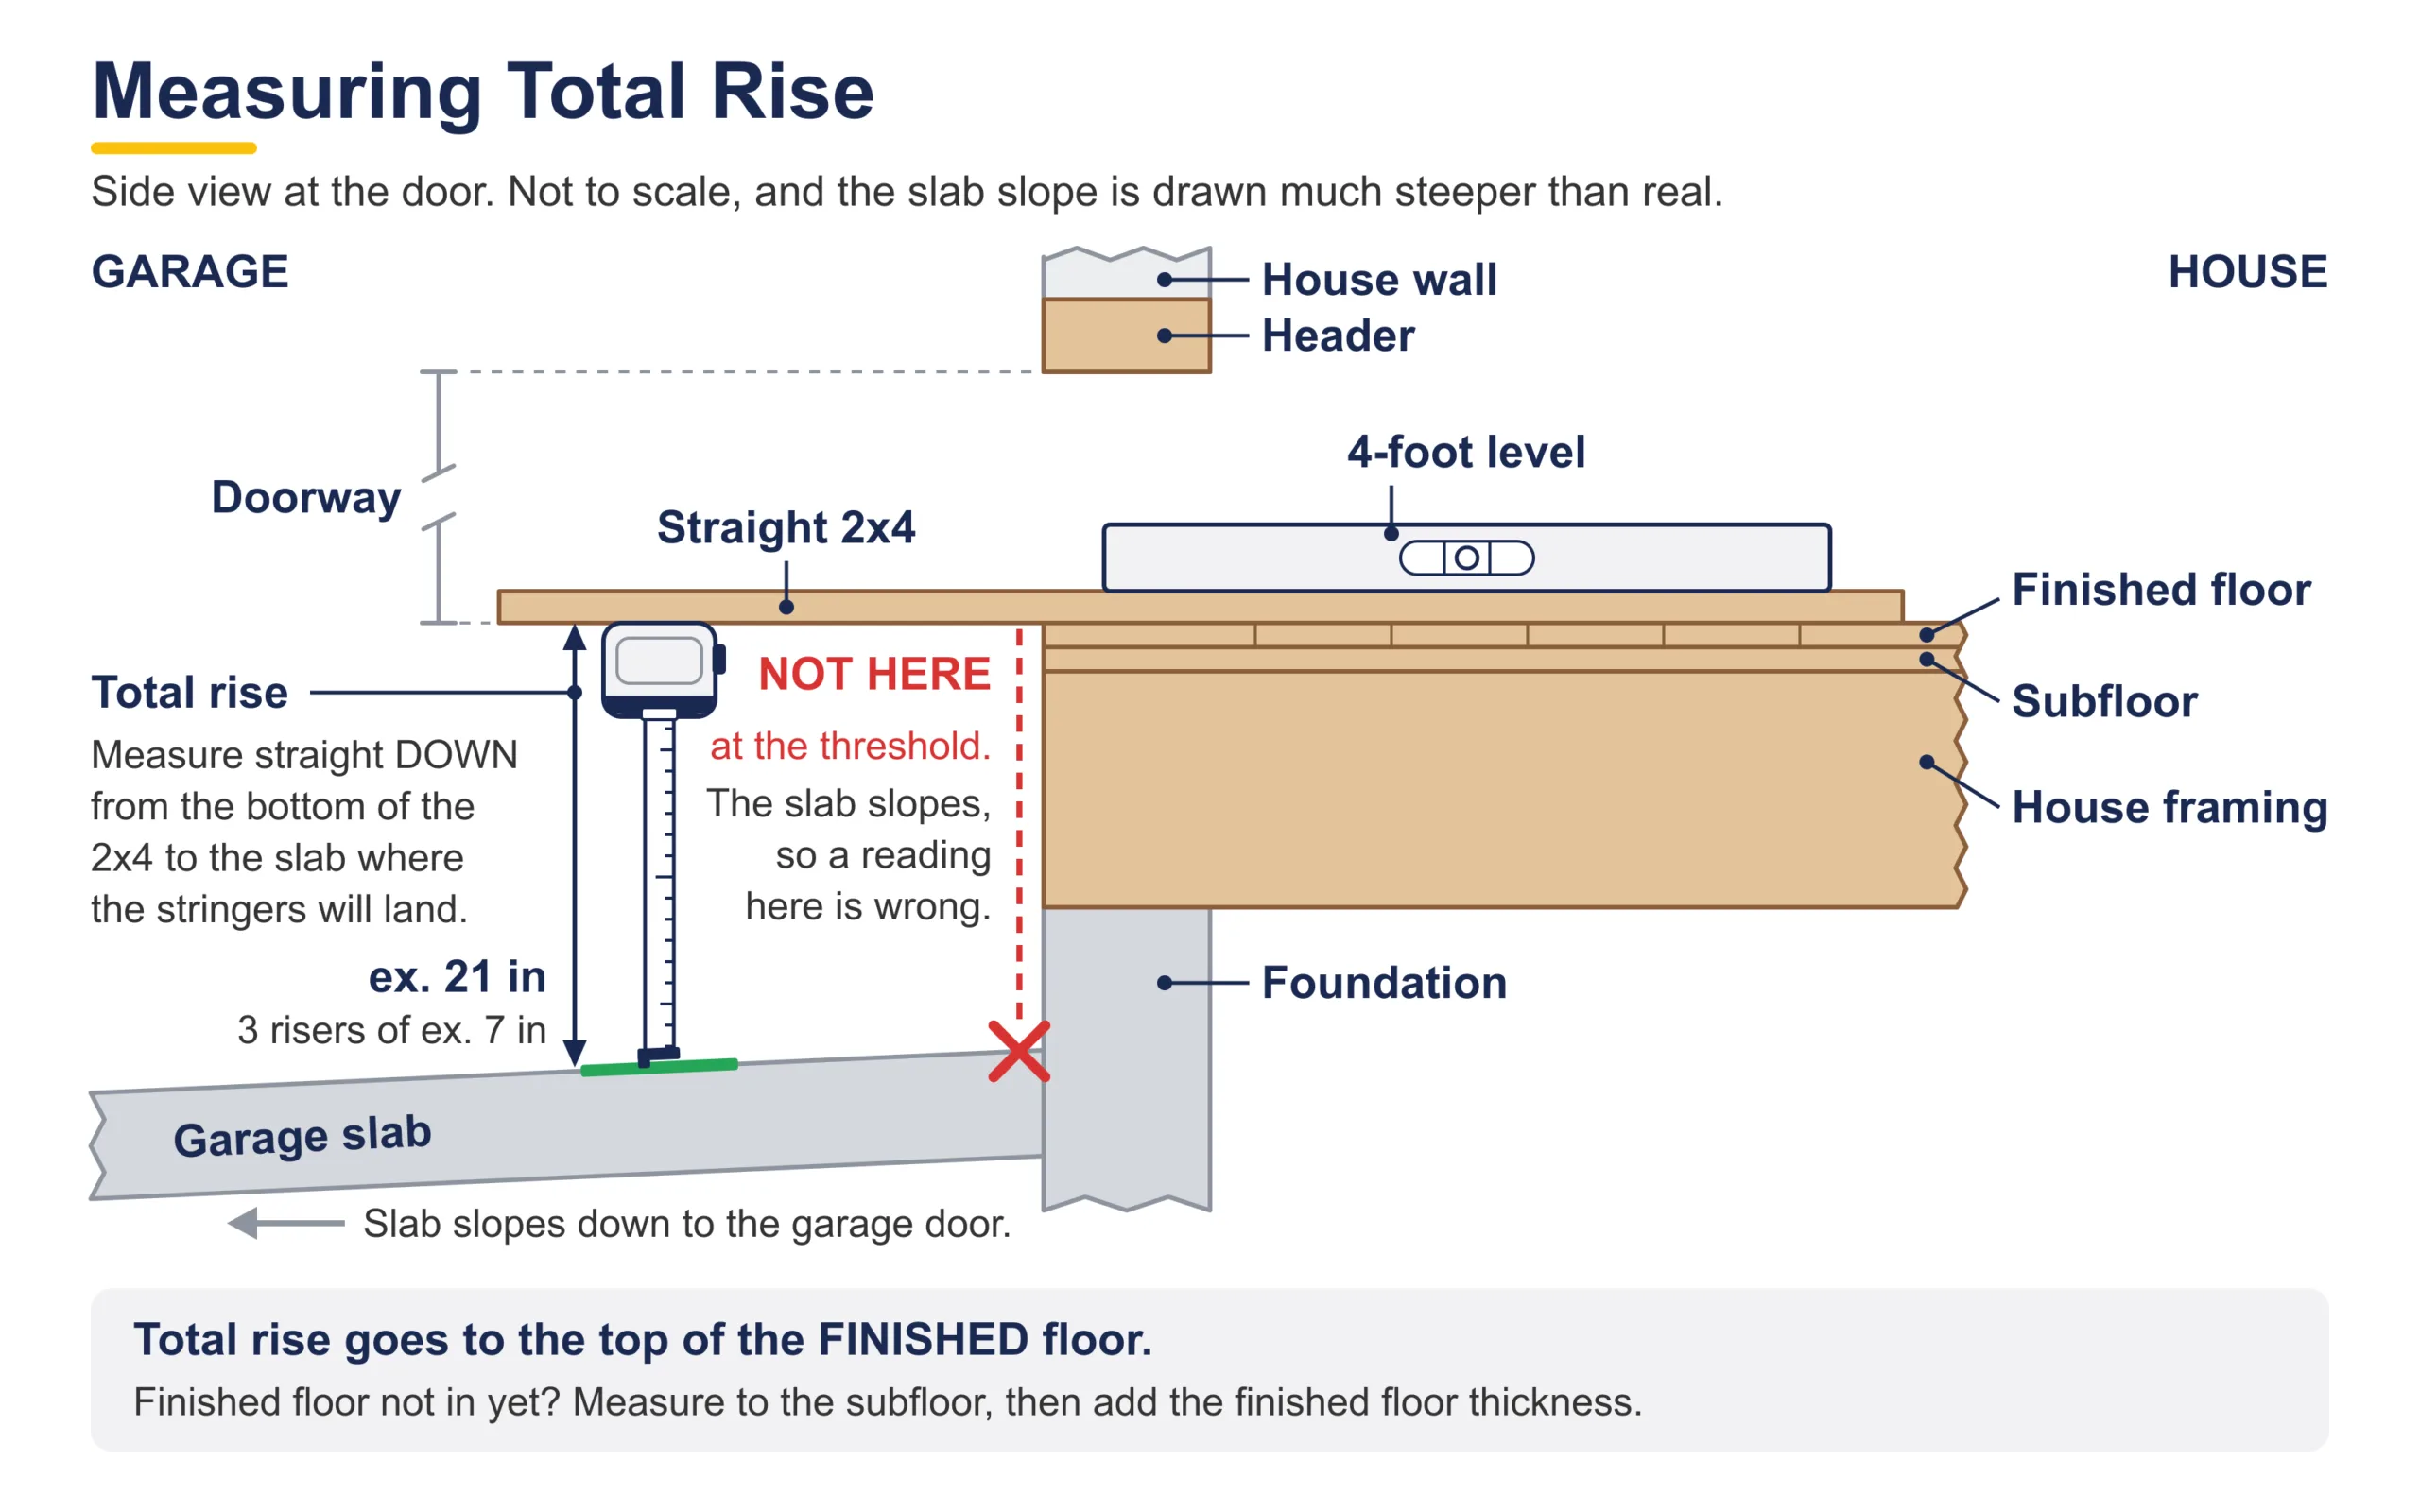
Now divide the total rise by your target riser height. The ideal riser height for comfort is 7″ to 7-1/2″. Code allows up to 7-3/4″, but our max is 7-5/8″. That leaves 1/8″ of room, because one riser cut even 1/16″ over the code max fails inspection. So divide the total rise by 7-5/8″, round UP to the next whole number of risers, then recalculate:
- Total rise = ex. 21″
- ex. 21″ ÷ 7-5/8″ = 2.75 → round UP to 3 risers
- ex. 21″ ÷ 3 = ex. 7″ per riser ✅ Under our 7-5/8″ max: 3 risers and 2 treads
- ⚠️ 2 risers would be ex. 10-1/2″ each, way OVER the 7-3/4″ code maximum
- 4 risers would be ex. 5-1/4″ each: legal, but short, and 4 risers needs a rail on every open side, so 3 is the answer
In this example, ex. 21″ divides evenly into 3 risers of ex. 7″, the build drawn in this guide: no landing and no handrail. Most jobs will not divide this cleanly. Put your own total rise into the garage steps calculator and it does this math for you, plus the stringer length, bottom cut and a material list. Something like 7-1/4″ or 7-3/8″ per riser is fine, as long as every riser is the same and none is over 7-5/8″. Between 22-7/8″ and 30-1/2″ you need 4 risers: the same steps, plus a rail on every open side. Over 30-1/2″ is a landing job - see How to Build Garage Steps with a Landing.
Pro Tip: The finished floor is almost never installed yet at this stage. If you measured to the subfloor, your total rise is short by the finished floor’s thickness - check the plans or ask the customer what is going down (3/4″ hardwood, tile plus its backer, LVP, and so on) and add that thickness to your measurement. If the finished floor is already installed, you measured to it directly and there is nothing to add. Getting this wrong by even 3/4″ will make your top riser feel different from the rest - and it will fail inspection.
Step 2: Lay Out the First Stringer #
This is where the framing square and stair gauges earn their keep. The stringer layout controls everything that follows - if the layout is wrong, the whole stair is wrong.
Setting up the framing square:
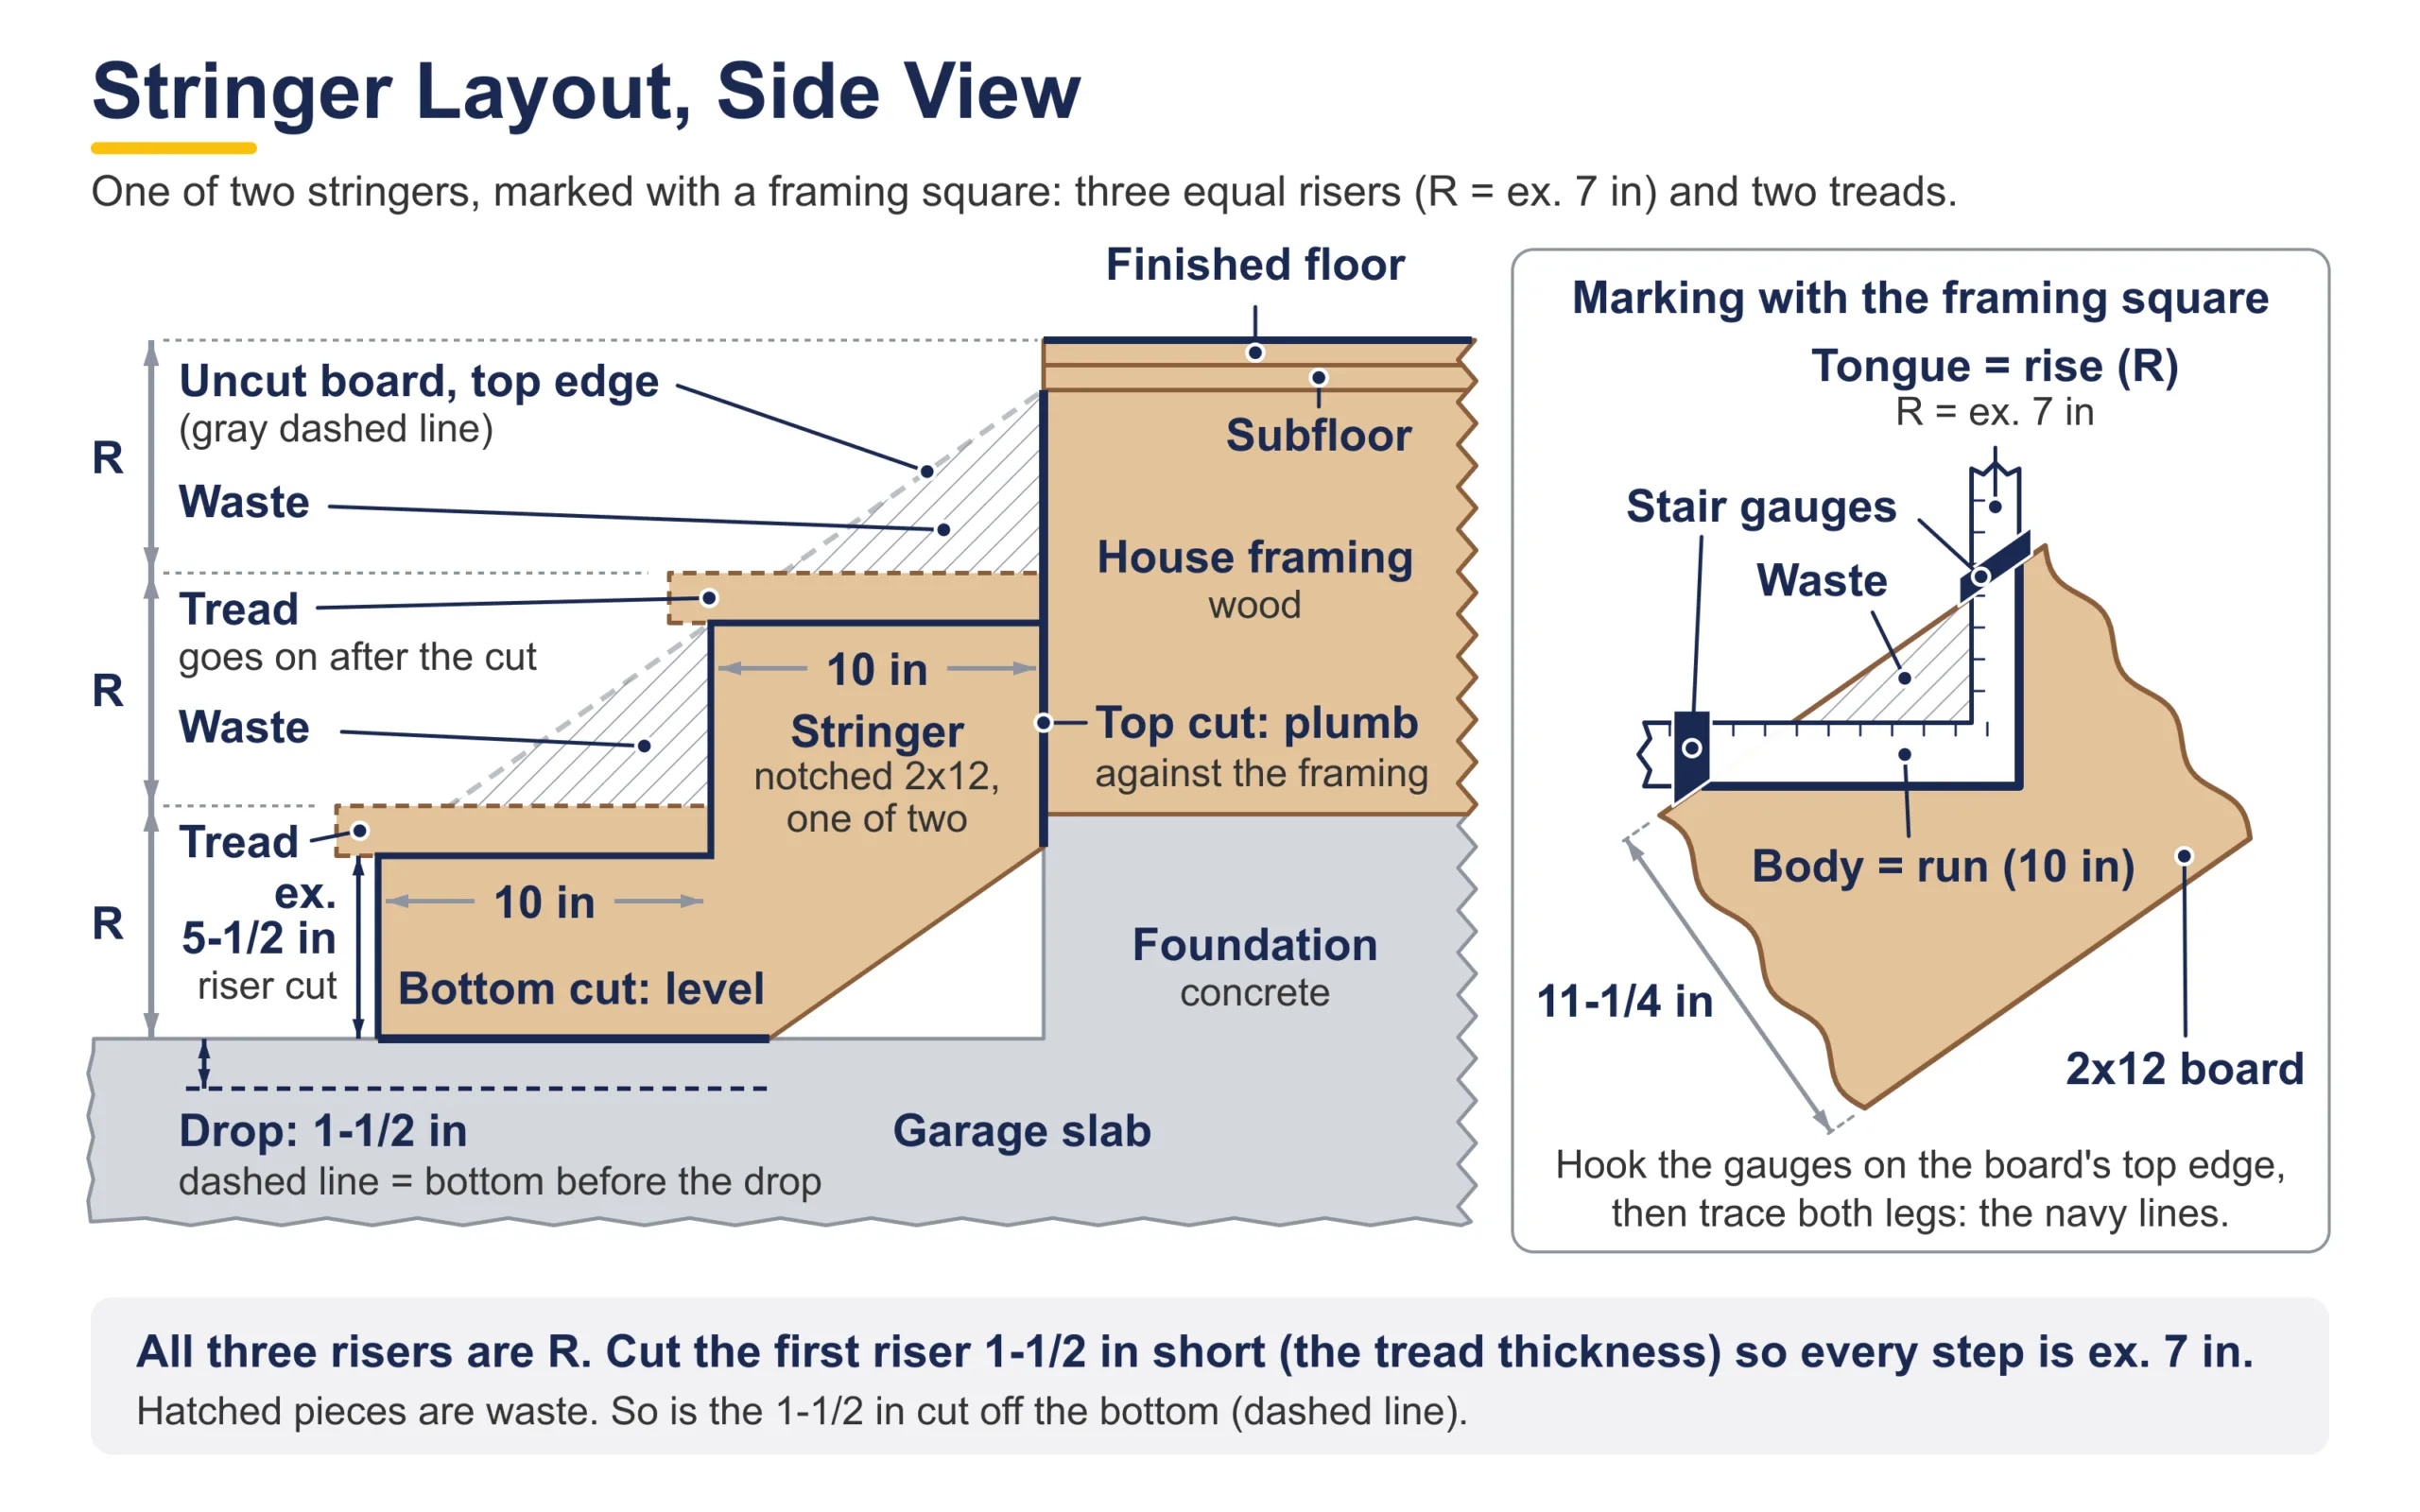
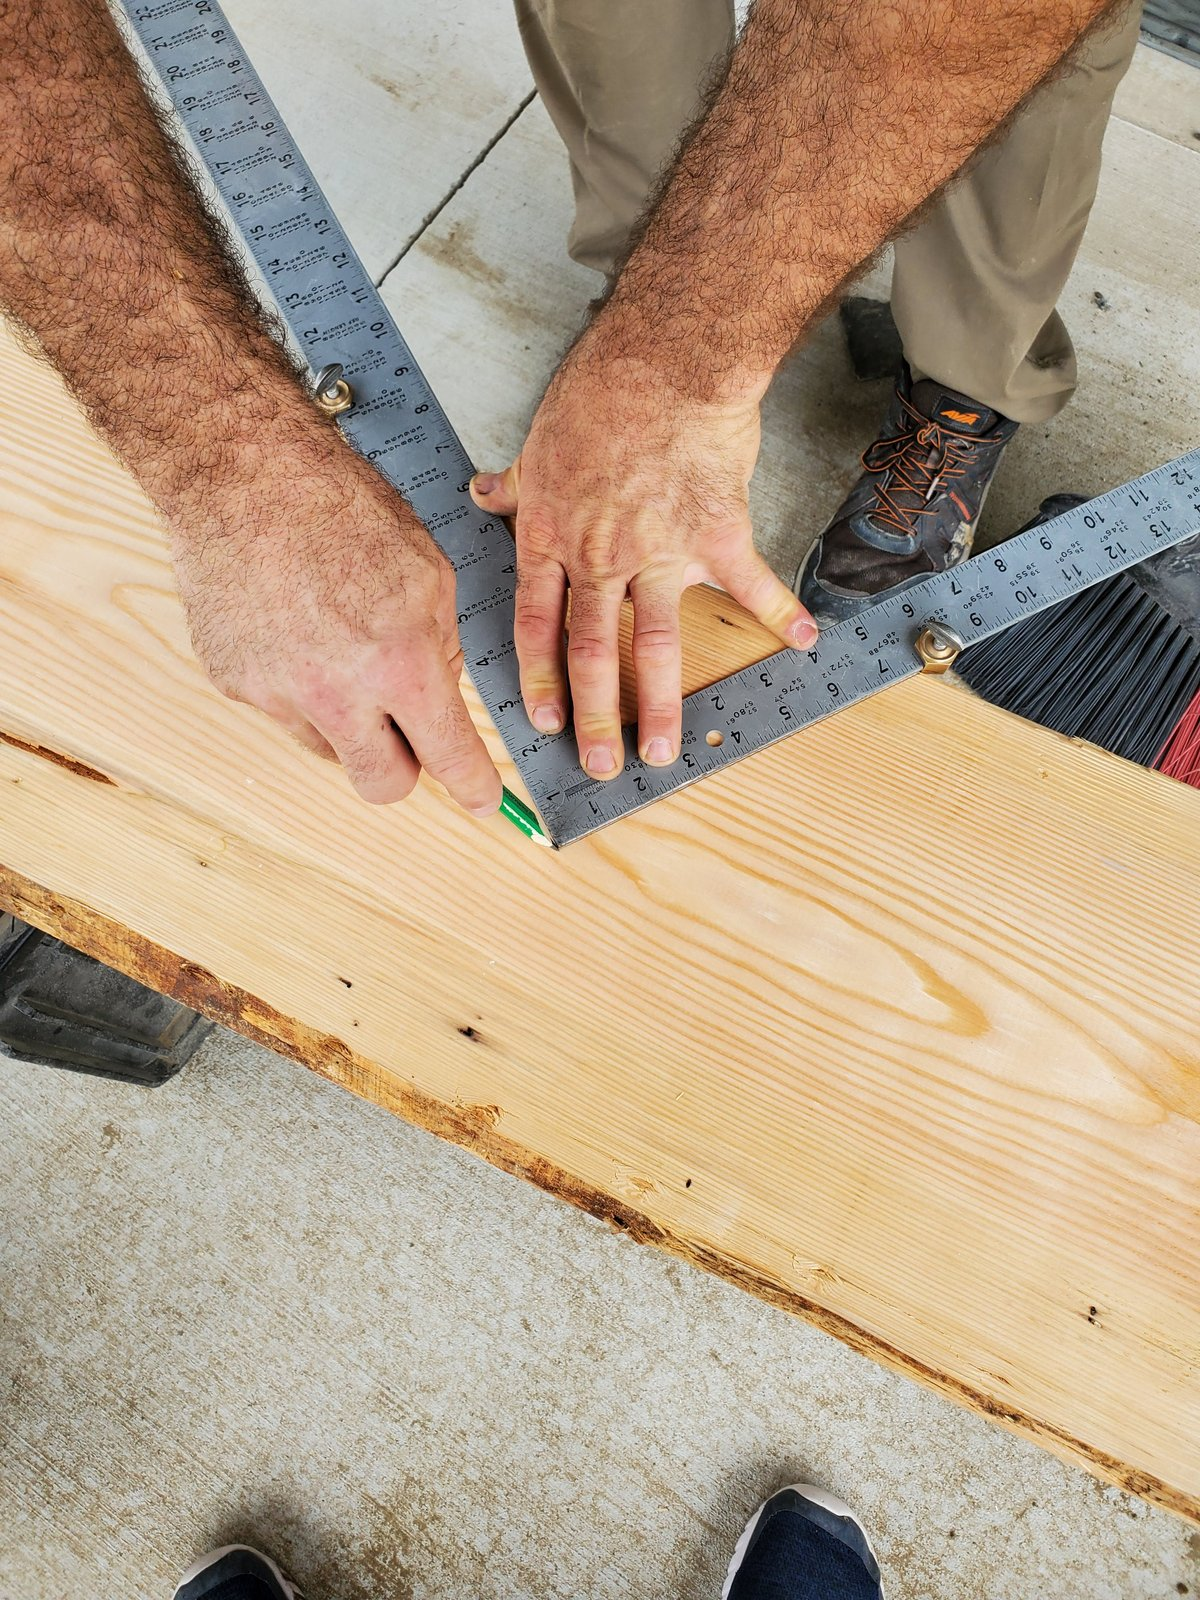
- Clamp one stair gauge to the tongue (narrow side) of the framing square at your riser height (the number you calculated in Step 1)
- Clamp the other stair gauge to the body (wide side) at your tread depth (10″, the run. The full 2×12 tread is 11-1/4″ deep, so it overhangs the riser line by 1-1/4″)
- Both gauges should hook on the edge of the 2×12 so the square sits at the same position every time you slide it along
Marking the layout:
- Lay the 2×12 on sawhorses with the crown (natural bow) facing UP - the crown side becomes the top of the stringer
- Start at one end. Position the framing square with both stair gauges hooked on the top edge of the board
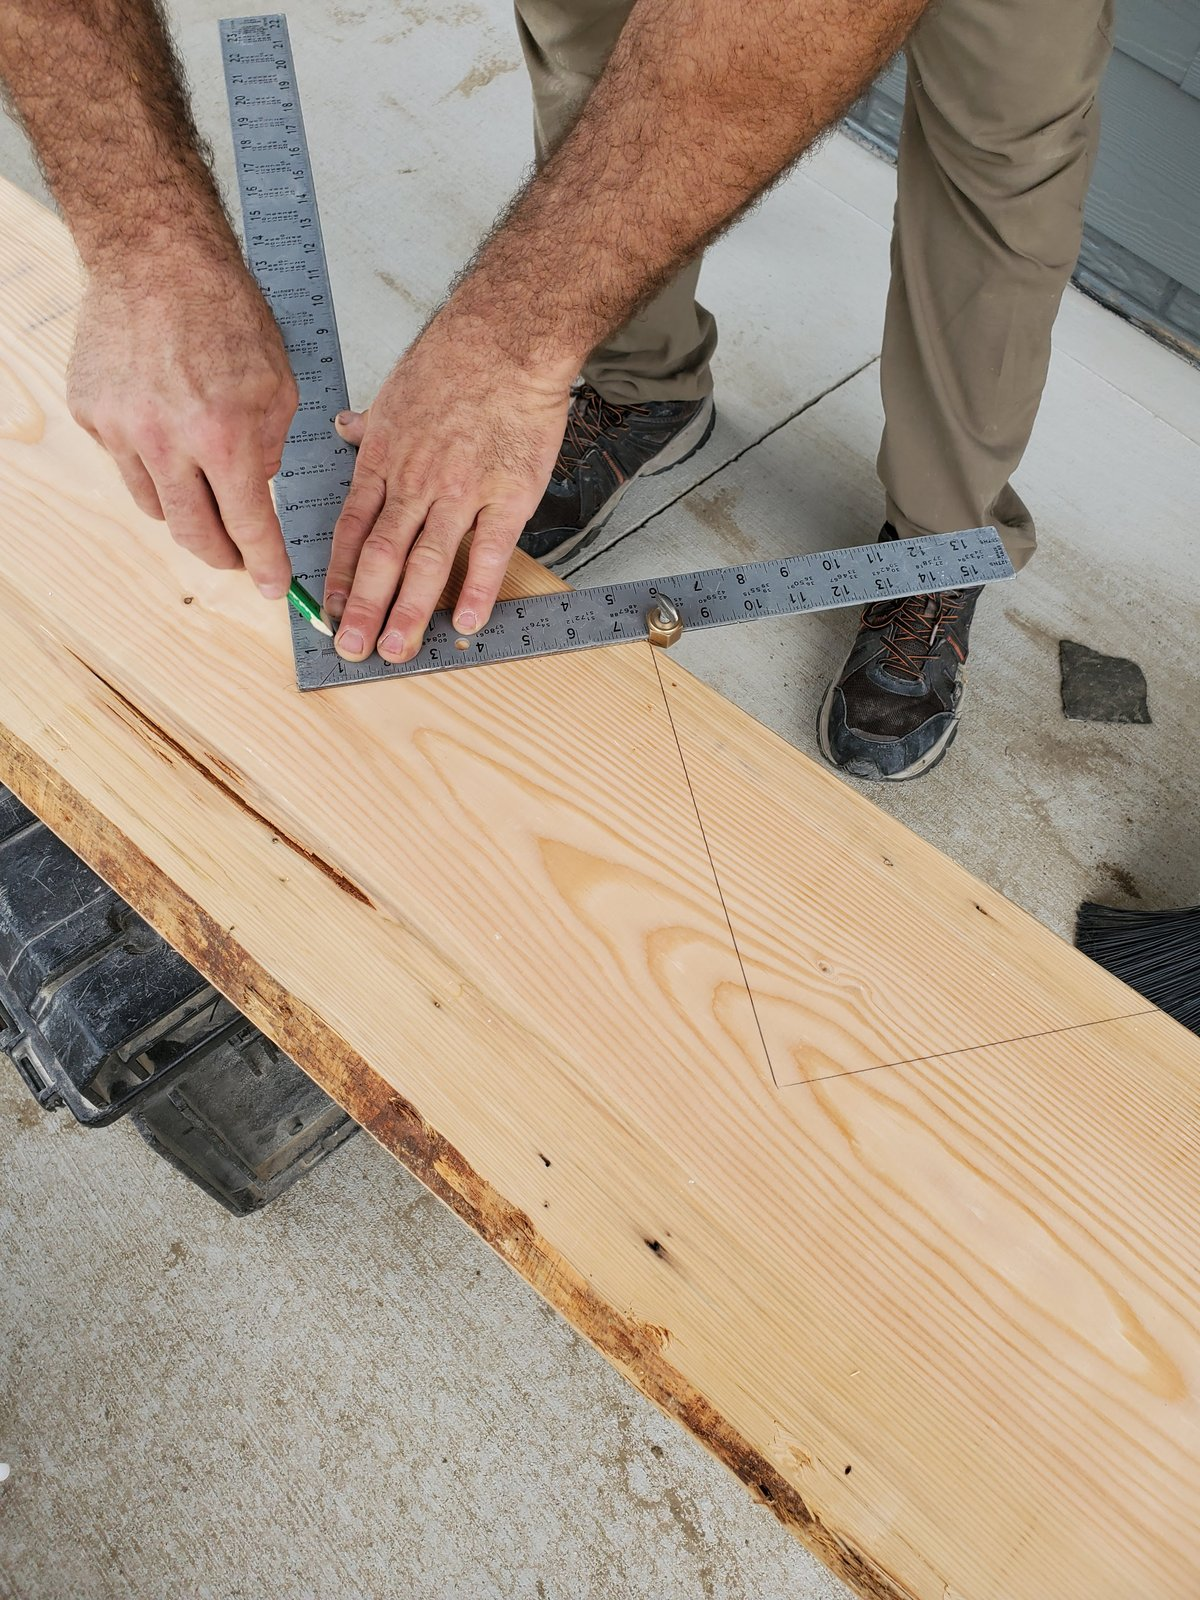
- Trace along both the tongue (riser line) and body (tread line) with a sharp pencil
- Slide the square along the board until the tongue aligns with the end of the previous tread line, and trace the next riser/tread pair
- Repeat for each step. For 3 risers, you’ll mark 3 riser lines and 2 tread lines. The top (third) riser line becomes the plumb cut against the house framing
Critical: The “drop” adjustment
After marking the layout, you must adjust the bottom of the stringer. Shorten the bottom riser by exactly one tread thickness. Here is why: once the tread board is installed on the bottom step, it adds height. Skip this adjustment, and the bottom riser (from the floor to the top of the first tread) ends up taller than all the others, by the thickness of the tread.
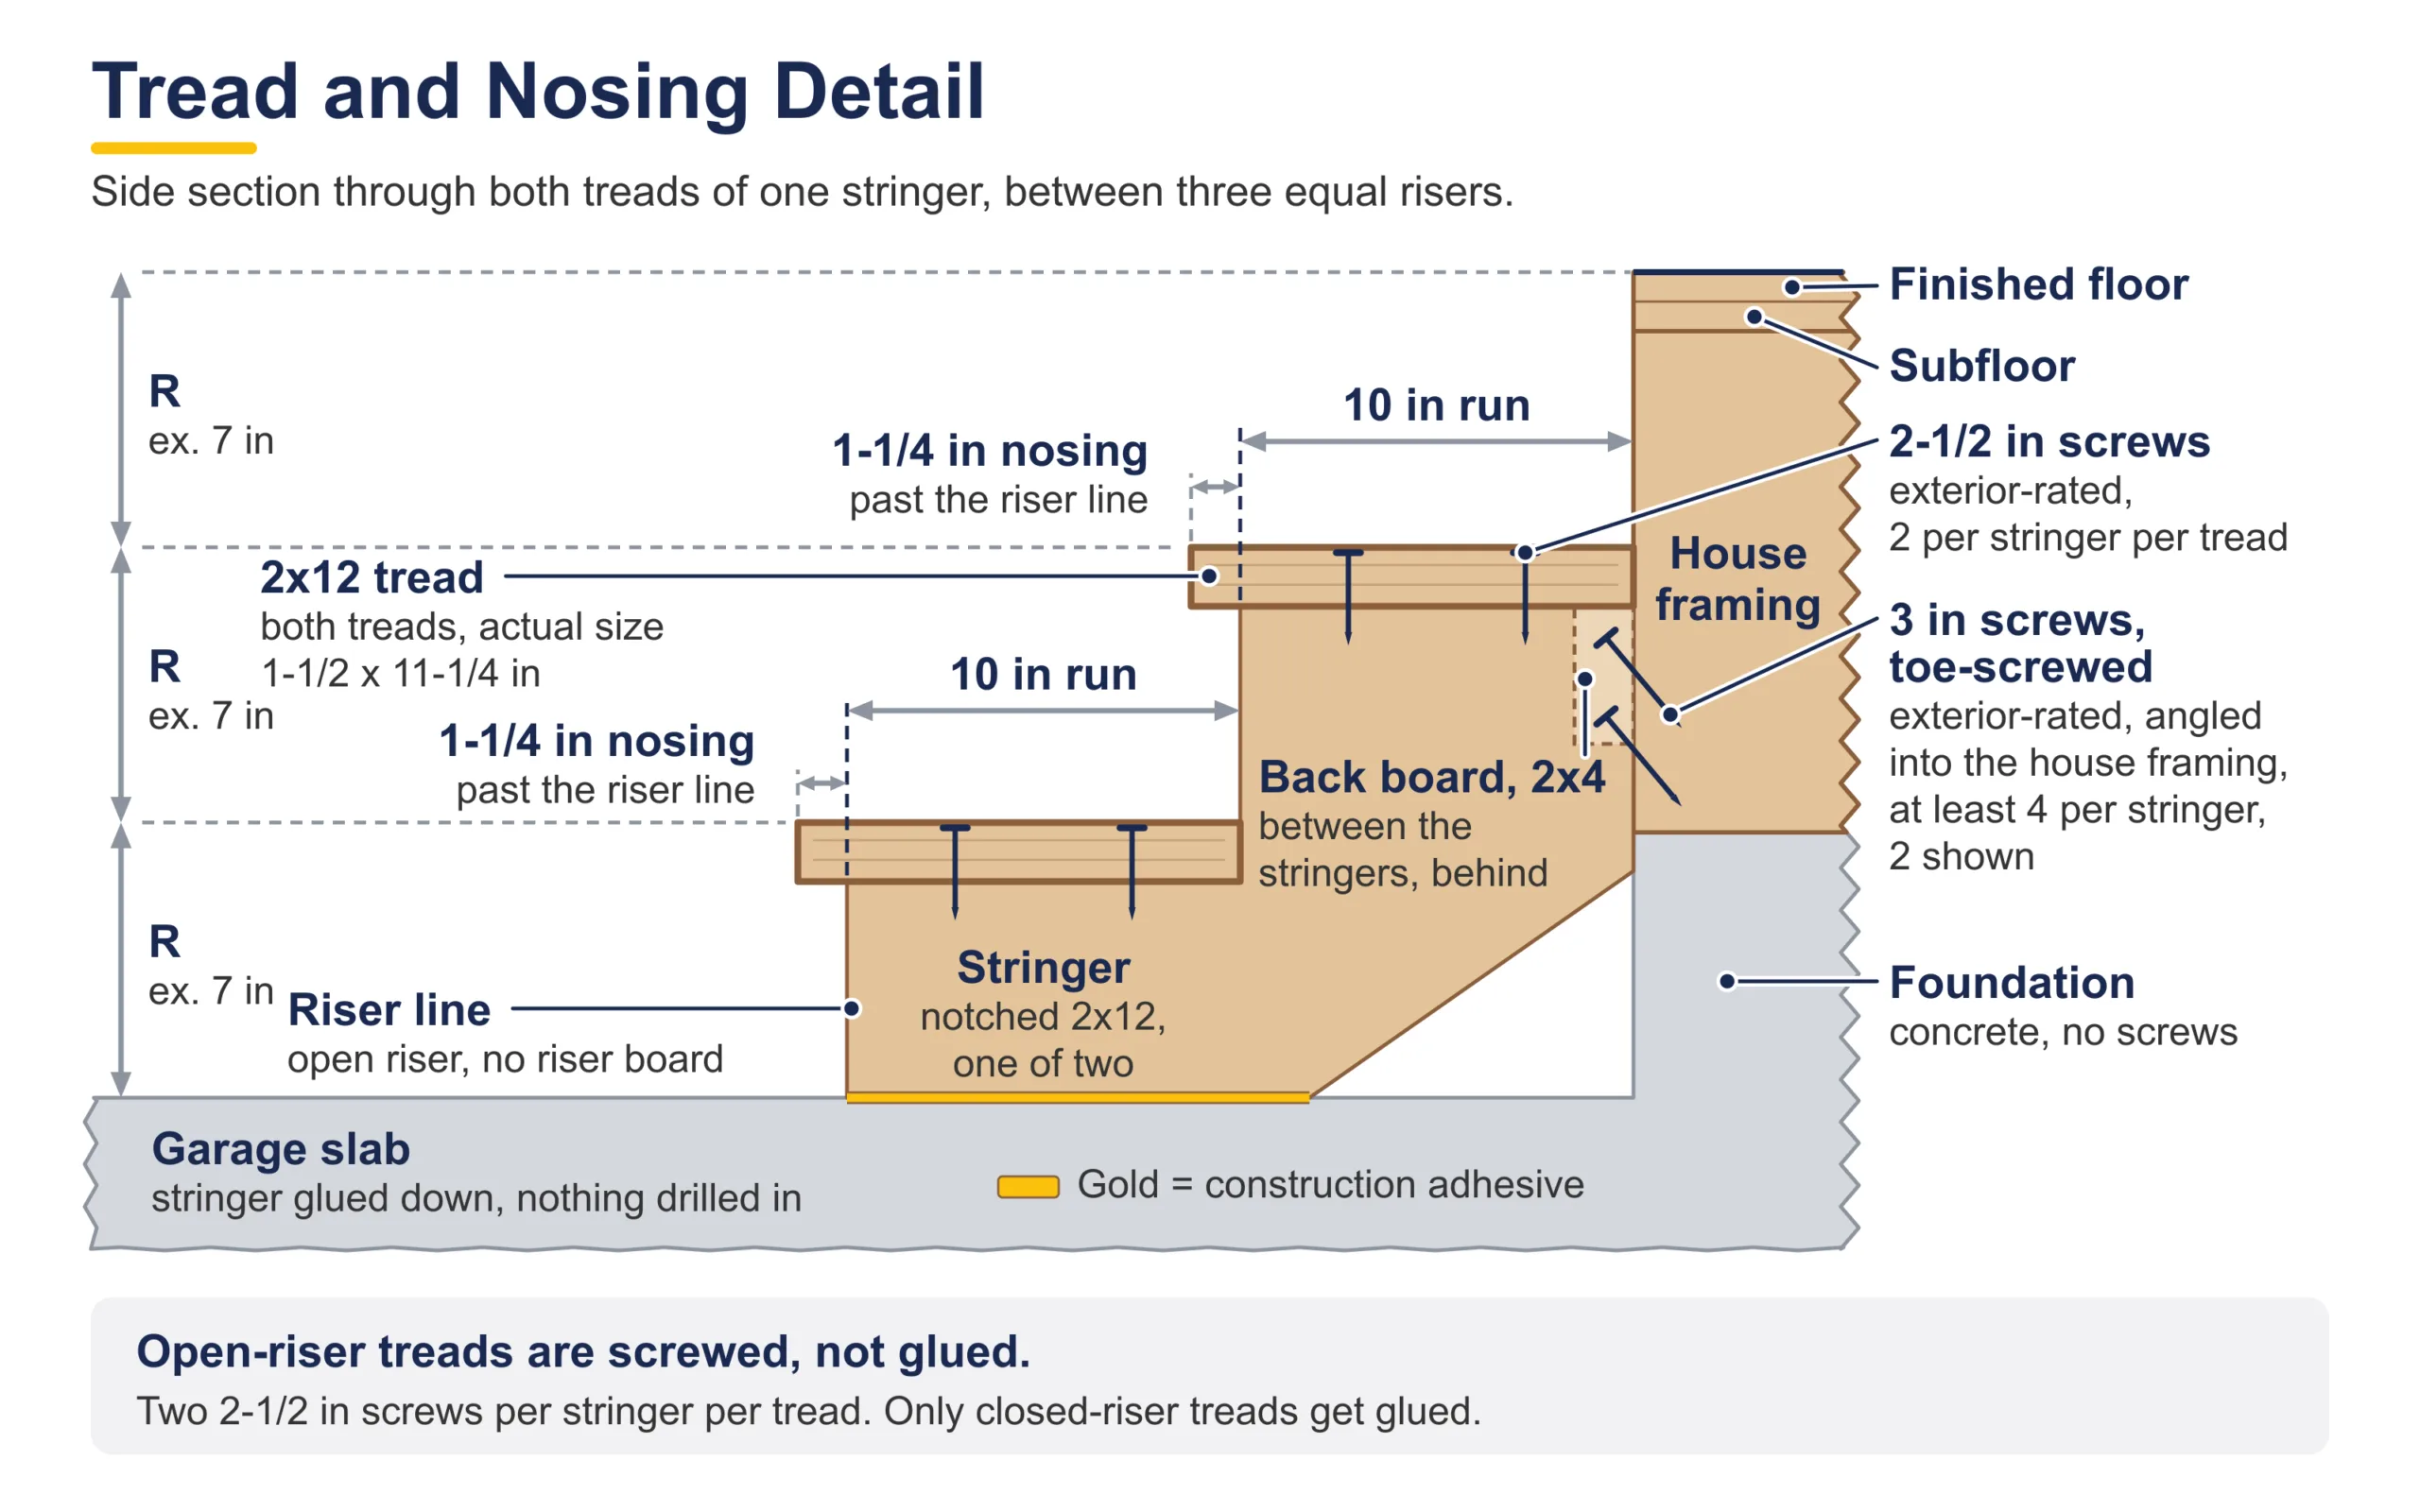
- Our garage step treads are always 2×12 (1-1/2″ actual thickness)
- So shorten the bottom of the stringer by 1-1/2″
- Mark a line parallel to the original bottom cut, offset up by the tread thickness. Cut on this new line
Top cut (plumb cut): At the top of the stringer, extend the last riser line straight up to the top edge of the board. This vertical (plumb) cut bears flat against the house framing: the rim joist (the framing board that caps the edge of the house floor) or the wall framing. The top tread sits on the last tread cut, one riser below the finished floor, so the house framing itself forms the top riser.
Pro Tip: Before cutting ANYTHING, set the marked 2×12 in position against the wall. Check the key measurement: is the top tread cut one riser plus one tread thickness below the finished floor (ex. 7″ + 1-1/2″ = ex. 8-1/2″ for the ex. 21″ rise)? If yes, your layout is correct. If not, recheck your math. It takes 2 minutes to verify and saves hours of rework.
Step 3: Cut the Stringers #
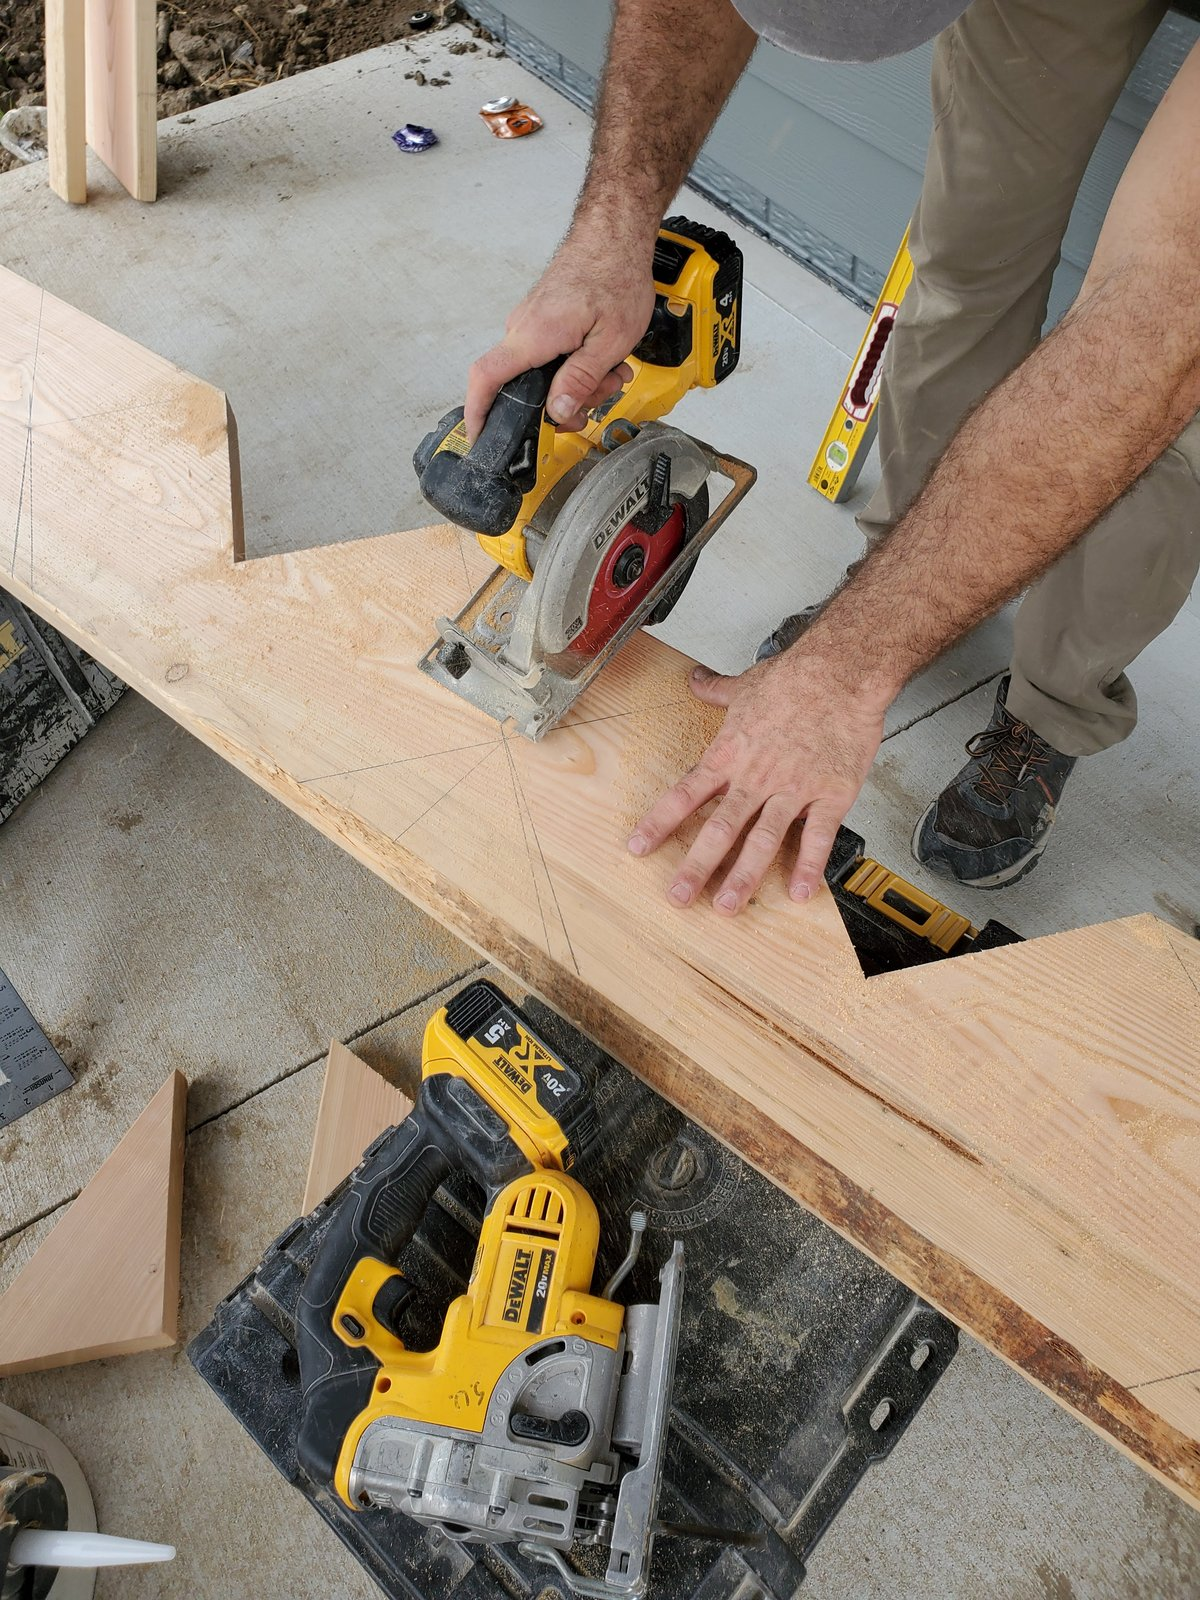
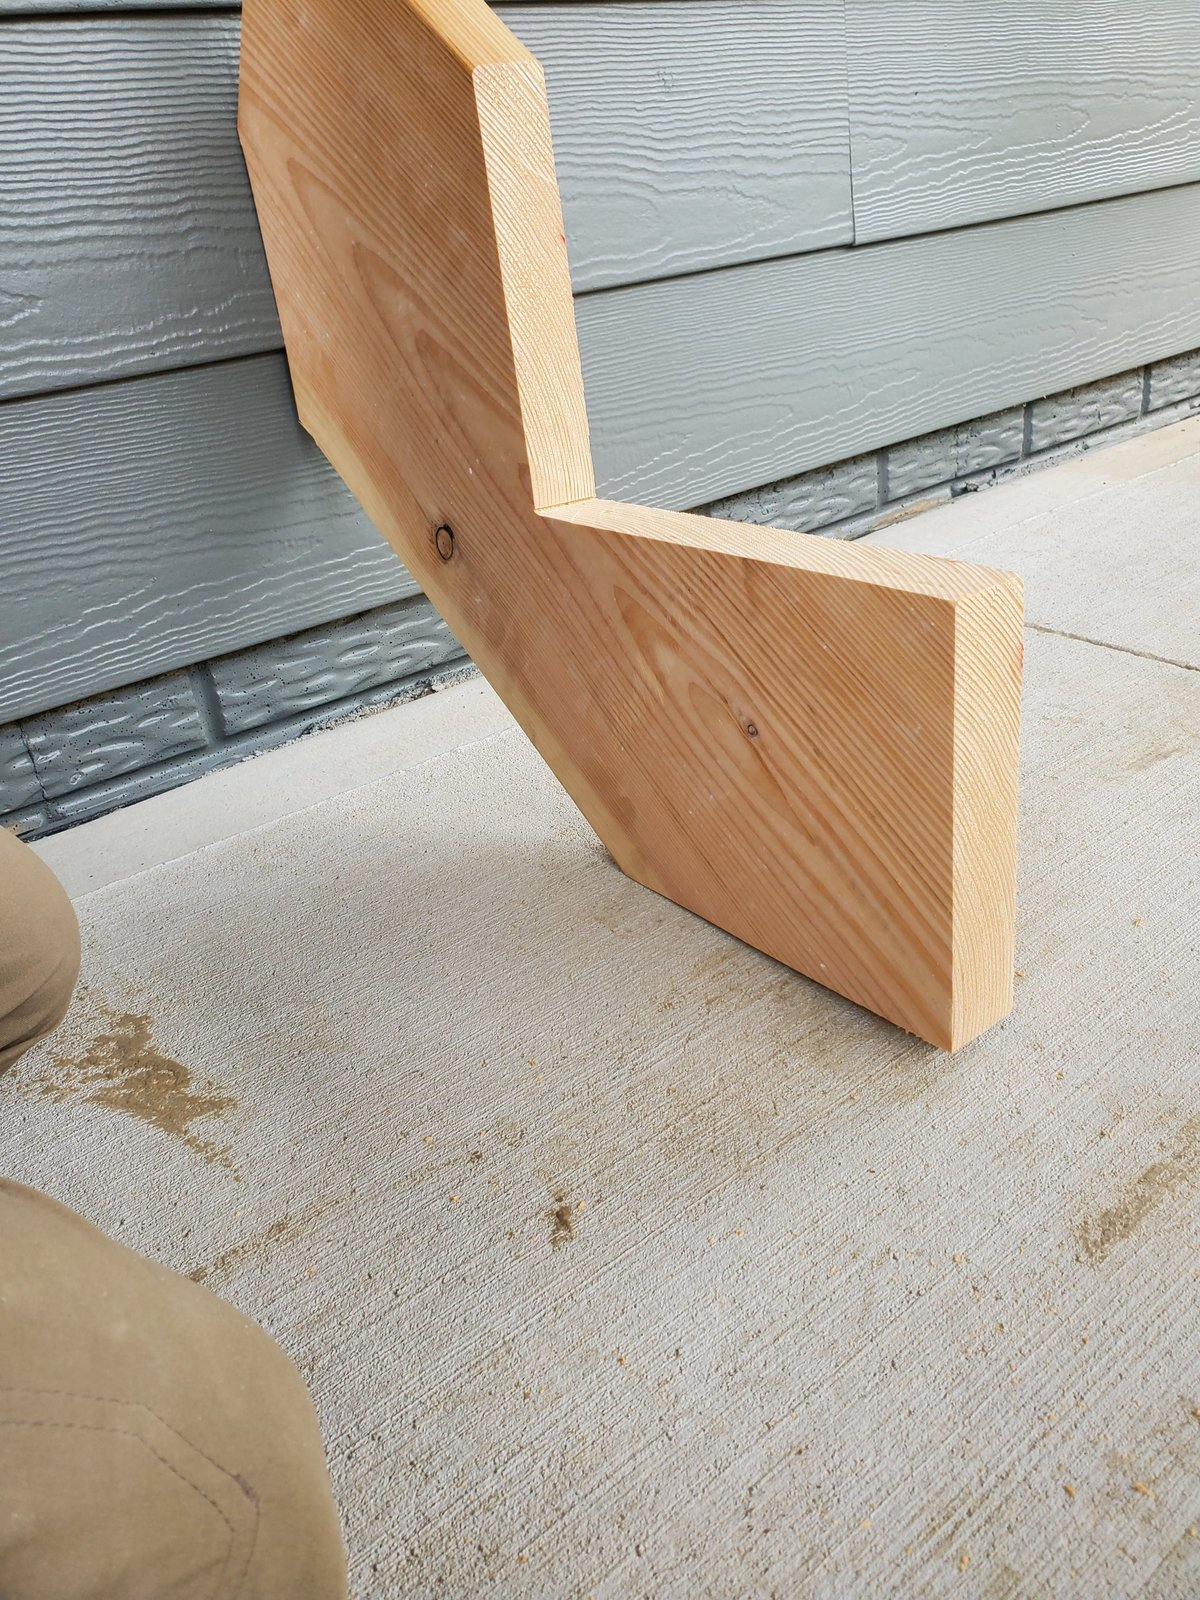
Cutting the stringers takes precision, and it is the hardest skill in this whole job. You are cutting large triangular notches out of the 2×12, and the wood that is left forms the skeleton that holds up the whole stair.
- Set the circular saw blade depth to cut through the full 1-1/2″ thickness of the 2×12. Use a sharp blade - a dull blade wanders and makes wavy cuts
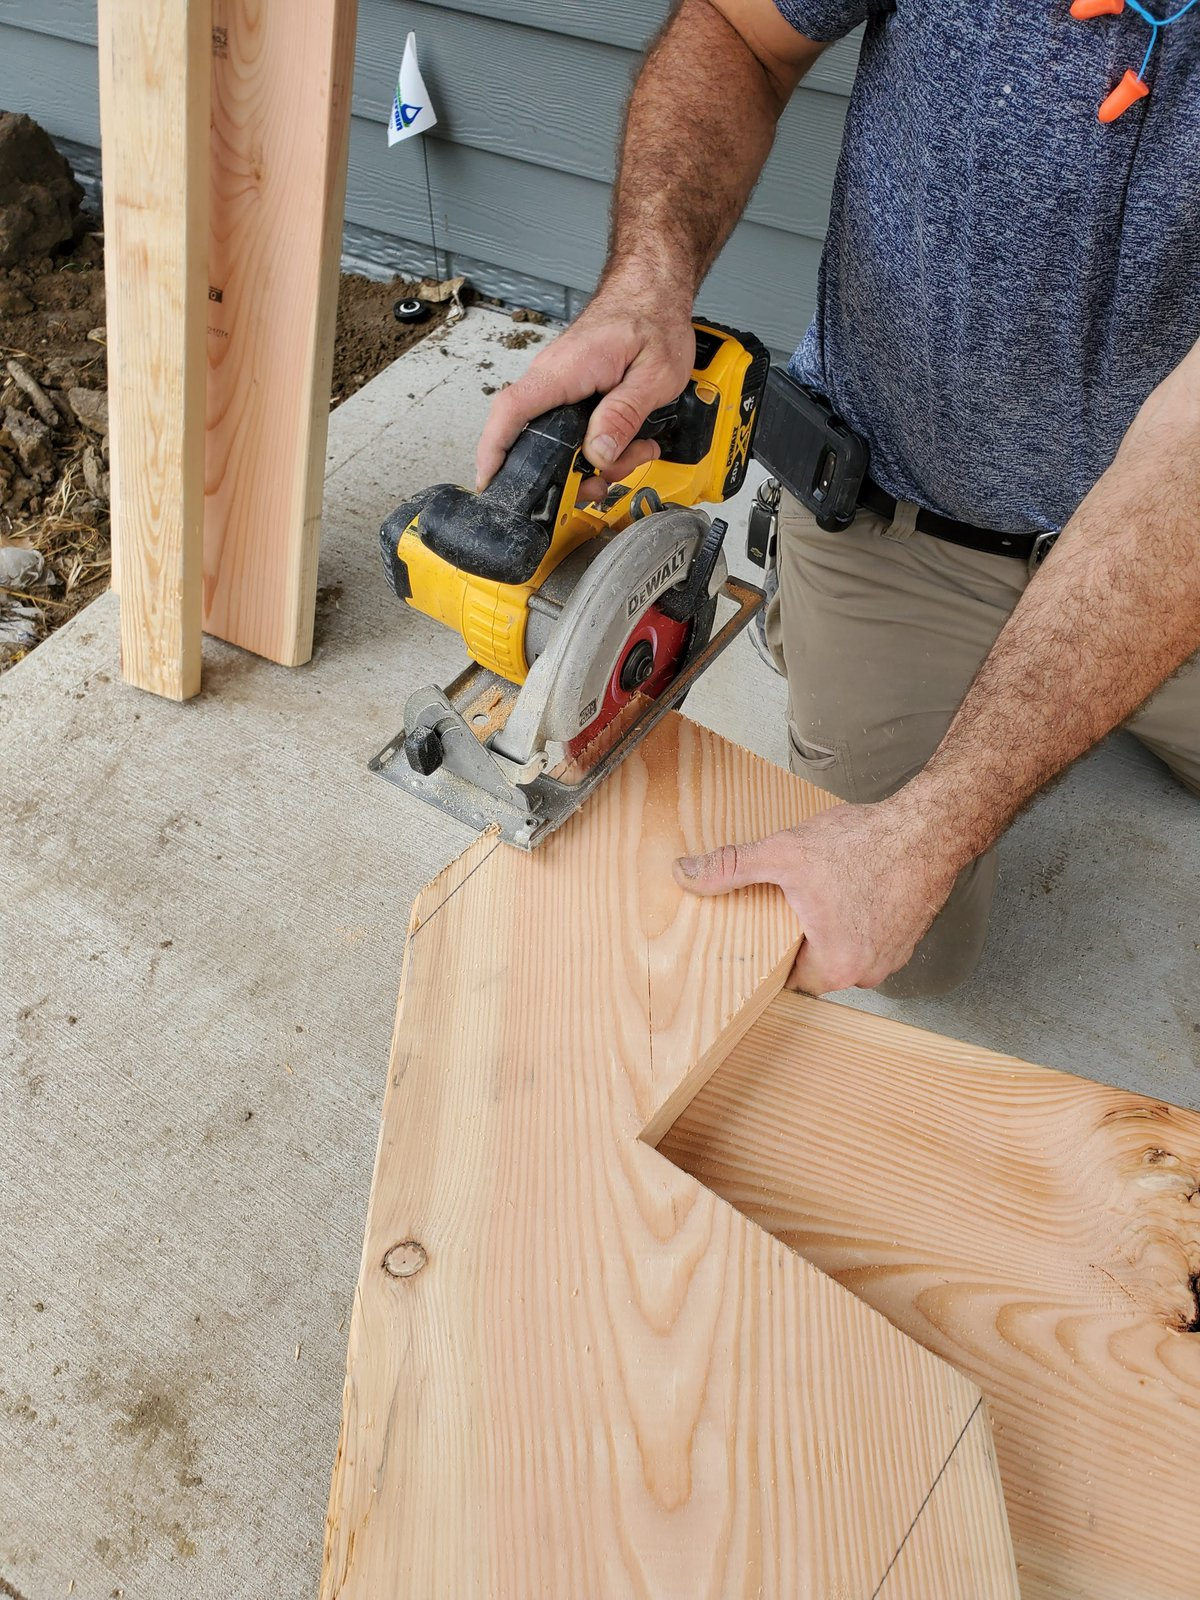
- Cut along the tread and riser lines carefully. The circular saw blade is round, so it CANNOT cut all the way into the inside corner where the tread and riser lines meet. STOP the circular saw cut at the corner - do NOT overcut past the lines. Overcutting weakens the stringer because you’ve removed wood from the structural portion
- Finish the inside corners with a handsaw. Use a sharp handsaw or jigsaw to carefully cut the remaining material at each inside corner where the circular saw couldn’t reach. Cut precisely to the pencil line - no further
- Cut the bottom (with drop adjustment) and the top plumb cut
How many stringers?
- Stairs up to 36″ wide at the brick mold: 2 stringers (one on each side) - this is what this guide covers
- Open-riser stairs wider than 36″ at the brick mold need a center stringer (closed risers carry 2 stringers up to 48″). See the 3-stringer supplemental for center stringer layout, installation, and blocking details
After cutting the first stringer, use it as a template for the rest. Clamp it on top of the next 2×12 and trace the pattern. Or better yet, cut the first one, test-fit it (Step 4), verify it’s correct, THEN use it as a template. Never mass-produce stringers from an unverified pattern.
After all stringers are cut, stack them on top of each other on a flat surface. All tread cuts and riser cuts should align within 1/16″. If one stringer is off, use it as the center stringer (where the error is least visible) or re-cut it.
Pro Tip: A 3-riser stringer only needs about 2-1/2 feet of 2×12 (about 3-1/2 feet for 4 risers). But buy a full-length board (8′ or 10′) and cut from the straightest, clearest section. Reject boards with large knots in the area where the tread/riser cuts fall - a knot at a cut point is a weak point that can crack under load. Look at the board from the end to check for twist.
Pro Tip: After cutting, check that the remaining “throat” of the stringer (the narrowest section of wood remaining after the tread/riser cuts) is at least 3-1/2″. A 2×12 laid out at our 7-5/8″ max riser and 10″ run still leaves about 5-1/4″, so a throat anywhere near 3-1/2″ means the layout is off. Recheck the layout before you cut.
Step 4: Dry-Fit the First Stringer #
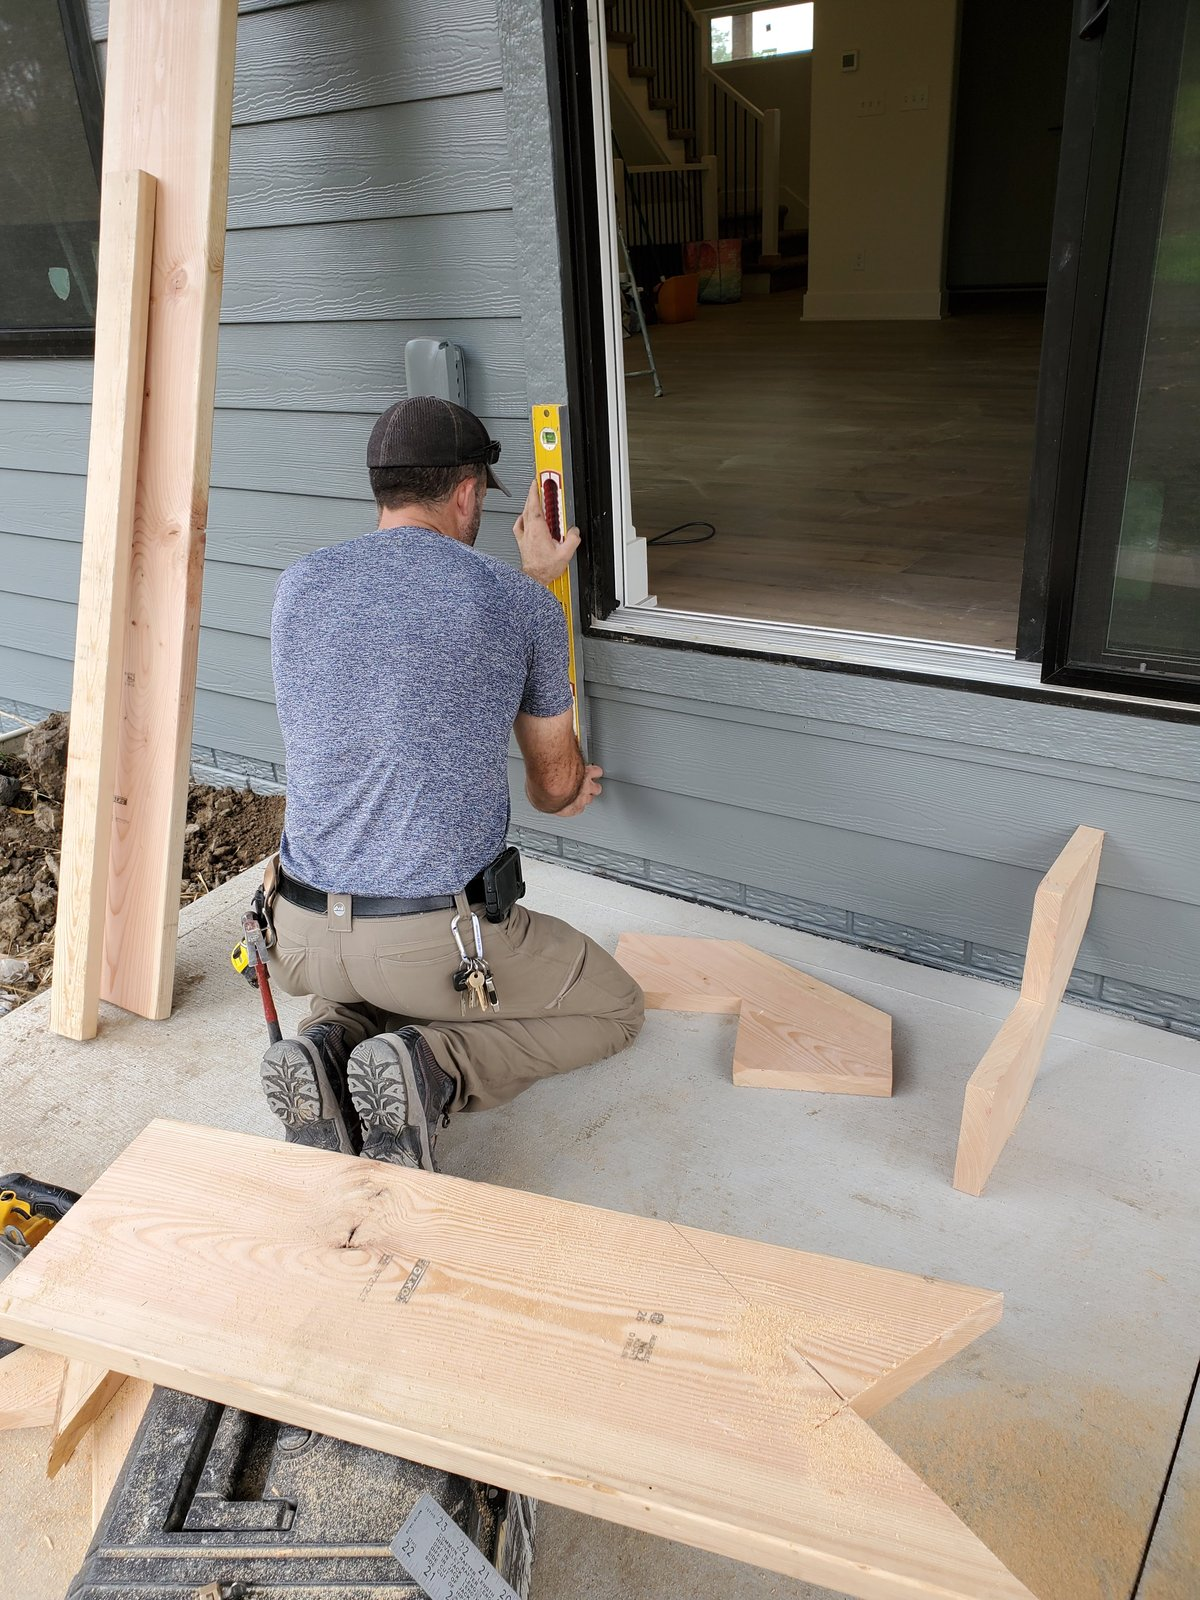
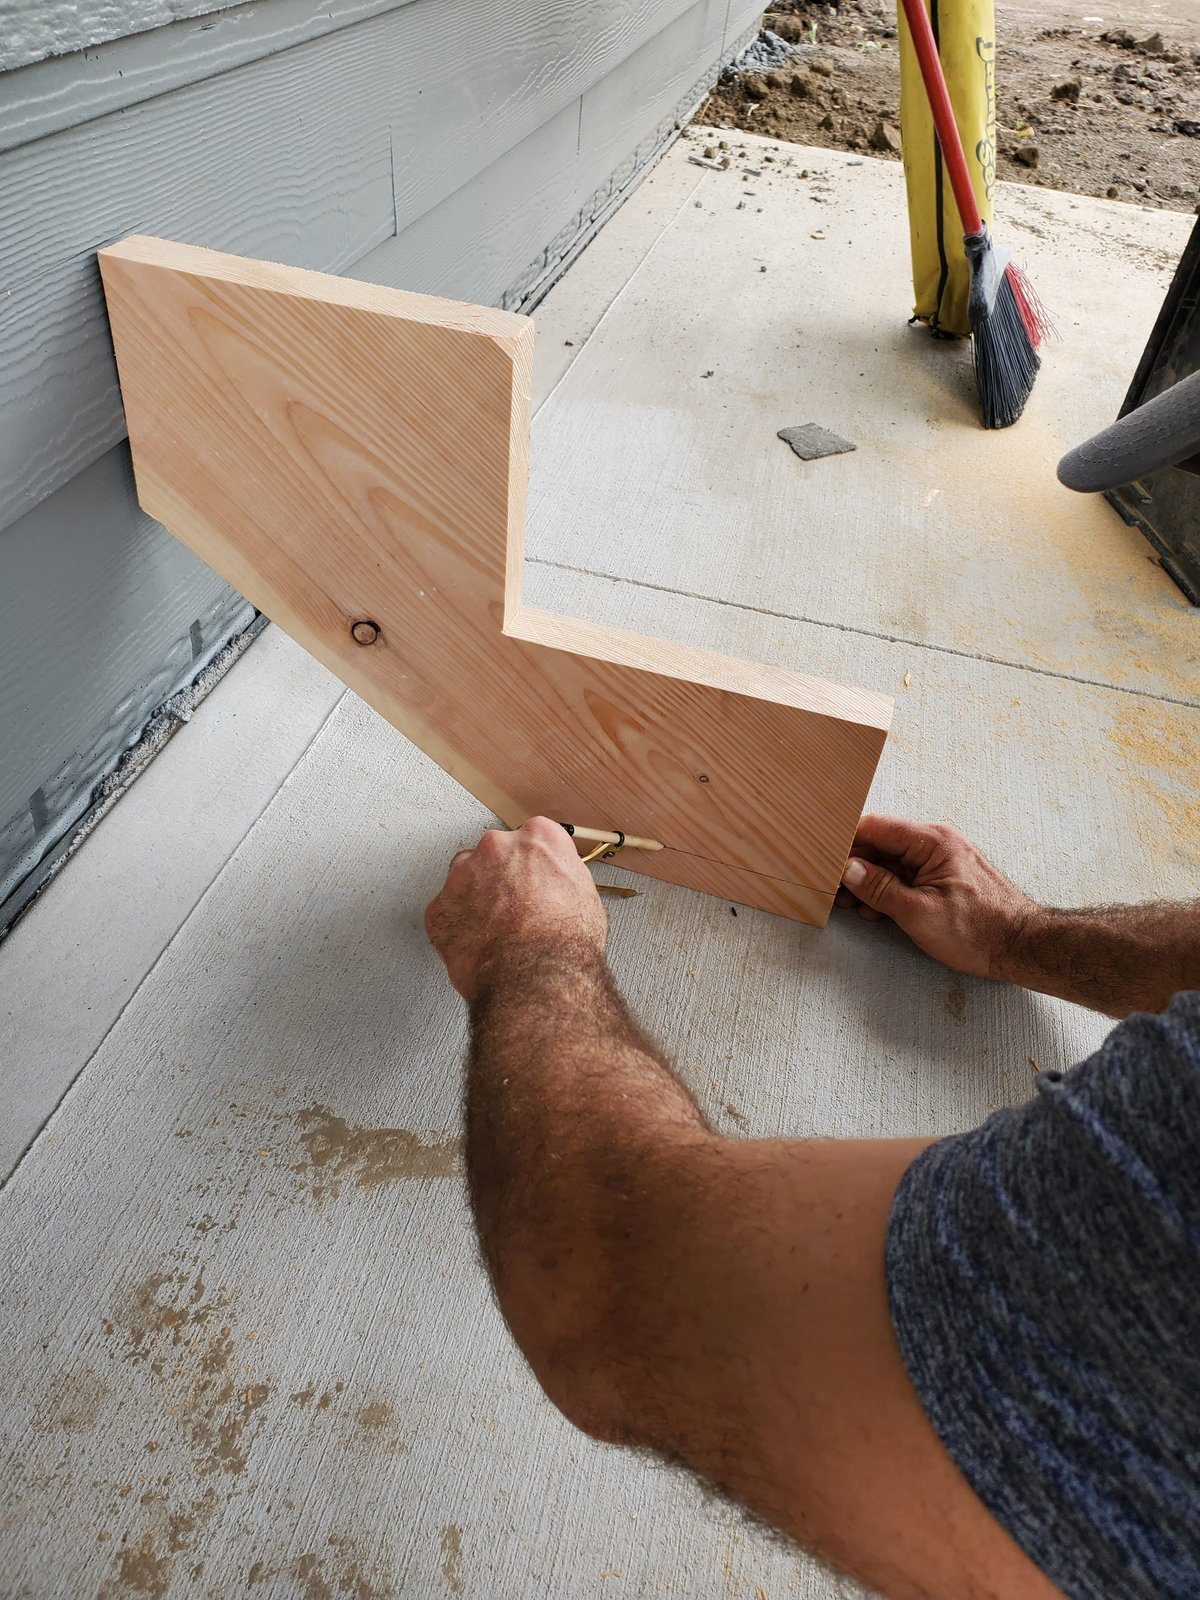
Before gluing or fastening anything permanently, test-fit the first stringer:
- Set the stringer in position with the top plumb cut against the house framing
- Place a level on each tread cut - they should all read level (or very close, accounting for the garage floor slope)
- Measure the first riser from the garage floor to the top of the first tread cut - this should equal your calculated riser height MINUS the tread thickness (because the drop adjustment was made, the tread material will bring it to the correct height)
- Temporarily place a piece of tread material on the first tread cut. Now measure from the garage floor to the top of the tread. This should equal your calculated riser height exactly
- Set a second piece of tread material on the top tread cut. Tread to tread should equal your riser height, and so should the top of that tread to the finished floor (the top riser)
- If any measurement is off by more than 1/4″, find the error before proceeding
Pro Tip: This dry-fit step is where most stair-building mistakes get caught. NEVER skip it. It takes 5 minutes and can save you from rebuilding the entire staircase. Walk up and down the dry-fitted stringer (carefully, holding onto the wall) - your feet will immediately tell you if a riser height is off.
Step 5: Glue the Stringers to the Slab #
Gluing the stringers to the slab is what keeps the bottom from sliding forward every time someone steps on them. Skip it, and nothing is holding the bottom in place.
- Sweep the concrete clean of dust, dirt and debris everywhere a stringer will sit - the adhesive needs to bond to bare concrete, not dust
- Dry-fit each stringer in its final position one more time, its outside face lined up with the outside edge of the door's brick mold, and trace its footprint on the slab with a pencil, so you can find the spot again once it is covered in adhesive
- Apply a generous bead of construction adhesive (PL Premium or a similar polyurethane construction adhesive) to the bottom edge of the stringer, in a zigzag pattern for full coverage
- Set the stringer back onto its traced footprint and press it down firmly along the full length of the cut, so the whole bottom edge is in contact with the slab
- Once the adhesive has cured per the tube’s instructions, test each stringer by trying to rock it side to side - it should be completely solid with no movement
Pro Tip: You are not drilling into the concrete or setting anchors on this job. The adhesive bond to the slab is what holds the bottom of the stairs down, so give it full, clean contact across the whole bottom edge and do not rush the press-down.
Step 6: Set and Attach the Stringers #
Now attach the top of each stringer to the house framing. The bottom is already secured by the adhesive from Step 5.
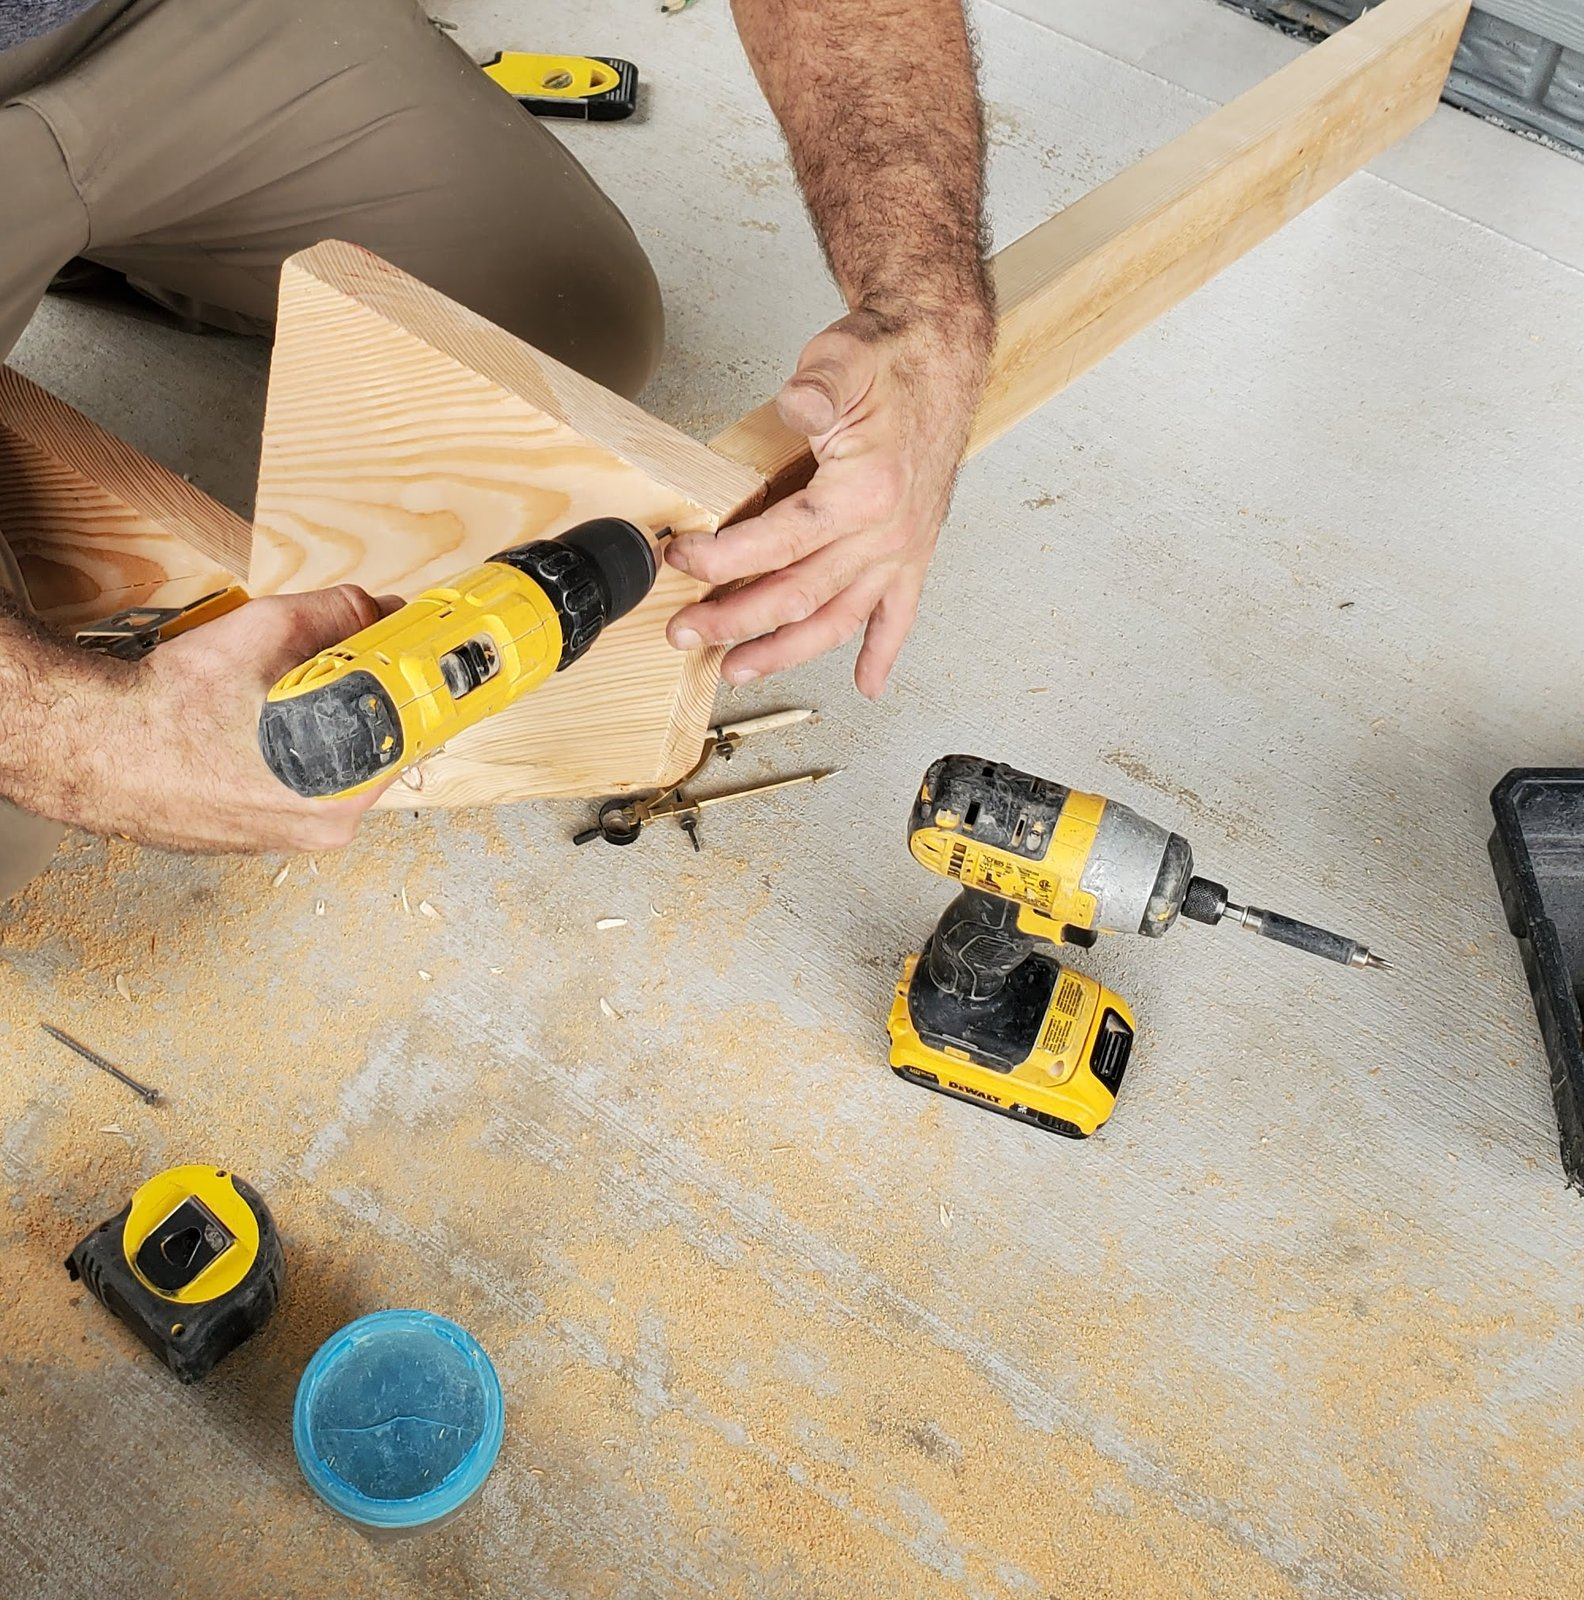
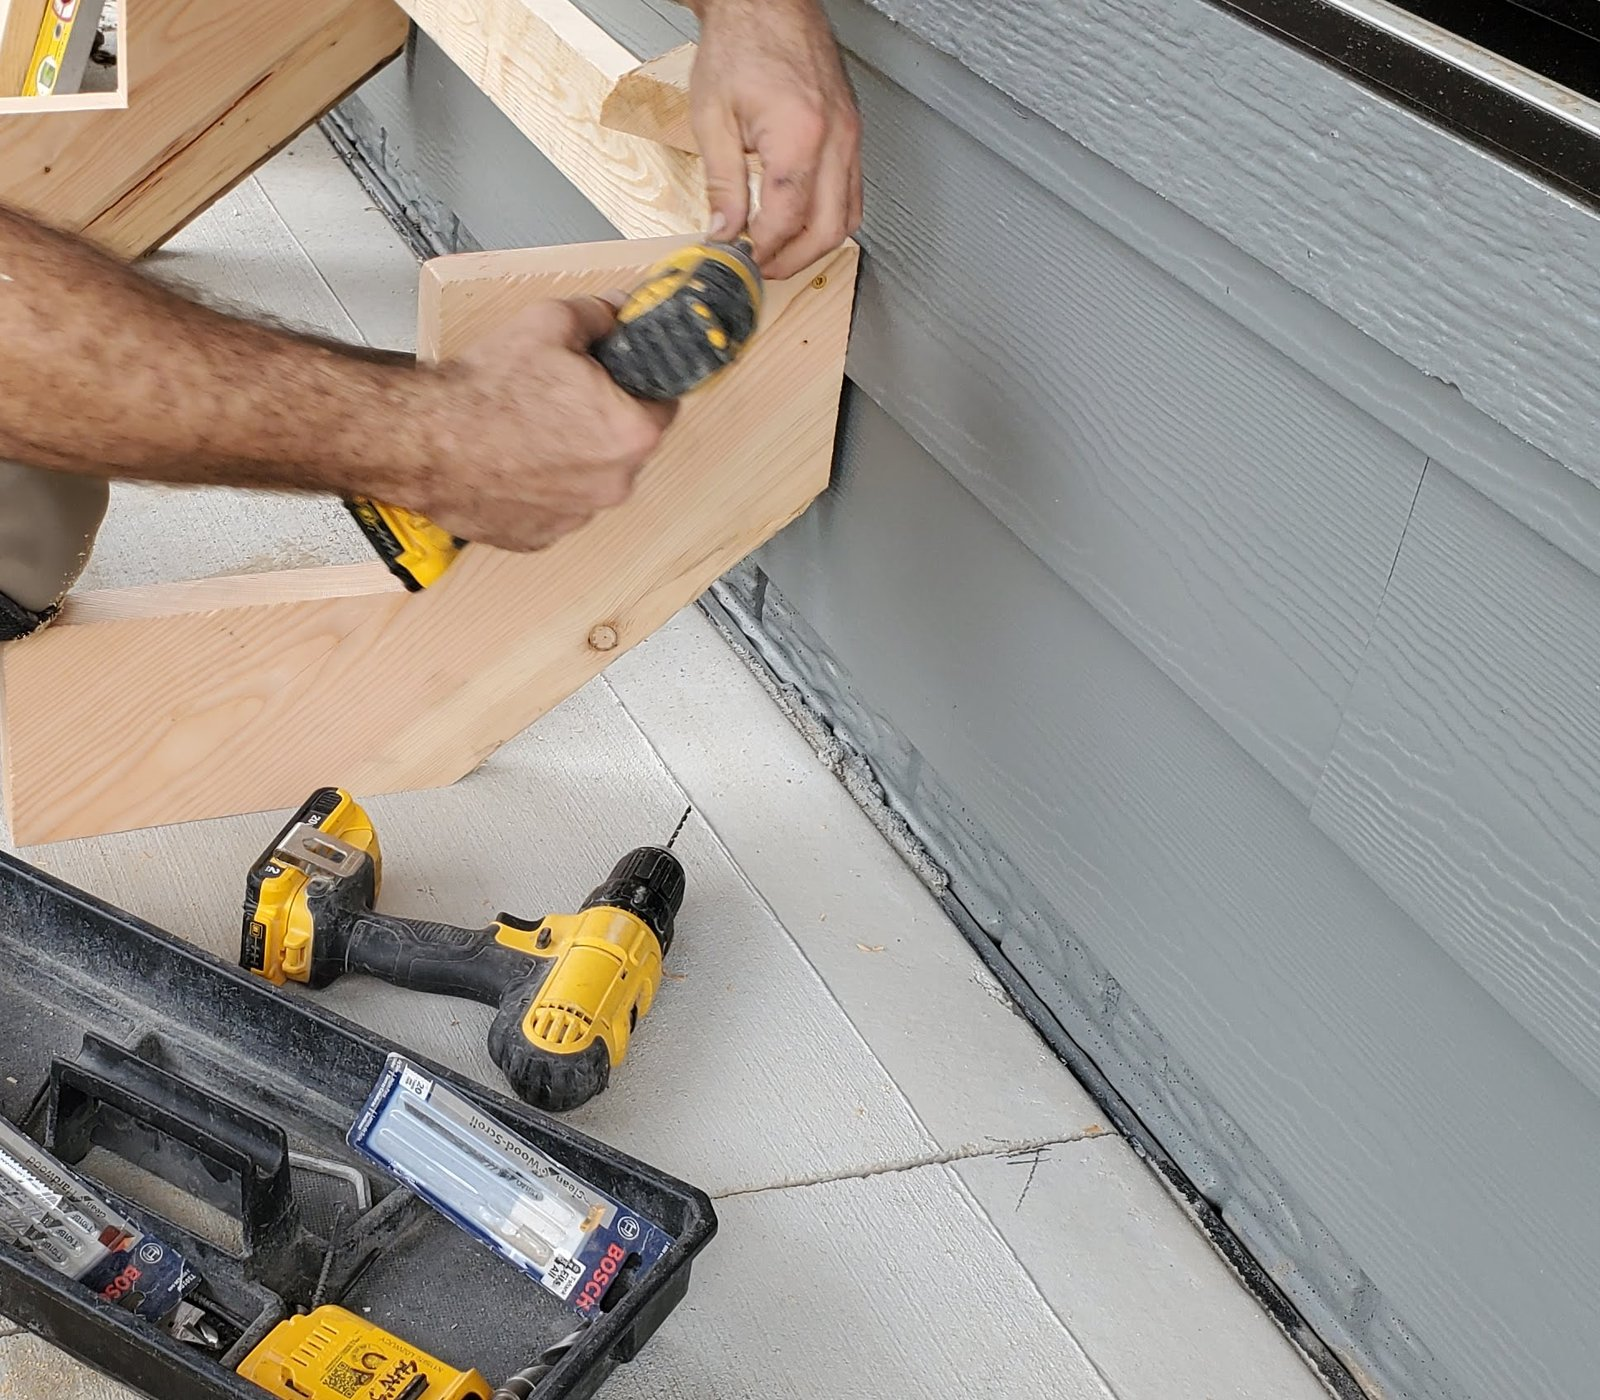
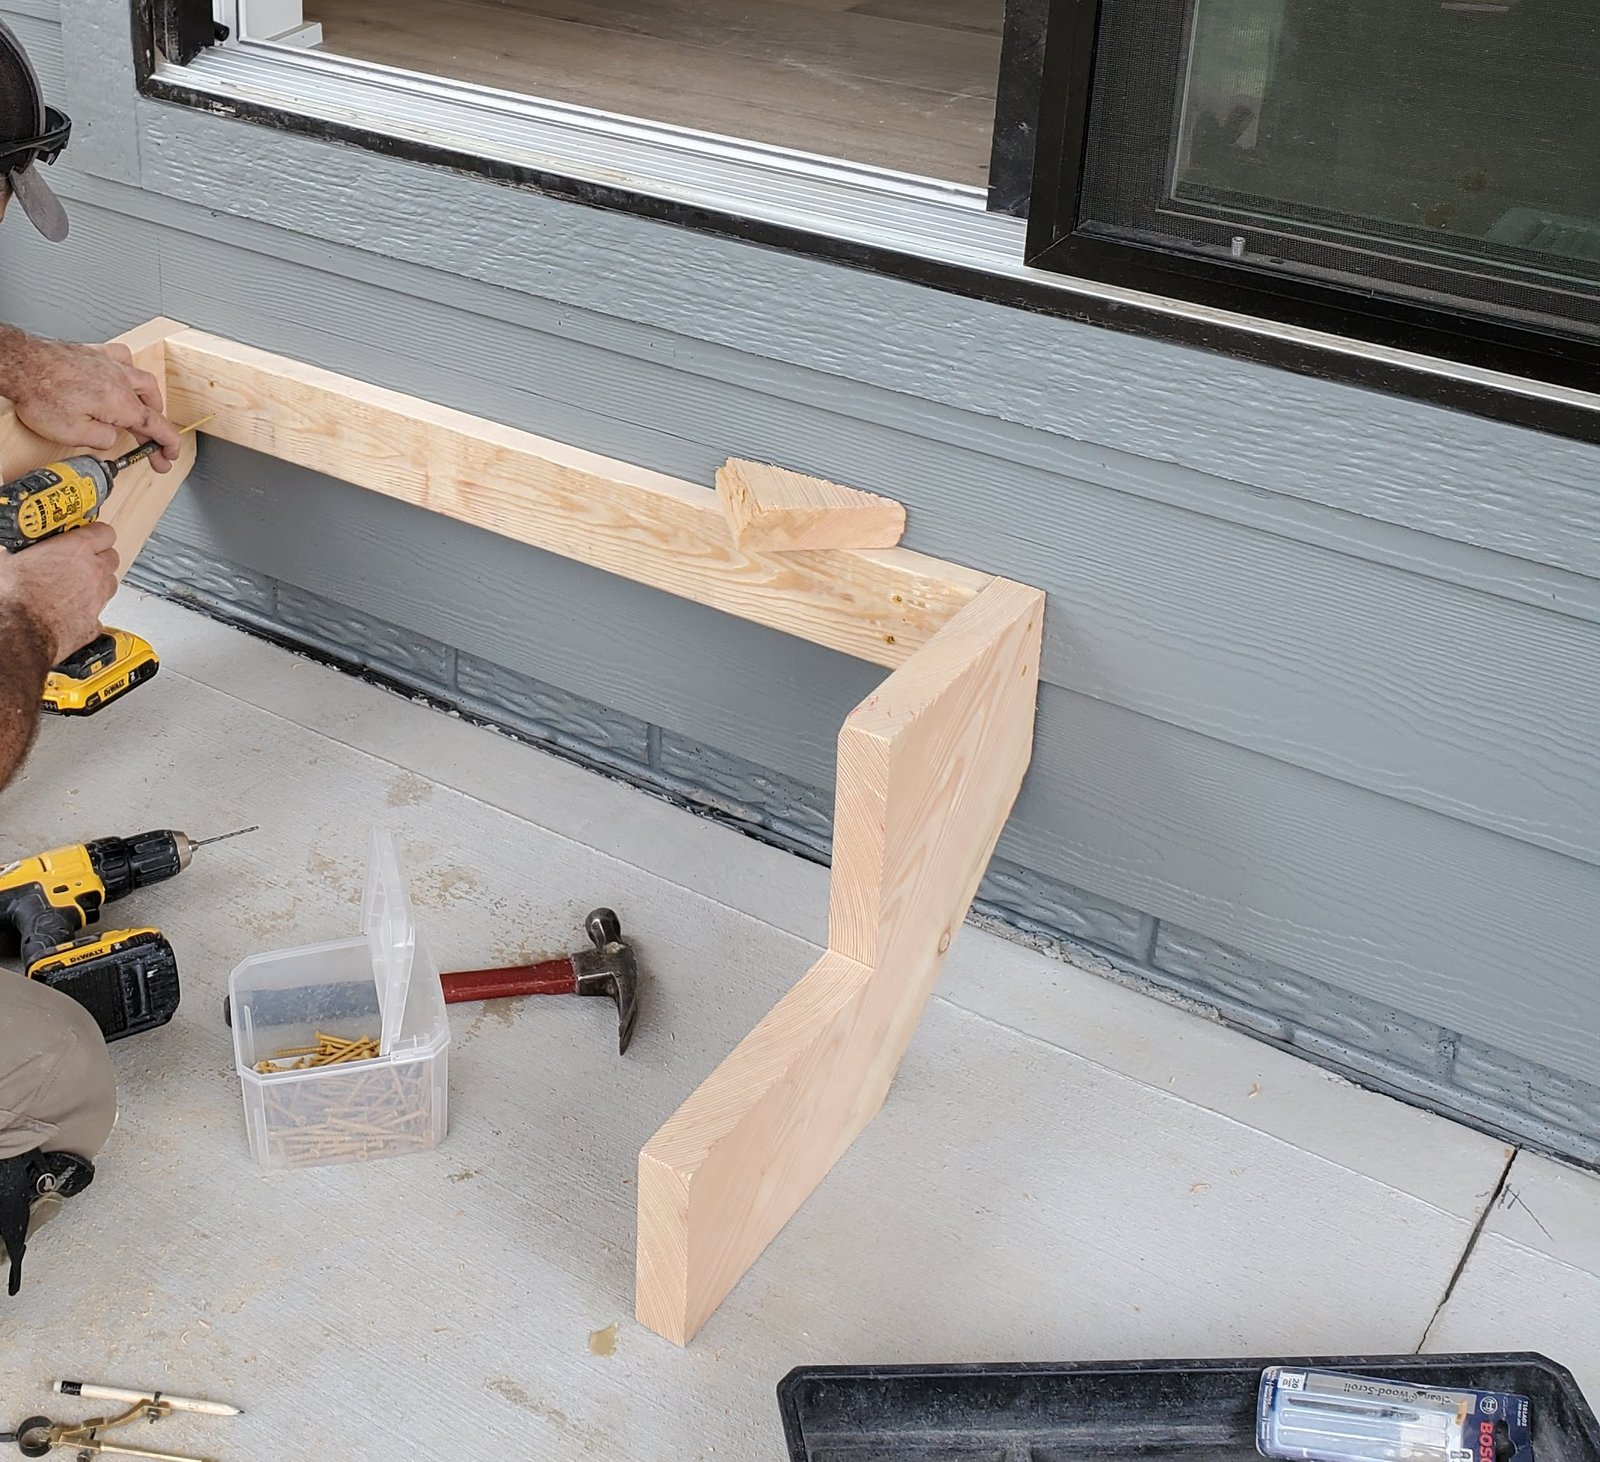
Back board: We always join the two stringers with a back board before they go up. Cut a 2x4 to fit between the stringers at the top, against the house, standing on edge with its top flush with the top tread cut, and screw through the outside face of each stringer into its ends. The two stringers and the back board then go against the house as one frame, and you fasten that frame as below.
Bottom attachment:
- Already secure from the glue-down in Step 5 - no additional fastening needed at the bottom
Top attachment:
- Fasten the frame into solid wood house framing with 3″ exterior-rated screws or lag screws. Either works; it just has to be strong. Toe-screw at an angle through each stringer near the plumb cut, at least 4 per stringer, and you can also drive them through the back board into the framing. Never fasten into siding alone, and never into the concrete foundation below the framing.
After attaching, check every tread cut with a level. If a stringer has shifted or tilted during attachment, shim it before proceeding.
For wider stairs that require a center stringer, see the 3-stringer supplemental for blocking and additional attachment details.
Step 7: Install the Treads #
Treads carry the full weight of every step, so this is one of the most important parts of the job. Screw them down. On open risers like these, the treads are screwed, not glued; closed-riser steps get their treads glued and screwed (see How to Build Garage Steps with Closed Risers).
- No glue on the tread cuts: open-riser treads are held by the screws
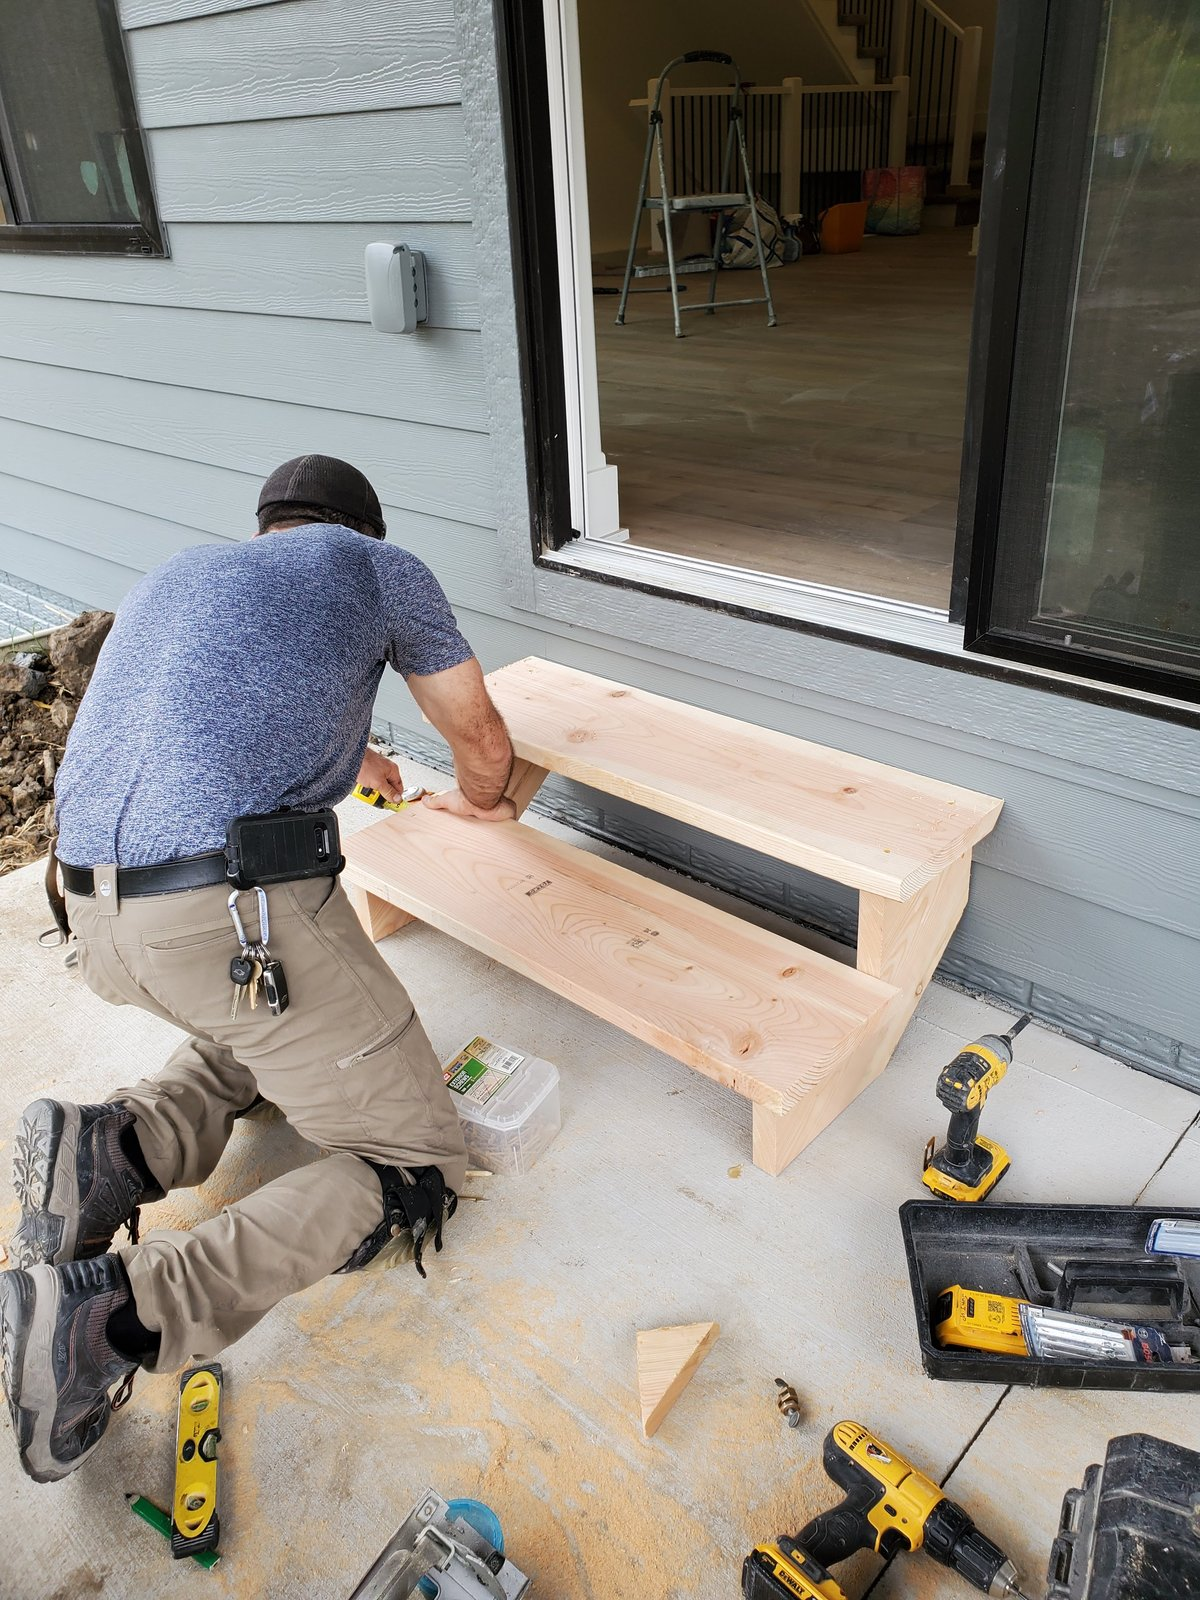
- Set the tread material in place. Push it back against the next riser cut (or the house framing on the top tread): a 2×12 on a 10″ run then overhangs the front exactly 1-1/4″. The tread should also overhang the outside stringers by 1-1/2″ on each side (or be flush if against a wall), since the stringers sit at the outside of the door's brick mold
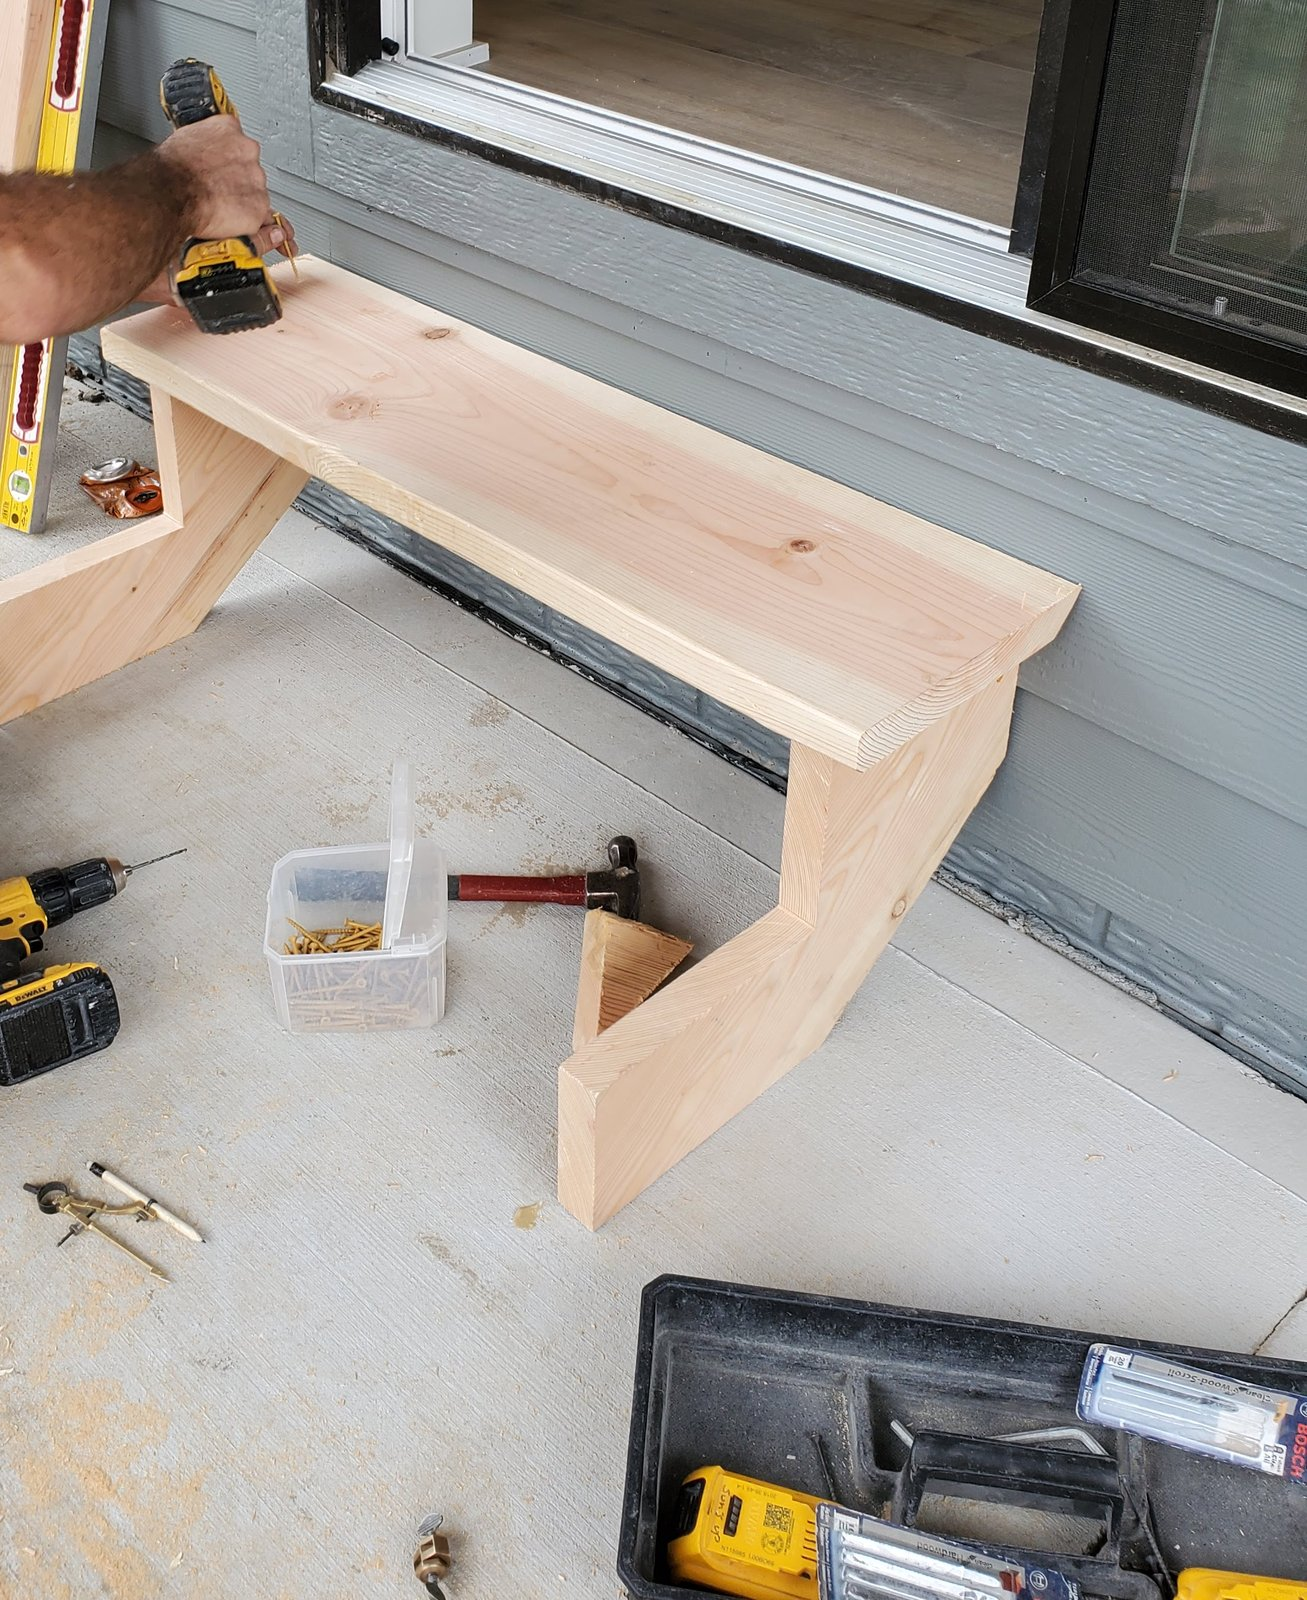
- Drive 2-1/2″ exterior-rated screws down through the tread into each stringer - at least 2 screws per stringer on every tread. Pre-drill if using hardwood treads to prevent splitting
- Check each tread with a level immediately after fastening. Shim under the tread at the stringer if needed
Pro Tip: On open-riser garage steps, the treads are screwed, not glued: at least 2 screws into each stringer on every tread. Closed-riser steps are the exception: there the treads get glued and screwed, which makes them a lot more secure and sturdy.
Pro Tip: Lightly round over the front edge of each 2×12 tread with sandpaper, or with a router and a 1/4″ roundover bit, so it is not sharp on bare feet. Skip the iron-on edge banding on garage steps: our treads are solid 2×12, not plywood.
Step 8: Final Verification and Finishing #
Before calling the job done, check every set of garage steps carefully:
- Measure every riser height (floor to tread, tread to tread, top tread to floor). Maximum variance allowed: 3/8″ between the tallest and shortest riser
- Walk up and down the stairs 5-6 times. Each step should feel identical. Your body will instantly feel an inconsistent riser
- Jump on each tread - no flexing, no bouncing, no creaking. If there’s flex, add a center stringer
- Check that the nosing projection is consistent on every tread
- Anti-slip protection is not optional on garage stair treads - smooth paint or bare wood gets dangerously slick when wet. If the treads get painted or stained, that part is the painter's job; just confirm anti-slip tread strips or grip tape go on before the steps see any traffic
Sealing the seam where the stringers meet the wall, and finishing the exposed stringer faces, are the painter’s jobs. Hand off a swept, solid set of steps and let him take it from there.
Quality Check #
- All risers within 3/8″ of each other (measure and record each one)
- Treads level side-to-side and front-to-back
- Stringers solid with zero flex when walking
- Bottom glued solidly to the concrete floor, no bounce when you step on it
- Top securely attached to house framing (no separation gap when weight applied)
- No squeaking under foot traffic
- Comfortable to walk - all steps feel identical (close your eyes and walk up/down)
- Nosing projection 1-1/4″ on every tread
- Tread width matches stair opening with correct overhang on sides
- No overcuts visible on stringer faces (cosmetic defect and structural concern)
- All fasteners countersunk or flush (no protruding screw heads on treads)
- Stringer throat width is at least 3-1/2″ at narrowest point
- Headroom clearance meets 6′-8″ minimum under any header or soffit (the underside of the framing above the stairs)
Troubleshooting Common Garage Steps Problems #
Steps feel bouncy or flex when walking #
The most common fix is adding a center stringer - see the 3-stringer supplemental for the full process. If the span is narrow (under 30″) and still flexing, check that the tread is a full 2×12 and that it is screwed to both stringers, at least 2 screws in each.
Bottom riser feels taller/shorter than the others #
This is the most common stair-building mistake. If the bottom riser feels TALLER: you forgot to make the drop adjustment (subtract one tread thickness from the bottom of the stringer). Remove the stairs and cut the drop adjustment from the bottom of each stringer. If the bottom riser feels SHORTER: you made the drop adjustment, but with the wrong measurement (for example, you subtracted 3/4″ but used 1-1/2″ thick treads), or you subtracted it twice by mistake. Re-measure and correct it.
Top riser is different from the others #
The total rise measurement was wrong. You either measured to the subfloor instead of the finished floor, or the finished floor has been installed since you measured and it changed the total rise. The only fix is to re-measure the actual total rise and re-cut the stringers. There are no shortcuts - an incorrect top riser cannot be shimmed or trimmed to match.
Stringers slide on the concrete floor #
The adhesive bond to the slab failed, or never fully set. Possible causes: the concrete wasn’t swept clean before gluing (dust and debris block the bond), the bead didn’t cover the full length of the bottom cut, or the stairs got used before the adhesive cured. Remove the stringer, clean both surfaces back to bare material, and re-glue with a full, even bead across the whole bottom edge. Give the adhesive the cure time on its label before anyone uses the stairs again.
Treads squeak when walked on #
The tread is not pulled tight to the stringer, or a screw has loosened. Drive additional screws through the tread into each stringer. For persistent squeaks, drive a screw from underneath (through the stringer tread cut up into the tread), which pulls the tread tight against the stringer.
Tread nosing overhang is inconsistent #
The tread wasn’t properly positioned before fastening, or stringers aren’t perfectly aligned. If only slightly off, you can plane or sand the nosing to match. If significantly off, remove the tread, reposition, and reattach. Use a tape measure to check the overhang as you position each tread.
Treads don’t sit level even though stringers were level during dry-fit #
The stringers shifted during final attachment. Check that the stringers are still plumb and the tread cuts are level. If a stringer has twisted or tilted, loosen its fasteners and re-set it. Blocking (short pieces of lumber nailed in between the stringers) stops this twisting, both during and after installation. Also check that each stringer’s bottom cut is making full contact with the slab - if the garage floor slopes (which it usually does), a gap under one end will show up as an uneven tread.
Stringer has a visible overcut past the tread/riser corner #
The circular saw ran past the layout line at the inside corner. This is both a look problem and a strength problem - overcuts weaken the stringer’s throat. If the overcut is minor (less than 1/2″ past the line), it’s usually fine structurally; flag it for the painter to fill if the stringer face will be visible and finished. If the overcut is bigger than that, cut a new stringer. To avoid this next time, stop the circular saw 1/2″ before the corner and finish the cut with a handsaw.
Garage Step Building Code Requirements #
These are the IRC 2021 numbers you need for a basic garage steps job like this one. Each line names the code section it comes from.
- Max riser height: 7-3/4″ (R311.7.5.1). That is the code. Our own max is 7-5/8″, 1/8″ under it, so a riser cut a hair long still passes
- Riser height variation within one flight: 3/8″ (R311.7.5.1)
- Min tread depth: 10″, with a nosing of 3/4″ to 1-1/4″ required when tread depth is under 11″ (R311.7.5.2, R311.7.5.3)
- Tread depth variation within one flight: 3/8″ (R311.7.5.2)
- Min width: 36″ clear above handrail height. At or below handrail height, 31-1/2″ clear with a handrail on one side, or 27″ clear with handrails on both sides (R311.7.1)
- Headroom: 6′-8″ minimum (R311.7.2)
- Handrail required on at least one side when a flight has 4 or more risers (R311.7.8). Our standard is a rail on every open side (a wall counts as a side), so no inspector can red-tag us for one
- Handrail height: 34″ to 38″ (R311.7.8.1)
- Max rise between landings: 151″ (R311.7.3)
- Landing at the door: a door other than the required egress door needs a landing or floor within 7-3/4″ of the top of the threshold, except a stair of not more than 2 risers on the exterior side of the door where the door does not swing over the stair (R311.3.2). Local codes raise that number: Omaha, Papillion and Bellevue allow up to 3 risers and Gretna up to 4 without a landing. La Vista and Sarpy County kept the 2, and there 3 risers passes only under the enclosed-garage exception (R311.7.6), when the door does not swing over the steps
- Some jurisdictions also require guards or a fully enclosed rail on both sides of an open stair, sometimes called cattle chute style. Code asks for guards only where a walking surface is more than 30″ above the floor below (R312.1.1), but Gretna wants the full chute at 4 or more risers anyway: no opening a 4″ ball passes through (6″ at the triangle under the bottom rail), plus closed risers. Omaha takes an open grab rail. Check with the local inspector before you build
When this guide stops and the landing guide starts: With an in-swinging door and 30-1/2″ of total rise or less (1 to 4 risers at our 7-5/8″ max), you are in the right guide; at 4 risers, add a rail on every open side. Over 30-1/2″, or with a door that swings out over the steps, you need a landing at the door - use How to Build Garage Steps with a Landing instead.
Check your own riser count against this, not just the worked example earlier in this guide. That example (ex. 21″) lands on 3 risers of ex. 7″, so no landing and no handrail. The 30-1/2″ landing line is our rule, not a code number: at our 7-5/8″ max riser, anything over 30-1/2″ is 5 risers, and every local code here wants a landing by then. To get these numbers for your own rise without doing the math by hand, use the garage steps calculator: enter the total rise and it returns the riser count and height, the stringer length and bottom cut, and a material list.
Part 2: Adding a Handrail to Garage Steps #
A handrail is required when a flight has 4 or more risers, or whenever the customer wants one. Code asks for one side; we put a rail on every open side, because some inspectors want both and a red tag costs more than a rail. A wall counts as a side, so a stair against a wall gets one rail, on the open side. Adding a handrail does not change the steps themselves - build them the same way either way.
To install it, cut into the treads at each post location and screw the post to the side of the stringer. See How to Install a Garage Step Handrail for the rail itself.
Safety Considerations #
- Handrail: Whether a handrail is required is a code question, not just a safety call: 4 or more risers gets a rail on every open side, and 1 to 3 risers needs none unless the customer or the local inspector asks for one. See the related guide for wall-mounted handrails
- Clearance: Make sure the stairs don’t interfere with car parking. Mark the stair footprint on the garage floor with tape before building so you can see how close your car comes. Confirm the footprint with the homeowner before you build: in a tight garage they may want the steps built differently
External Resources #
- IRC R311.7 - Stairway Code Requirements (International Code Council)
All Garage Steps Guides #
- → You are here: Build Garage Steps - Core guide - 2 stringers, open risers, up to 30-1/2 inches of rise (start here)
- Garage Steps with a Landing - Over 30-1/2 inches of rise, or a door that swings over the steps
- Garage Steps with 3 Stringers - Add a center stringer for open-riser stairs wider than 36″
- Garage Steps with Closed Risers - Add riser boards for a finished look
- Garage Step Handrail - When and how to install a code-compliant handrail
Reference Photos #
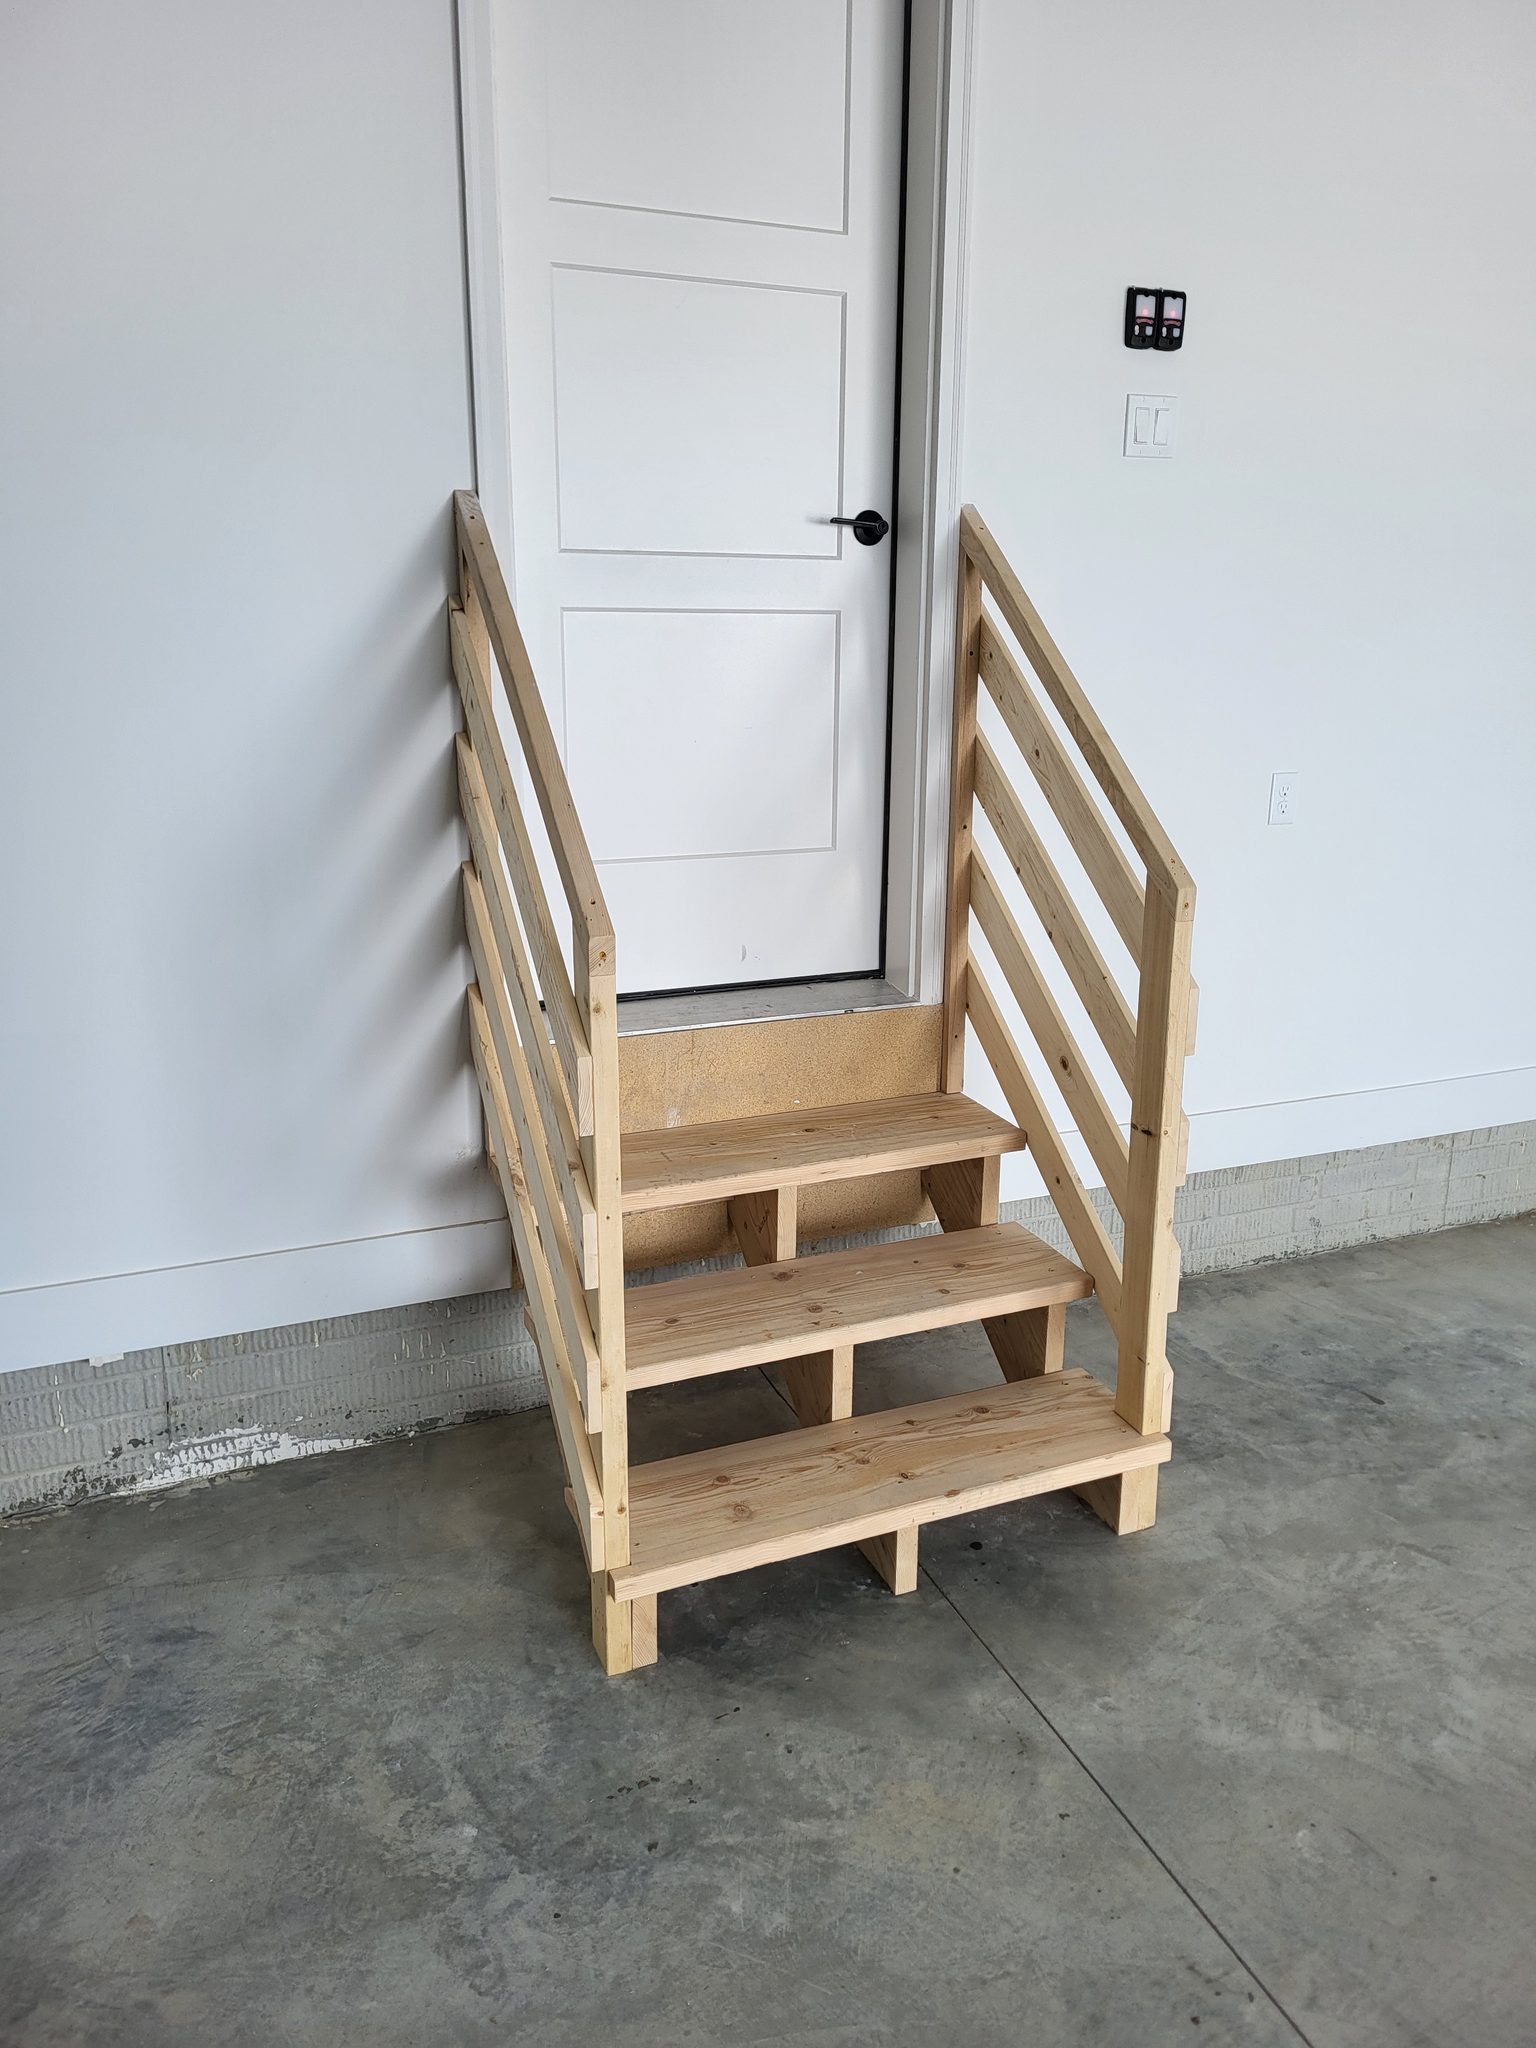
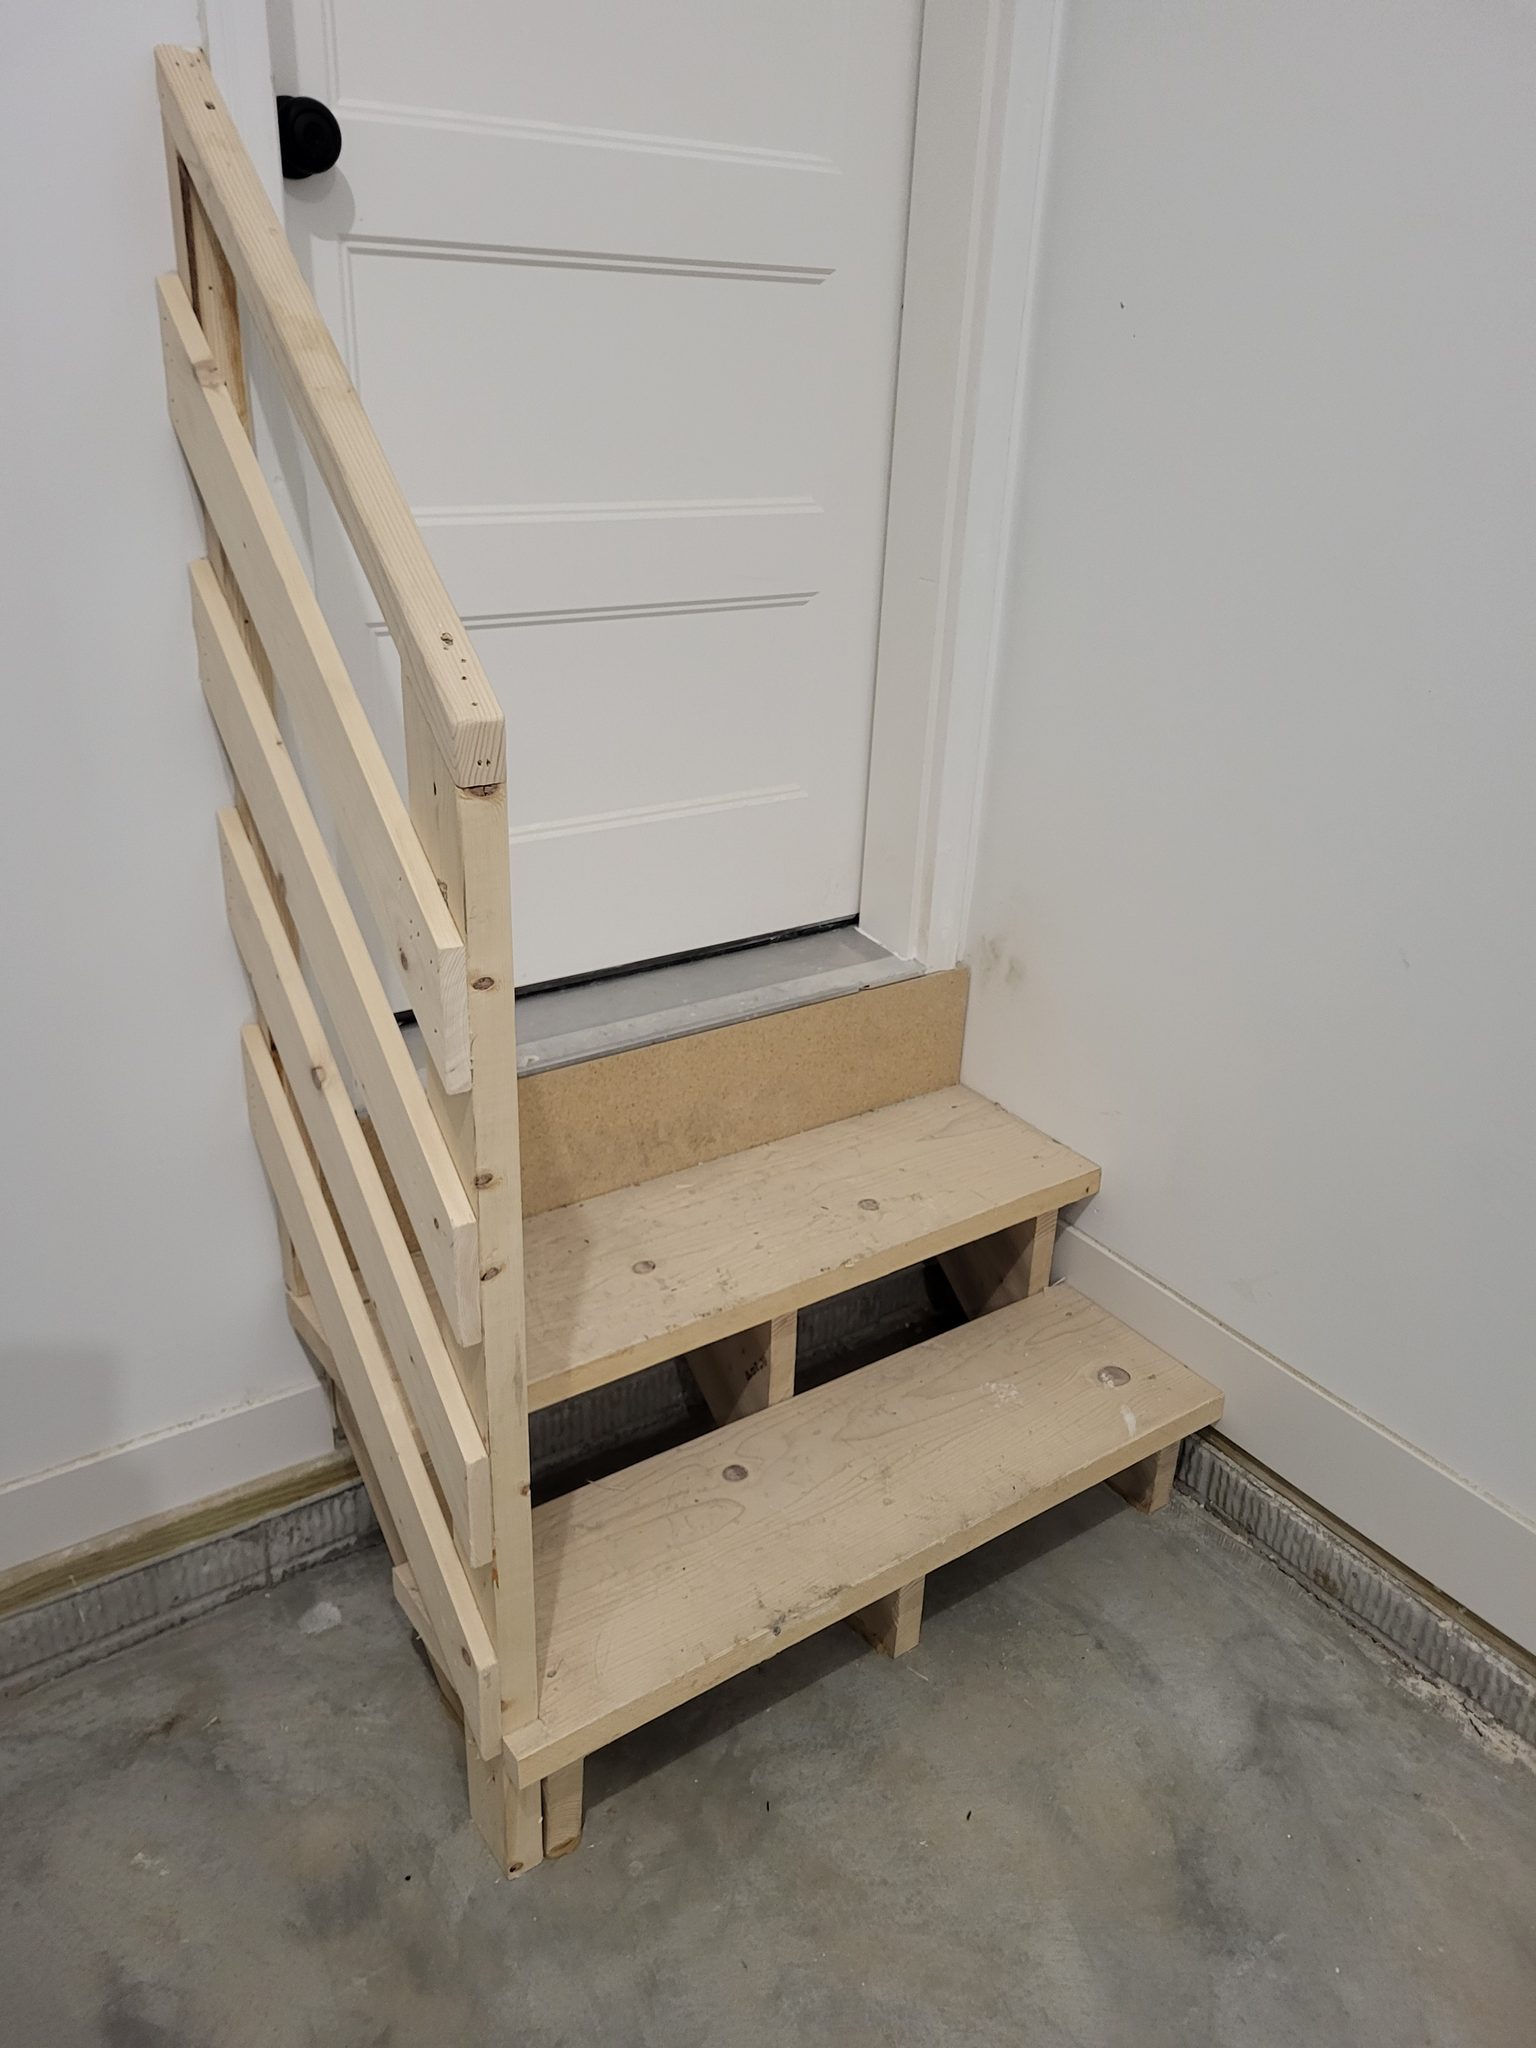
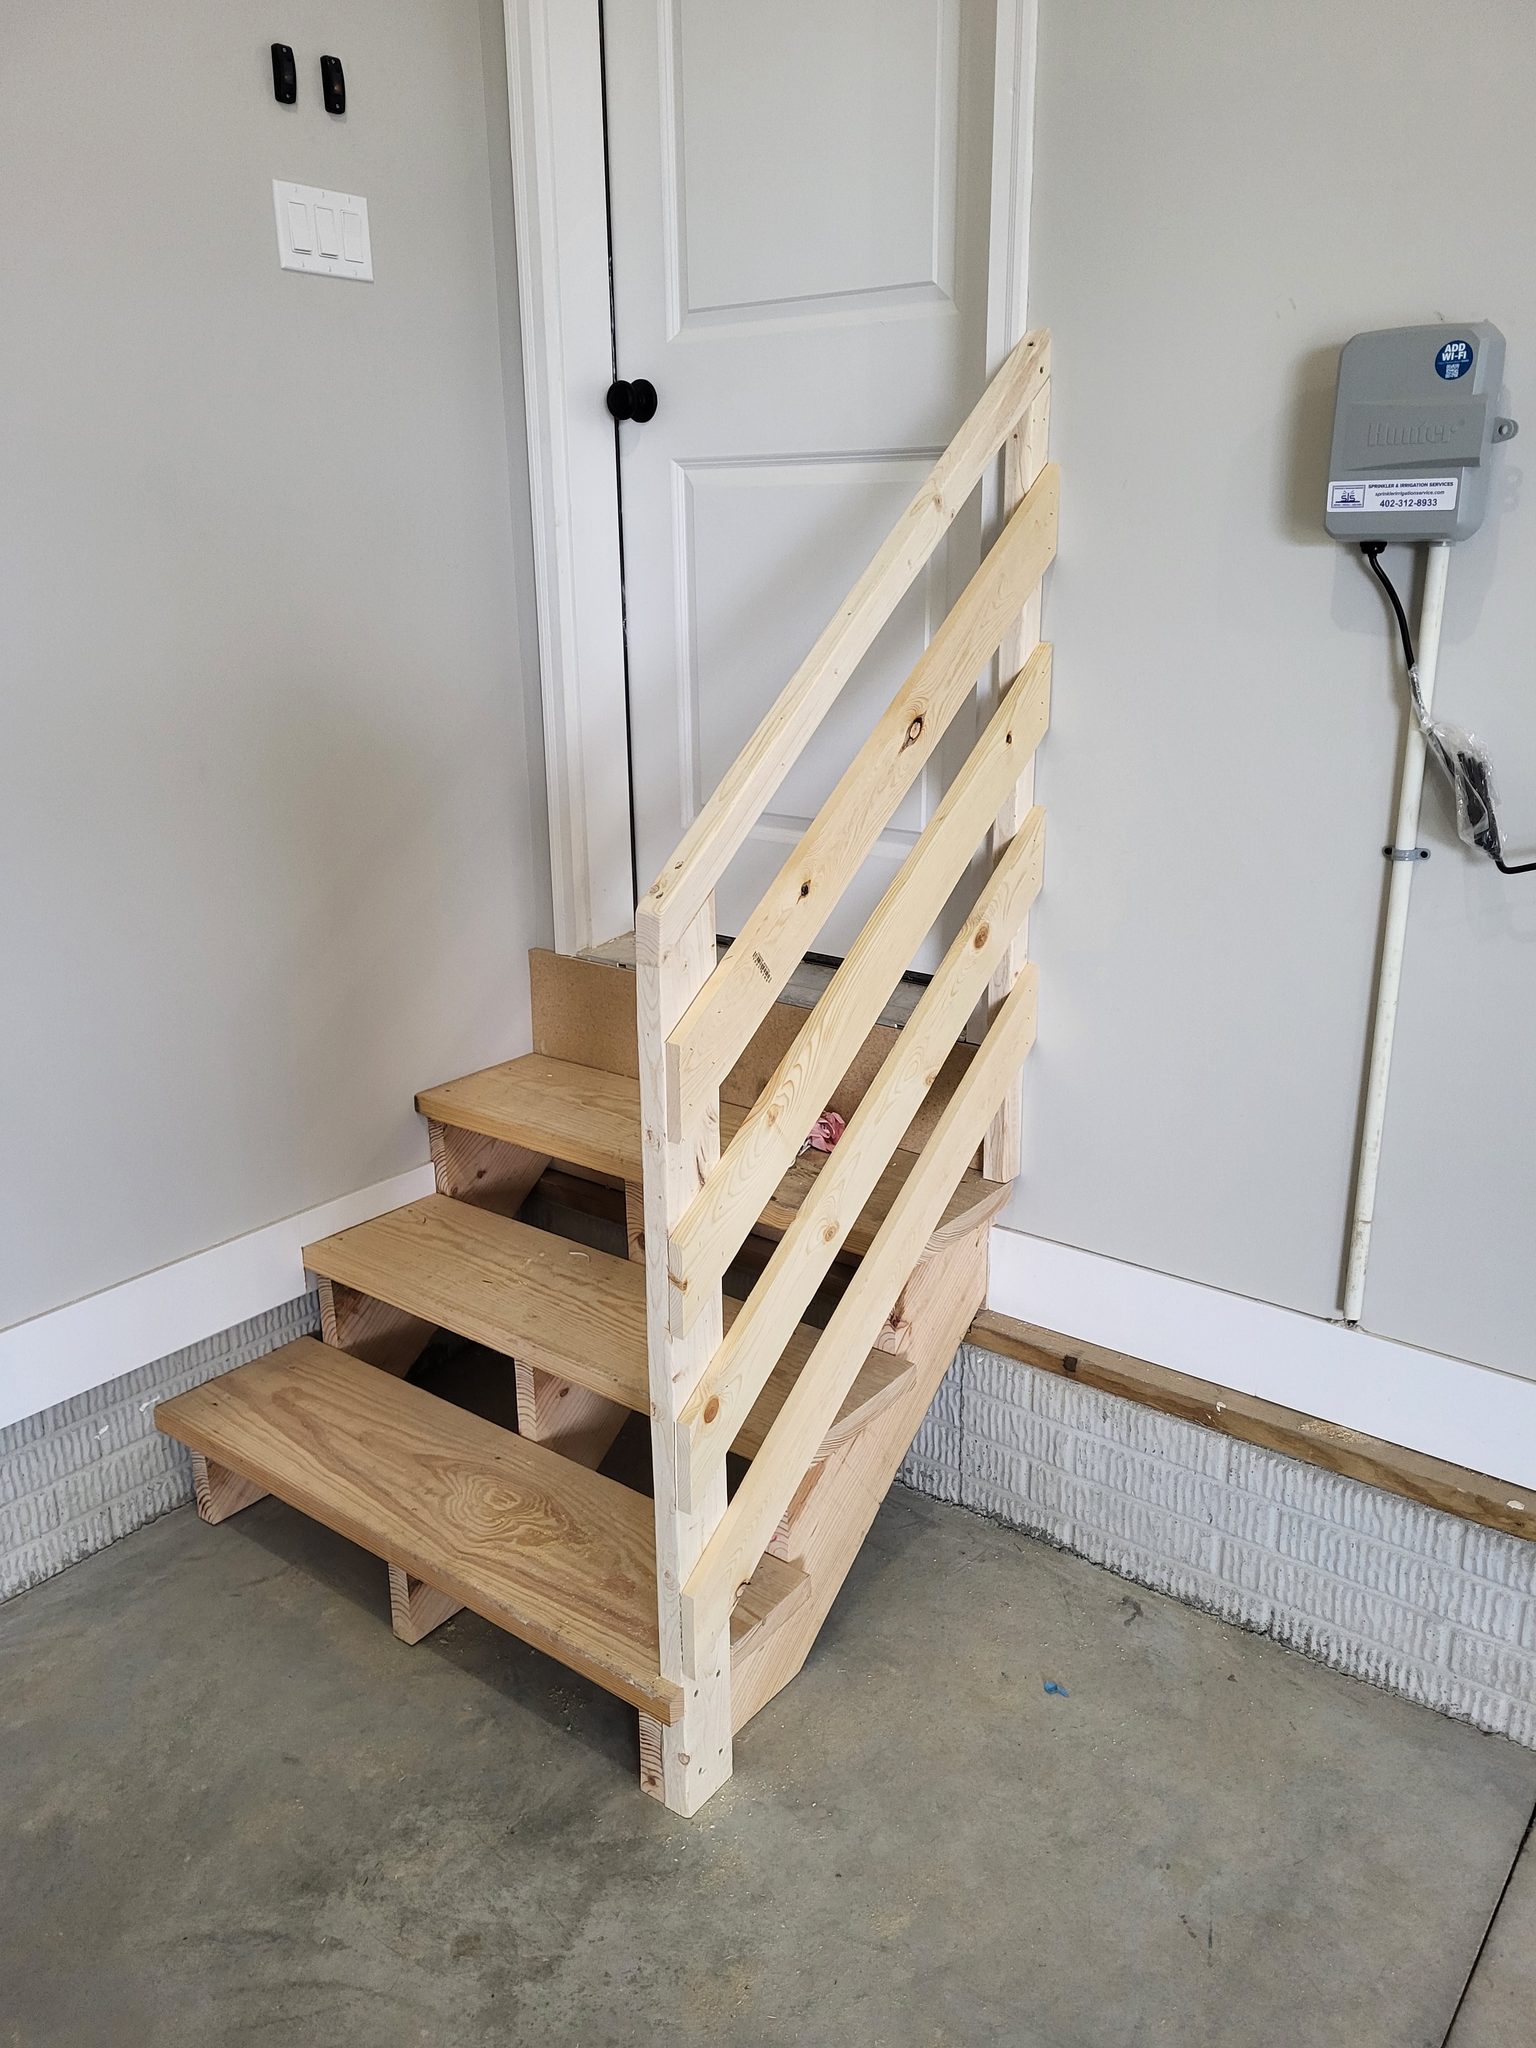
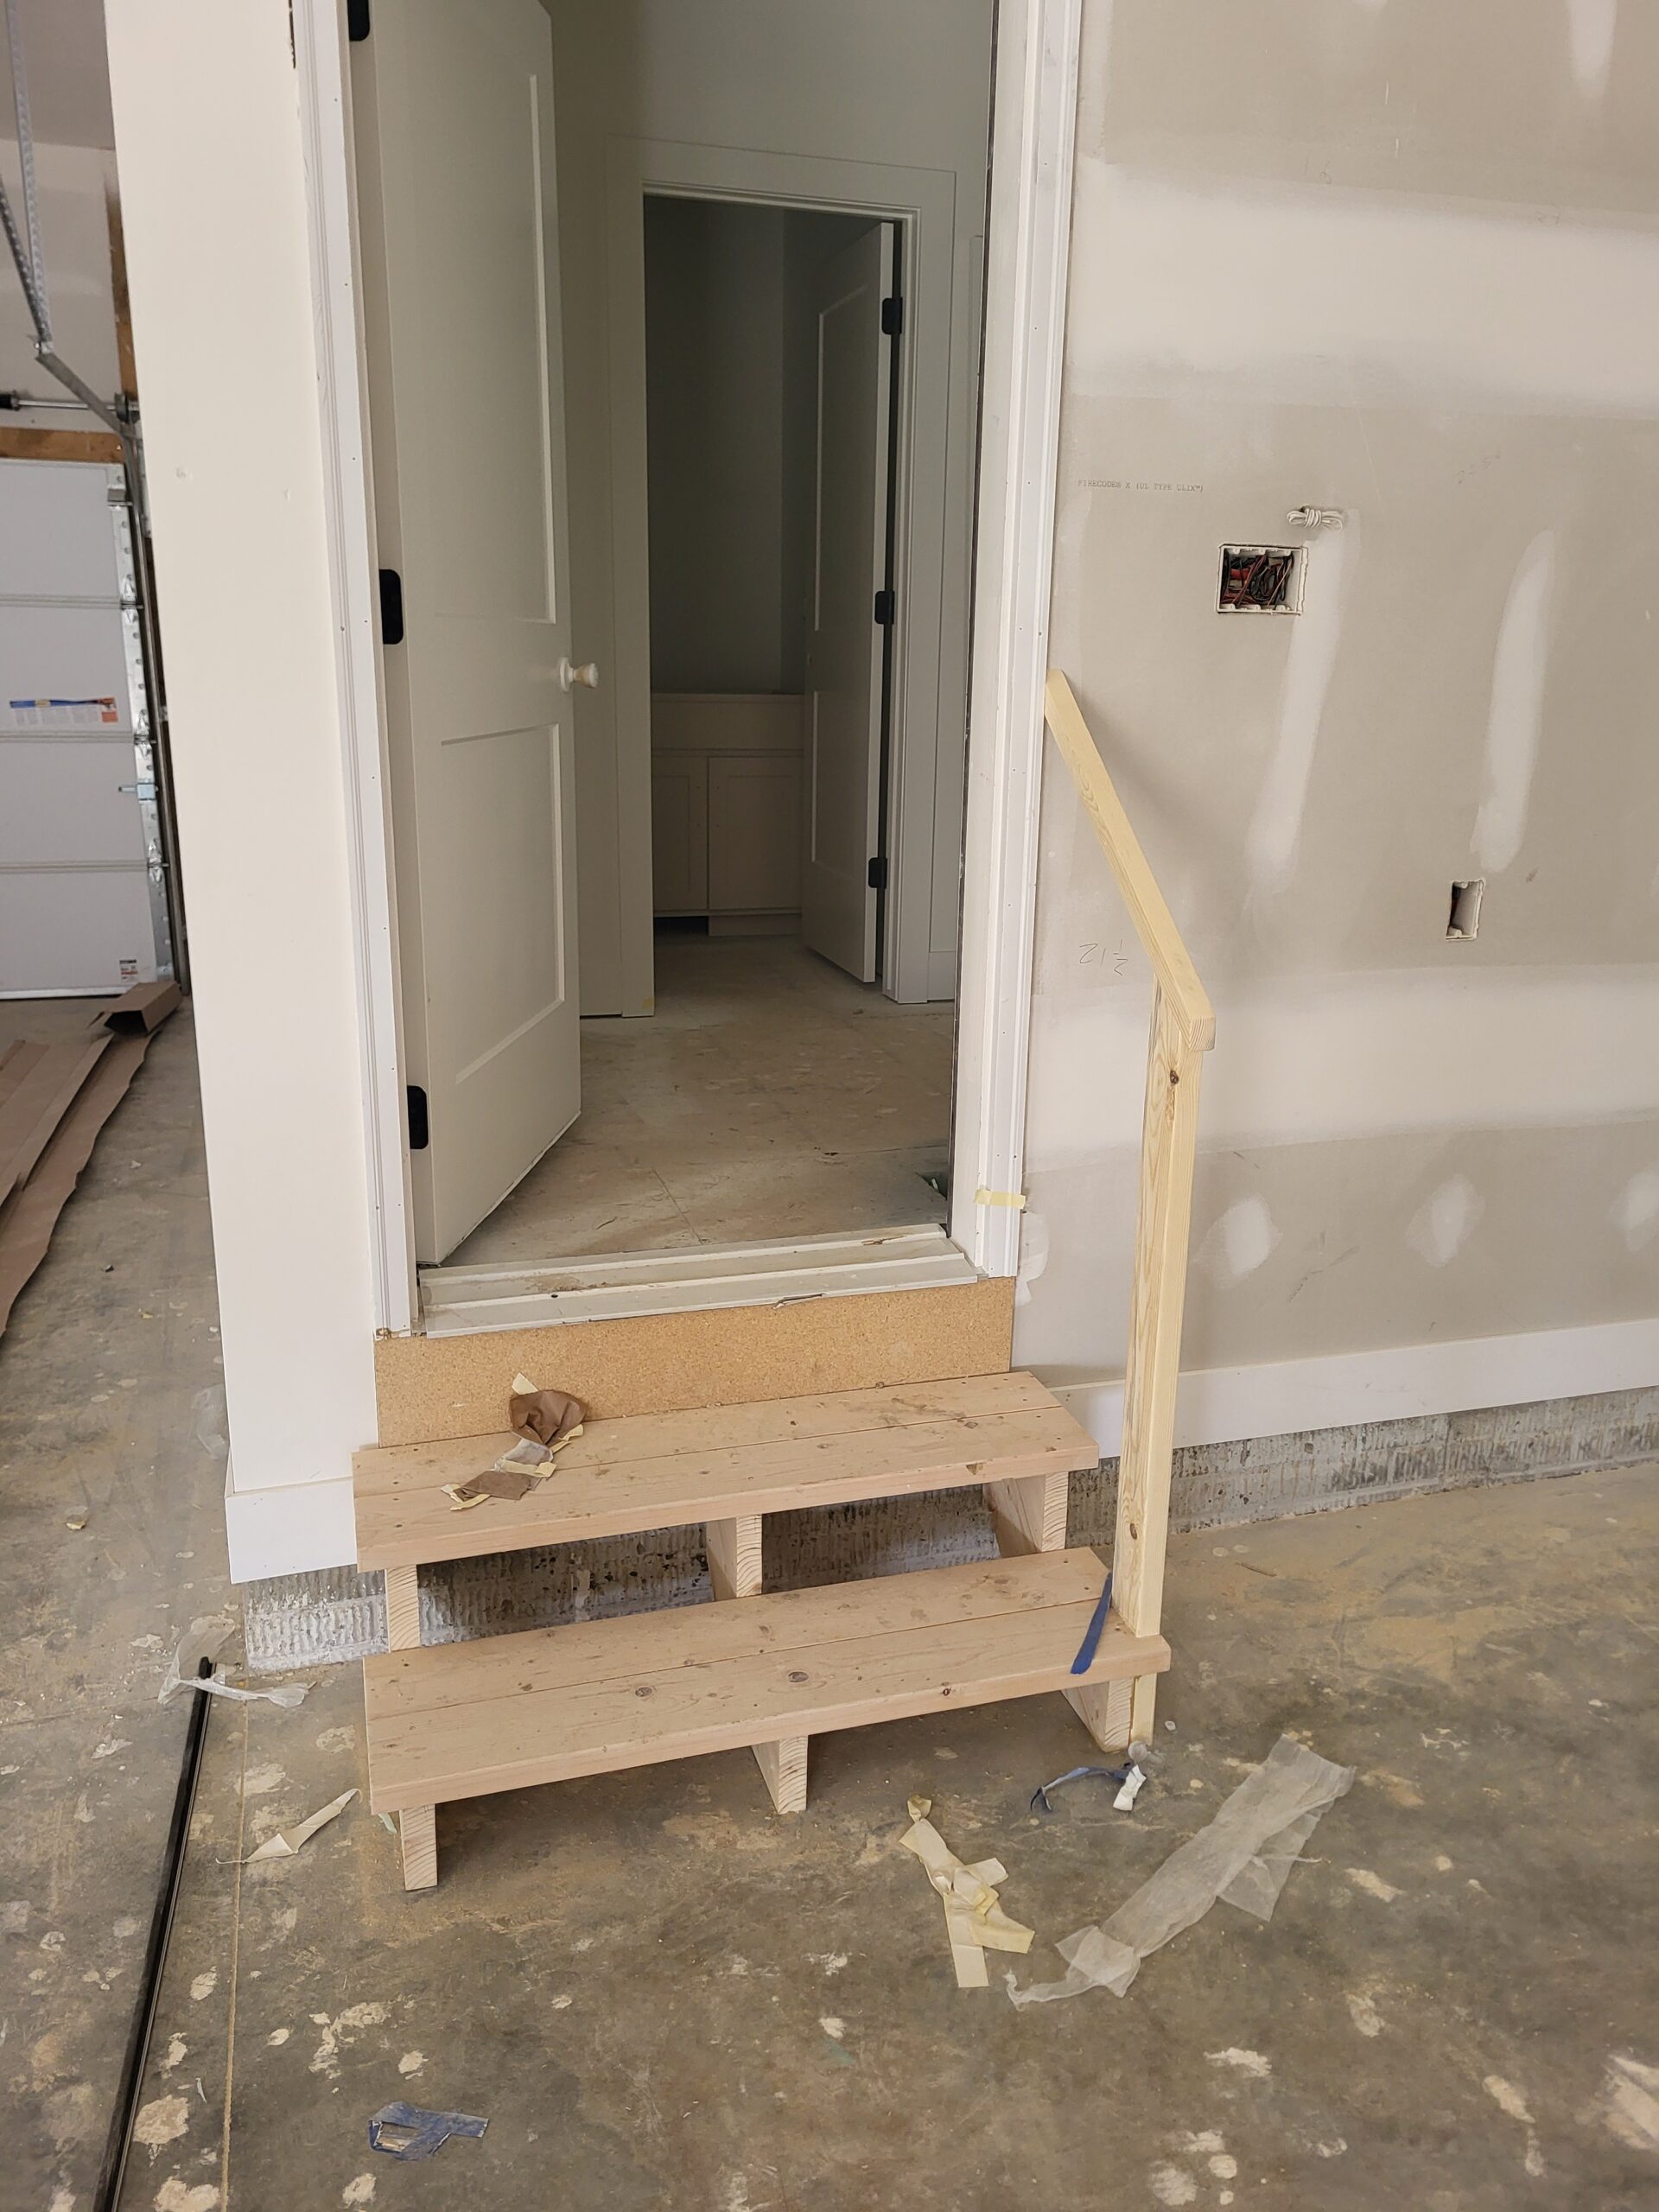
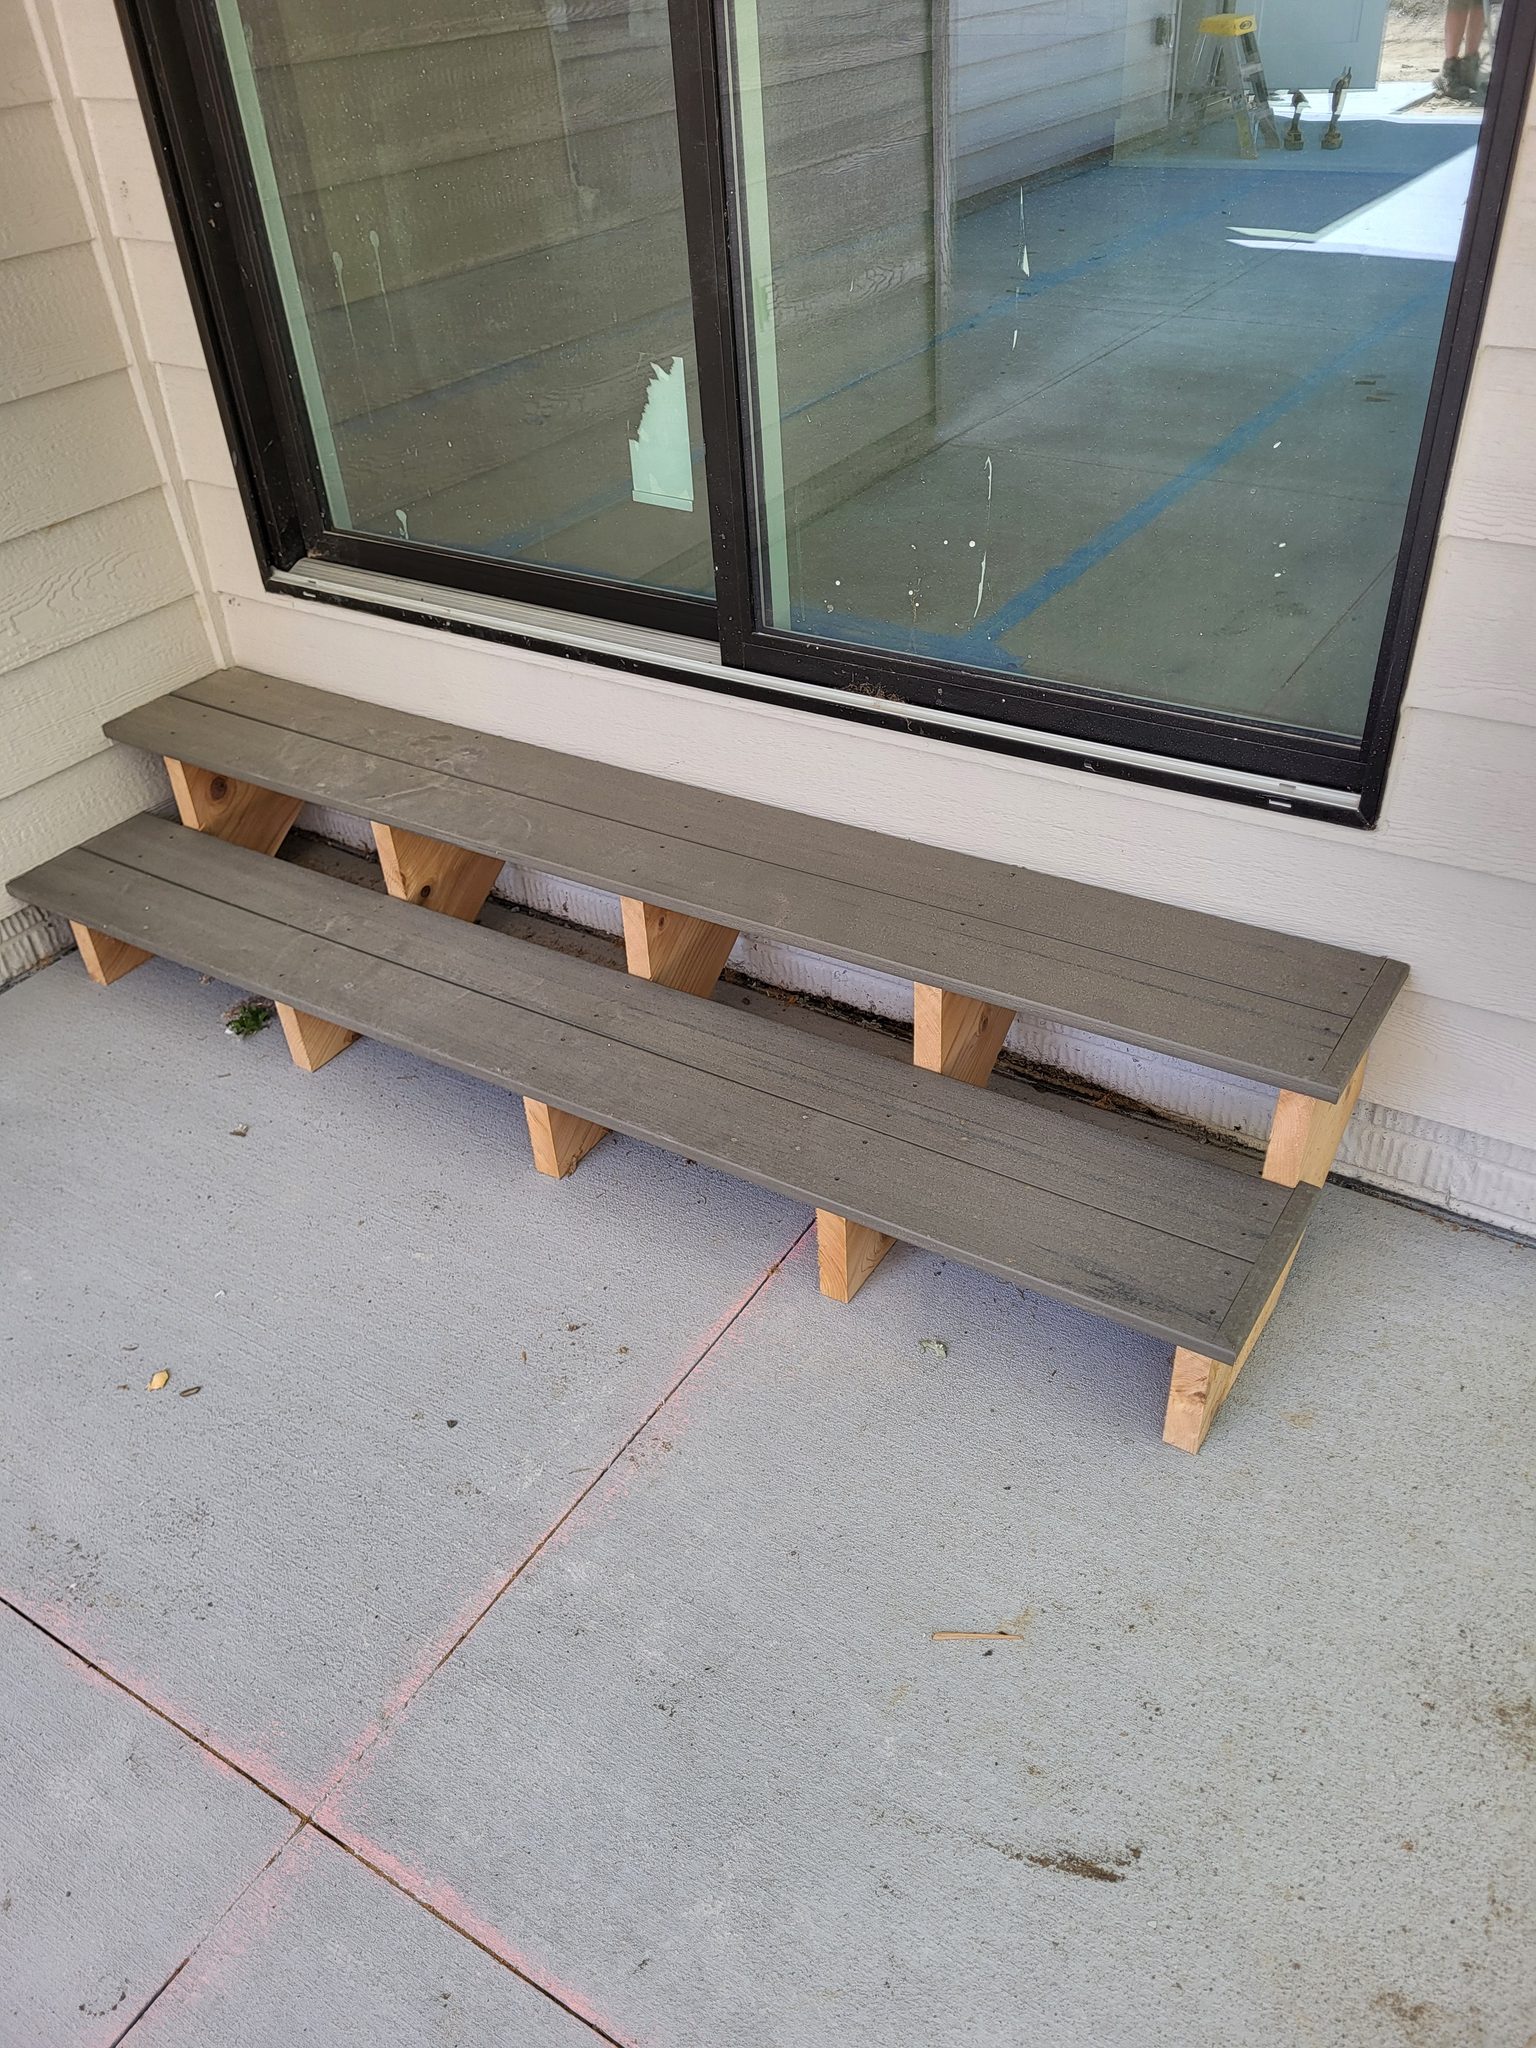
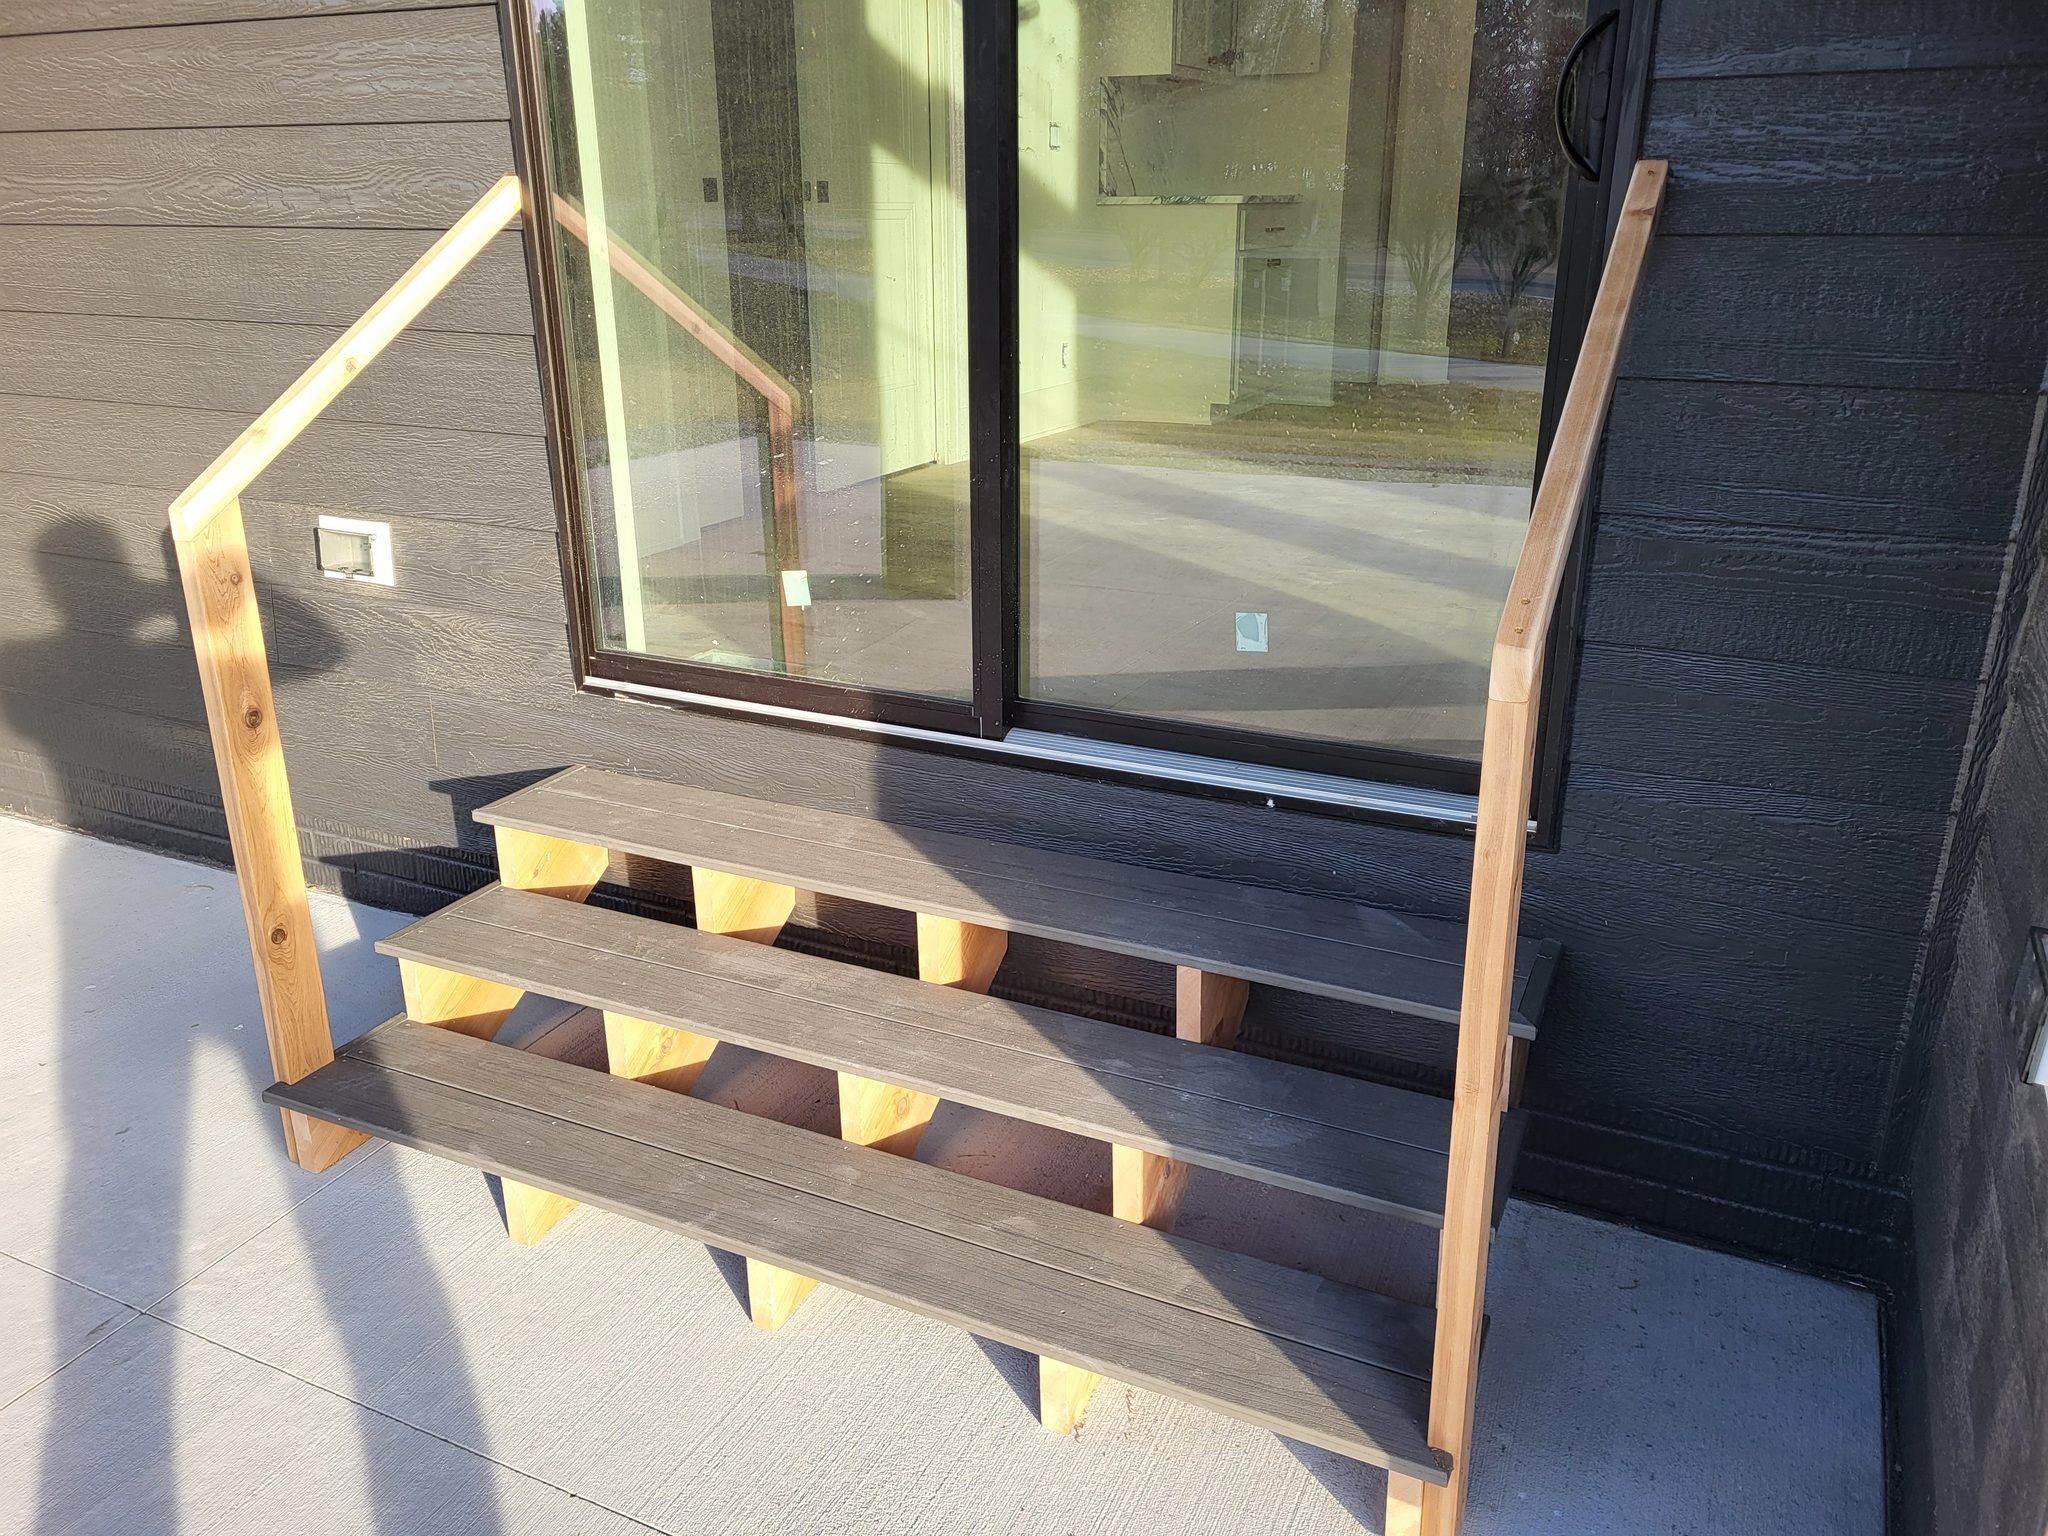
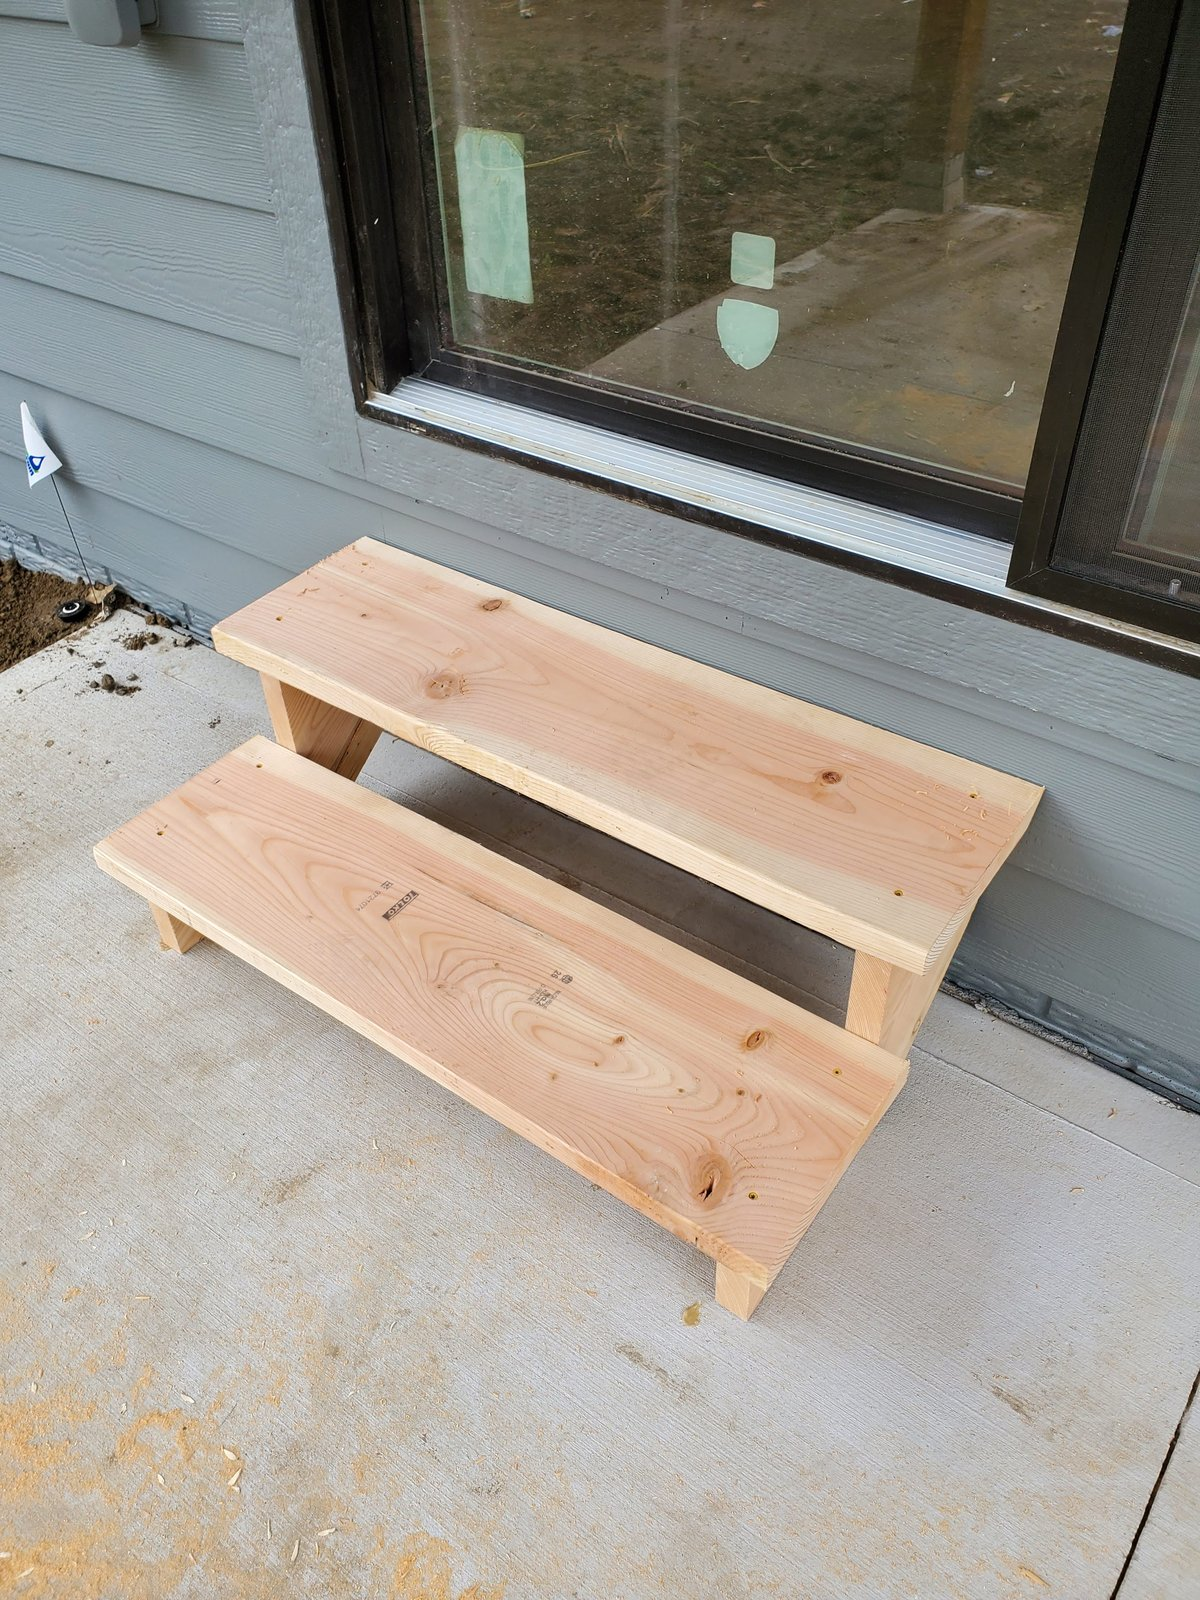
The following photos show examples of this type of work completed in the field. These serve as visual references for quality standards, proper installation techniques, and finished results.
Showing 6 of 6 photos