Skip to content

Let's Build Stuff

  • Home
  • Start Here
  • Glossary
  • Learn
  • Blog
  • About
  • Contact
  • Browse the guides
Let's Build Stuff

How can we help you?

Closets

7
  • Closet and Cabinet Trim Parts
  • How to Install a Wire Shelf in a Closet
  • How to Install Granite Support
  • How to Install a Closet Countertop Shelf
  • How to Build Basic Closet Shelves - Part 1 of 3 (Standards)
  • How to Build Basic Closet Shelves - Part 2 of 3 (Layout Design)
  • How to Build Basic Closet Shelves - Part 3 of 3 (Building)

Doors & Openings

29
  • Door and Window Parts
  • How to Install a Knock-Down Hollow Metal Frame
  • Installing a Weather-Exposed Exterior Door: The Extra Steps
  • How to Install a Pocket Door Frame
  • How to Install Door Blinds
  • How to Resize a Door Opening
  • How to Install a Welded Hollow Metal Frame
  • How to Install a Door Bump
  • How to Install an Exterior Finish Slab
  • How to Install an 8'0" Pocket Door
  • How to Install an 8'0" Solid Core Pre-Hung Interior Door
  • How to Install an 8'0" Hollow Core Pre-Hung Interior Door
  • How to Install a 6'8" Solid Core Pre-Hung Interior Door
  • How to Install a 6'8" Cased Opening
  • How to Finish a Bypass Door Install
  • How to Install 8'0" Bi-Fold or Bypass Door Slabs
  • How to Install 6'8" Bi-Fold or Bypass Door Slabs
  • How to Install an 8'0" Bi-Fold or Bypass Door Frame
  • How to Install a 6'8" Bi-Fold or Bypass Door Frame
  • How to Install an Apartment Entry Slab Door with a Sweep
  • How to Install a Pre-Hung Door
  • How to Install a House-to-Garage Door
  • How to Install a Cased Opening
  • How to Install a Pocket Door for a Perfect Finish
  • How to Install Bifold Doors
  • How to Adjust an Exterior Door
  • How to Install Barn Doors
  • How to Install Bypass Doors
  • How to Install an Interior Center-Opening or French Door

General Carpentry

13
  • Which Material and Profile Goes Where
  • Exterior Trim Materials
  • Framing and Treated Lumber for the Trim Carpenter
  • Lumber Sizing, Grading, and Milling
  • Sheet Goods and Engineered Materials
  • Wood Species Field Guide
  • Choosing Nail Guns and Air Tools for Finish Carpentry
  • How the Guide Library Is Organized
  • Difficulty Levels Explained: What Levels 1, 2, and 3 Mean
  • Carpenter Hand Tools: What to Buy for Your Own Bag
  • Finish Carpentry Cheat Sheets and Printable References
  • How to Set a Barn Door Floor Guide
  • How to Trim a House, Start to Finish

Hardware

10
  • How to Install a Peep Sight
  • How to Install Privacy Pocket Door Hardware
  • How to Install Cabinet Hardware
  • How to Install a Window Blind in an Apartment
  • How to Install a Shower Rod in an Apartment Unit
  • How to Install Self-Closing Hinges
  • How to Install a Coat Hook
  • How to Install Address Numbers Total
  • How to Install Bath Accessories
  • How to Install a Lockset on a Door

Miscellaneous

2
  • How to Install Stock Trim Material
  • How to Install a Fire Extinguisher Cabinet

Moldings

28
  • Wall Treatments and Fireplace Trim Vocabulary
  • Trim Profiles: Casing, Base, and the Molding Families
  • How to Case Ganged Windows
  • How to Install Baby Shoe at Stair Nosing
  • How to Build a Custom Decorative Header
  • How to Install Crown Molding
  • How to Install an Interior Window Sill or Stool
  • How to Install a Transom Window Above a Door
  • Install Pre-Cut Shoe Molding, Nail Down
  • Make a Plinth Block
  • Install a Plinth Block at the Base of Casing
  • How to Install a Mullion Strip
  • Interior Window Frame for Tall Openings (120″ and Above)
  • Interior Window Frame for Medium-Tall Openings (90″ to 119″)
  • How to Install an Interior Window Frame
  • Window Jamb Extension for Tall Windows (120″ and Above)
  • Window Jamb Extension for Medium-Tall Windows (90″ to 119″)
  • How to Install a Window Jamb Extension Like a Pro
  • How to Case Tall Windows (10 Feet and Above)
  • Window Casing for Medium-Tall Windows (90″ to 119″)
  • How to Case One Side of an 8'0" Door
  • How to Case One Side of a 6'8" Door
  • How to Build an Attic Access Cover
  • How to Install Baseboard
  • How to Case One Side of an Exterior Door
  • How to Install Base Shoe
  • How to Case a Window
  • How to Install a Door Jamb Extension

Specialty

21
  • How to Install Vertical Shiplap
  • How to Install Herringbone Shiplap
  • How to Install Diagonal Shiplap
  • How to Install Chevron Shiplap
  • How to Hang a Mantel
  • How to Install LVP Flooring
  • How to Build a Floating Shelf
  • How to Install Decorative Wall Treatments
  • How to Install Ceiling Beams
  • How to Install a Butcher Block Countertop
  • How to Install a Mirror
  • How to Install Cabinets
  • How to Install Shiplap on a 3-Sided Fireplace Under 10'
  • How to Install Shiplap, 0' to 7'
  • How to Install Shiplap on a Ceiling
  • How to Install Shiplap 3 side fireplace wrap above 15'
  • How to Install Shiplap 3 side fireplace wrap 10'-15'
  • How to Install Shiplap on Walls Over 14 Feet Wide
  • How to Install Shiplap on a Wall 7 to 14 Feet Wide
  • How to Install a Locker Bench with Hooks
  • How to Install a Locker Bench with Cubbies

Stairs/Handrails

21
  • Stair Parts and Railing Vocabulary
  • How to Install Horizontal Bar Railing
  • How to Build a Handrail for Metal Balusters Like a Pro
  • How to Install a Wood Wall Cap
  • How to Install Wood Nosing
  • How to Install a False Tread Stair End Cap
  • How to Install Notched Skirt Boards
  • How to Install a Handrail Fitting
  • How to Install a Handrail Bracket
  • How to Install a Garage Step Handrail
  • How to Build Garage Steps with Closed Risers
  • How to Build Garage Steps with 3 Stringers (Open Risers)
  • How to Install a Straight Stair Riser
  • How to Install a Mitered Stair Riser
  • How to Secure and Finish a Stair Baluster
  • How to Install Stair Skirt Boards: Drop-In Method
  • How to Build a Wall-Mount Handrail
  • How to Mount a Handrail to the Wall
  • How to Install a Newel Post
  • How to Build Garage Steps with a Landing
  • How to Build Garage Steps: Safe, Code-Compliant Stairs
  • Home
  • Learn
  • Specialty
  • How to Install Decorative Wall Treatments
View Categories

How to Install Decorative Wall Treatments

0:00 / 10:38
  • View as Markdown Open this page as plain Markdown (opens in a new tab)
  • Open in ChatGPT Ask questions about this page (opens in a new tab)
  • Open in Claude Ask questions about this page (opens in a new tab)
  • Open in Google AI Studio Ask questions about this page (Google account required) (opens in a new tab)
On this page
IntroductionBefore You BeginPrerequisitesWhat You Need To KnowTools RequiredPower ToolsHand ToolsSuppliesMaterialsHow to Install Decorative Wall Treatments Step by StepStep 1: Confirm the Style and Lay Out the WallStep 2: Dry-Lay the PatternStep 3: Cut the Field Boards or BattensStep 4: Fasten the Field BoardsStep 5: Install the Cap or RailStep 6: Finish the Corners and EndsClose-OutQuality CheckTroubleshootingGap drifts wider or narrower across the wallA board falls between studs at the end of a runWall is not flat behind the treatmentRelated Guides

Specialty Skill Level: Intermediate (Level 2) · Estimated Time: Varies by Treatment and Wall Size

Introduction #

Decorative wall treatment covers the trim work that goes beyond baseboard, casing, and crown to turn a plain wall into a feature: shiplap, wainscot and board-and-batten, and chair rail on an accent wall. Each of these has its own look and its own layout, but they share the same prep, the same fastening logic, and the same standard for a clean, consistent result. This guide covers that shared ground. For the exact cut list and step-by-step on a specific treatment, see the dedicated task guide, starting with the shiplap family linked below.

Decorative wall treatment is specialty trim, the same broad category the trim and moulding guide at This Old House lays out. Per the overview in How to Trim a House, specialty items like this are planned and built separately from the rest of the trim phase, and often happen before the rest of the trim on a room, since the wall needs to be finished before baseboard or casing dies into it.

Before You Begin #

Prerequisites #

  • Drywall is complete and primed on the wall you are treating
  • Flooring is installed, or its finished height is accounted for in your layout
  • Electrical and plumbing rough-ins on this wall are complete
  • You know the exact treatment style called for on the plans or from the customer: board width, reveal or gap, cap detail, and how far up the wall it runs
  • You know whether the customer supplied a plywood or OSB backer on this wall, or whether you are working straight over drywall
  • Outlets, switches, and any wall-mounted fixtures on the wall are identified before you lay out board lines

What You Need To Know #

  • Let boards or panels acclimate to the room for at least 48 hours before you install them; wood that goes up too soon can warp or open a gap later as it adjusts
  • We plan every job for drywall. The default method is glue plus face-nail into studs where you can hit them. We never install a plywood backer or furring strips ourselves; that is not our step, even when a job would benefit from one
  • If the customer supplied OSB or plywood backer on the wall, that is a bonus, not a requirement, and it changes your fastening: fasten straight to it and skip the glue
  • Find and mark your studs before you cut a single board. A 6-foot level or a laser makes fast, straight layout lines for stud marks and top-of-treatment lines
  • Check plumb as you go, not just level. A plumb bob or a level held vertically catches a wall that leans out of true top to bottom, which a horizontal layout line alone will not catch
  • Keep your gap or reveal consistent for the whole run. On lapped board treatments like shiplap, a nickel makes a reliable 1/8" spacer between courses; use the same spacer for every board so the gap does not drift
  • Glue every miter and every wood-to-wood joint, and never cross-nail a miter. A tight glued joint holds better than a nail driven through the corner
  • Dry-lay your pattern before you nail anything permanent. For a batten or wainscot layout, lay the vertical strips out on the floor or hold them to the wall first, and adjust spacing before you commit

Tools Required #

Power Tools #

  • Miter saw: for cutting boards, battens, and cap pieces to length
  • Table saw: for ripping boards or battens to width when the profile is not sold pre-milled to size
  • 15-gauge finish nailer: for the main field boards, into studs
  • 18-gauge brad nailer: for cap pieces, mitered corners, and delicate trim
  • Compressor, plus a charged battery backup for the nailers

Hand Tools #

  • Stud finder: to mark every stud on the wall before you start
  • 6-foot level or laser level: for straight, level layout lines across the wall
  • Plumb bob: checks vertical alignment on tall panels, battens, and full-height runs
  • Chalk line: for snapping long horizontal or vertical layout lines
  • Tape measure: for board spacing and overall wall dimensions
  • A nickel or a 1/8" spacer block: to hold a consistent gap between lapped boards

Supplies #

  • Wood glue: for every miter and wood-to-wood joint
  • Wood filler or putty: for gluing, puttying, and sanding wood-to-wood joints and seams between panels flush; never used to fill nail holes, that is painter scope
  • 15-gauge finish nails and 18-gauge brads, sized to the thickness of the boards and cap you are installing
  • Construction adhesive: only where the customer has supplied a backer to glue to; on bare drywall runs, rely on studs and glued joints instead

Materials #

  • Shiplap, board-and-batten stock, or wainscot components per the plans, in finger-joint primed, poplar, or MDF for paint grade, or a matching solid species for stain grade
  • Cap rail or chair rail stock, if the treatment calls for a top cap
  • Corner blocks, if the design uses them at outside corners

How to Install Decorative Wall Treatments Step by Step #

Step 1: Confirm the Style and Lay Out the Wall #

Confirm the exact treatment with the customer or the plans before you cut anything: board width, gap or reveal, how far up the wall it runs, and any cap detail. Measure the wall and mark your stud locations with the stud finder and a level line. If the layout is symmetrical (centered battens, for example), work out your spacing from the center of the wall out, not from one edge in, so you do not end up with an odd-width piece in the middle of the wall.

Step 2: Dry-Lay the Pattern #

Before you commit to a single permanent fastener, dry-lay the boards or battens against the wall, or lay them out on the floor at their planned spacing. Check the gap or spacing reads consistent end to end, and check that the pattern lands the way the plans call for at both ends of the wall. This is the point to catch a spacing problem, not after half the wall is nailed up.

Step 3: Cut the Field Boards or Battens #

Cut your longest, most visible pieces first from the straightest stock. Batch identical lengths together using a stop block on the miter saw so every piece comes out the same, the same batching principle you would use cutting baseboard or casing for a whole house. Where the stock runs long enough, plan your cuts to use full-length boards rather than piecing shorter ones together; fewer seams reads cleaner and gives you less spacing math to keep consistent across the wall.

Step 4: Fasten the Field Boards #

Fasten each board or batten into the studs you marked in Step 1. On bare drywall, glue the board and face-nail it into every stud it crosses; skip the glue only where the customer supplied a plywood or OSB backer and you are fastening straight to that. Hold your 1/8 inch spacer block at each stud line to keep the gap consistent as you work across the wall. A nickel is about 5/64 inch, so do not swap one in for the block.

Step 5: Install the Cap or Rail #

If the design includes a cap rail or chair rail on top, miter the outside corners and glue every joint. Where the cap meets a wall or a casing, cut it square and butt it in tight. Nail the cap into the top plate or into studs where you can reach them, and pin it to the top of the field boards where you cannot.

Step 6: Finish the Corners and Ends #

Outside corners get a mitered joint, glued and pinned tight, on both the field boards and the cap. Where the treatment ends against a door casing, window casing, or adjoining wall, cut the last piece square and butt it in tight rather than leaving a gap for the painter to deal with.

Close-Out #

Sweep up all cutoffs, sawdust, and packaging from the wall and the floor in front of it; do not shop vac it. Set any proud brads below the surface with a nail set before you leave the room. Stage leftover material with the rest of the trim stock in case another wall on the job uses the same treatment.

Quality Check #

  • Gap or reveal is consistent across the entire wall, top to bottom and end to end
  • Every board and batten is secured into a stud or, where the customer supplied a backer, fastened straight to it
  • No plywood backer or furring strips were installed as one of our own steps
  • Outside corner miters are tight, glued, and pinned
  • Cap or rail sits flush and level along its whole run
  • Wood-to-wood joints are glued, puttied, and sanded flush where needed
  • No cross-nailed miters anywhere on the wall
  • Area is swept clean, cutoffs removed

Troubleshooting #

Gap drifts wider or narrower across the wall #

This almost always means the spacer was not held the same way on every board. Stop, re-check your last few boards with the spacer, and reset from a point where the gap still reads correct rather than trying to average the error out over the rest of the wall.

A board falls between studs at the end of a run #

If the customer did not supply a backer, do not add one yourself; that is not our step. Glue the board well at that point and rely on the field nailing on either side to hold the end tight while the glue sets.

Wall is not flat behind the treatment #

A wall that is slightly out of flat will telegraph through a board treatment more than it would under baseboard. Flag any wall with a noticeable bow or hump for the customer or GC before you install over it; this is outside our scope to correct.

Related Guides #

  • How to Install Shiplap, 0' to 7'
  • How to Install Shiplap 2, 7' to 14'
  • How to Install a Mullion Strip
  • How to Trim a House, Start to Finish
  • How to Install Chevron Shiplap
  • How to Install Herringbone Shiplap
  • How to Install Crown Molding
  • How to Build a Custom Decorative Header
  • Wall Treatments and Fireplace Trim Vocabulary

Reference Photos #

The following photos show examples of this type of work completed in the field. These serve as visual references for quality standards, proper installation techniques, and finished results.

Showing 12 of 12 photos
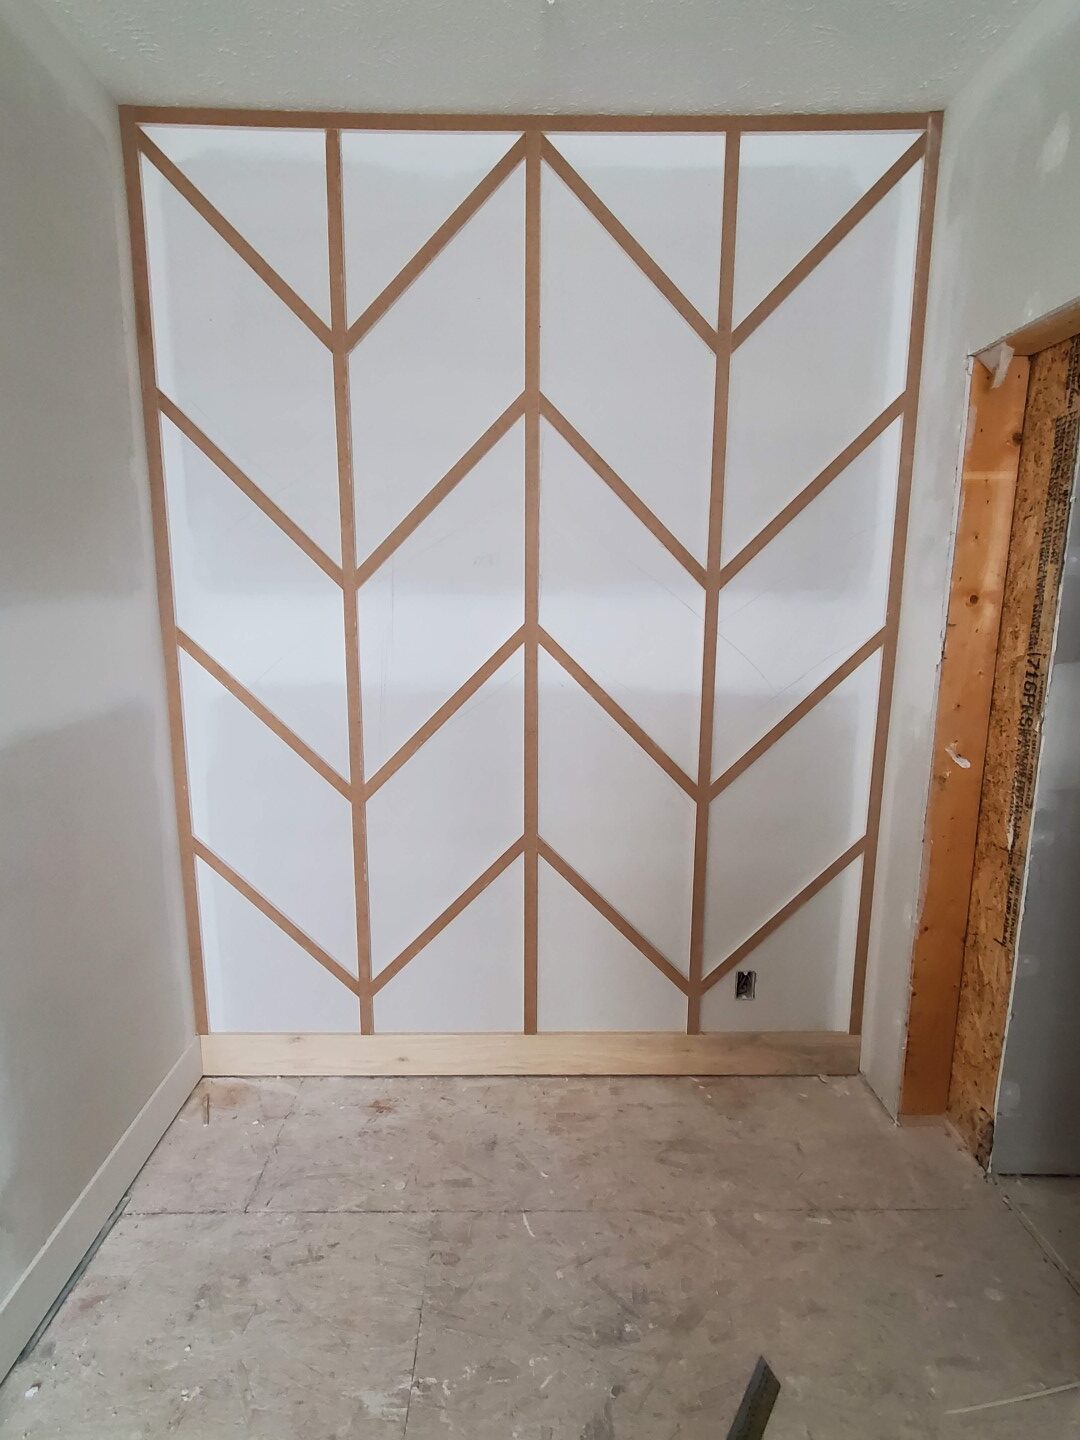
Chevron pattern accent wall with raw wood strips over drywall, unfinished and ready for paint
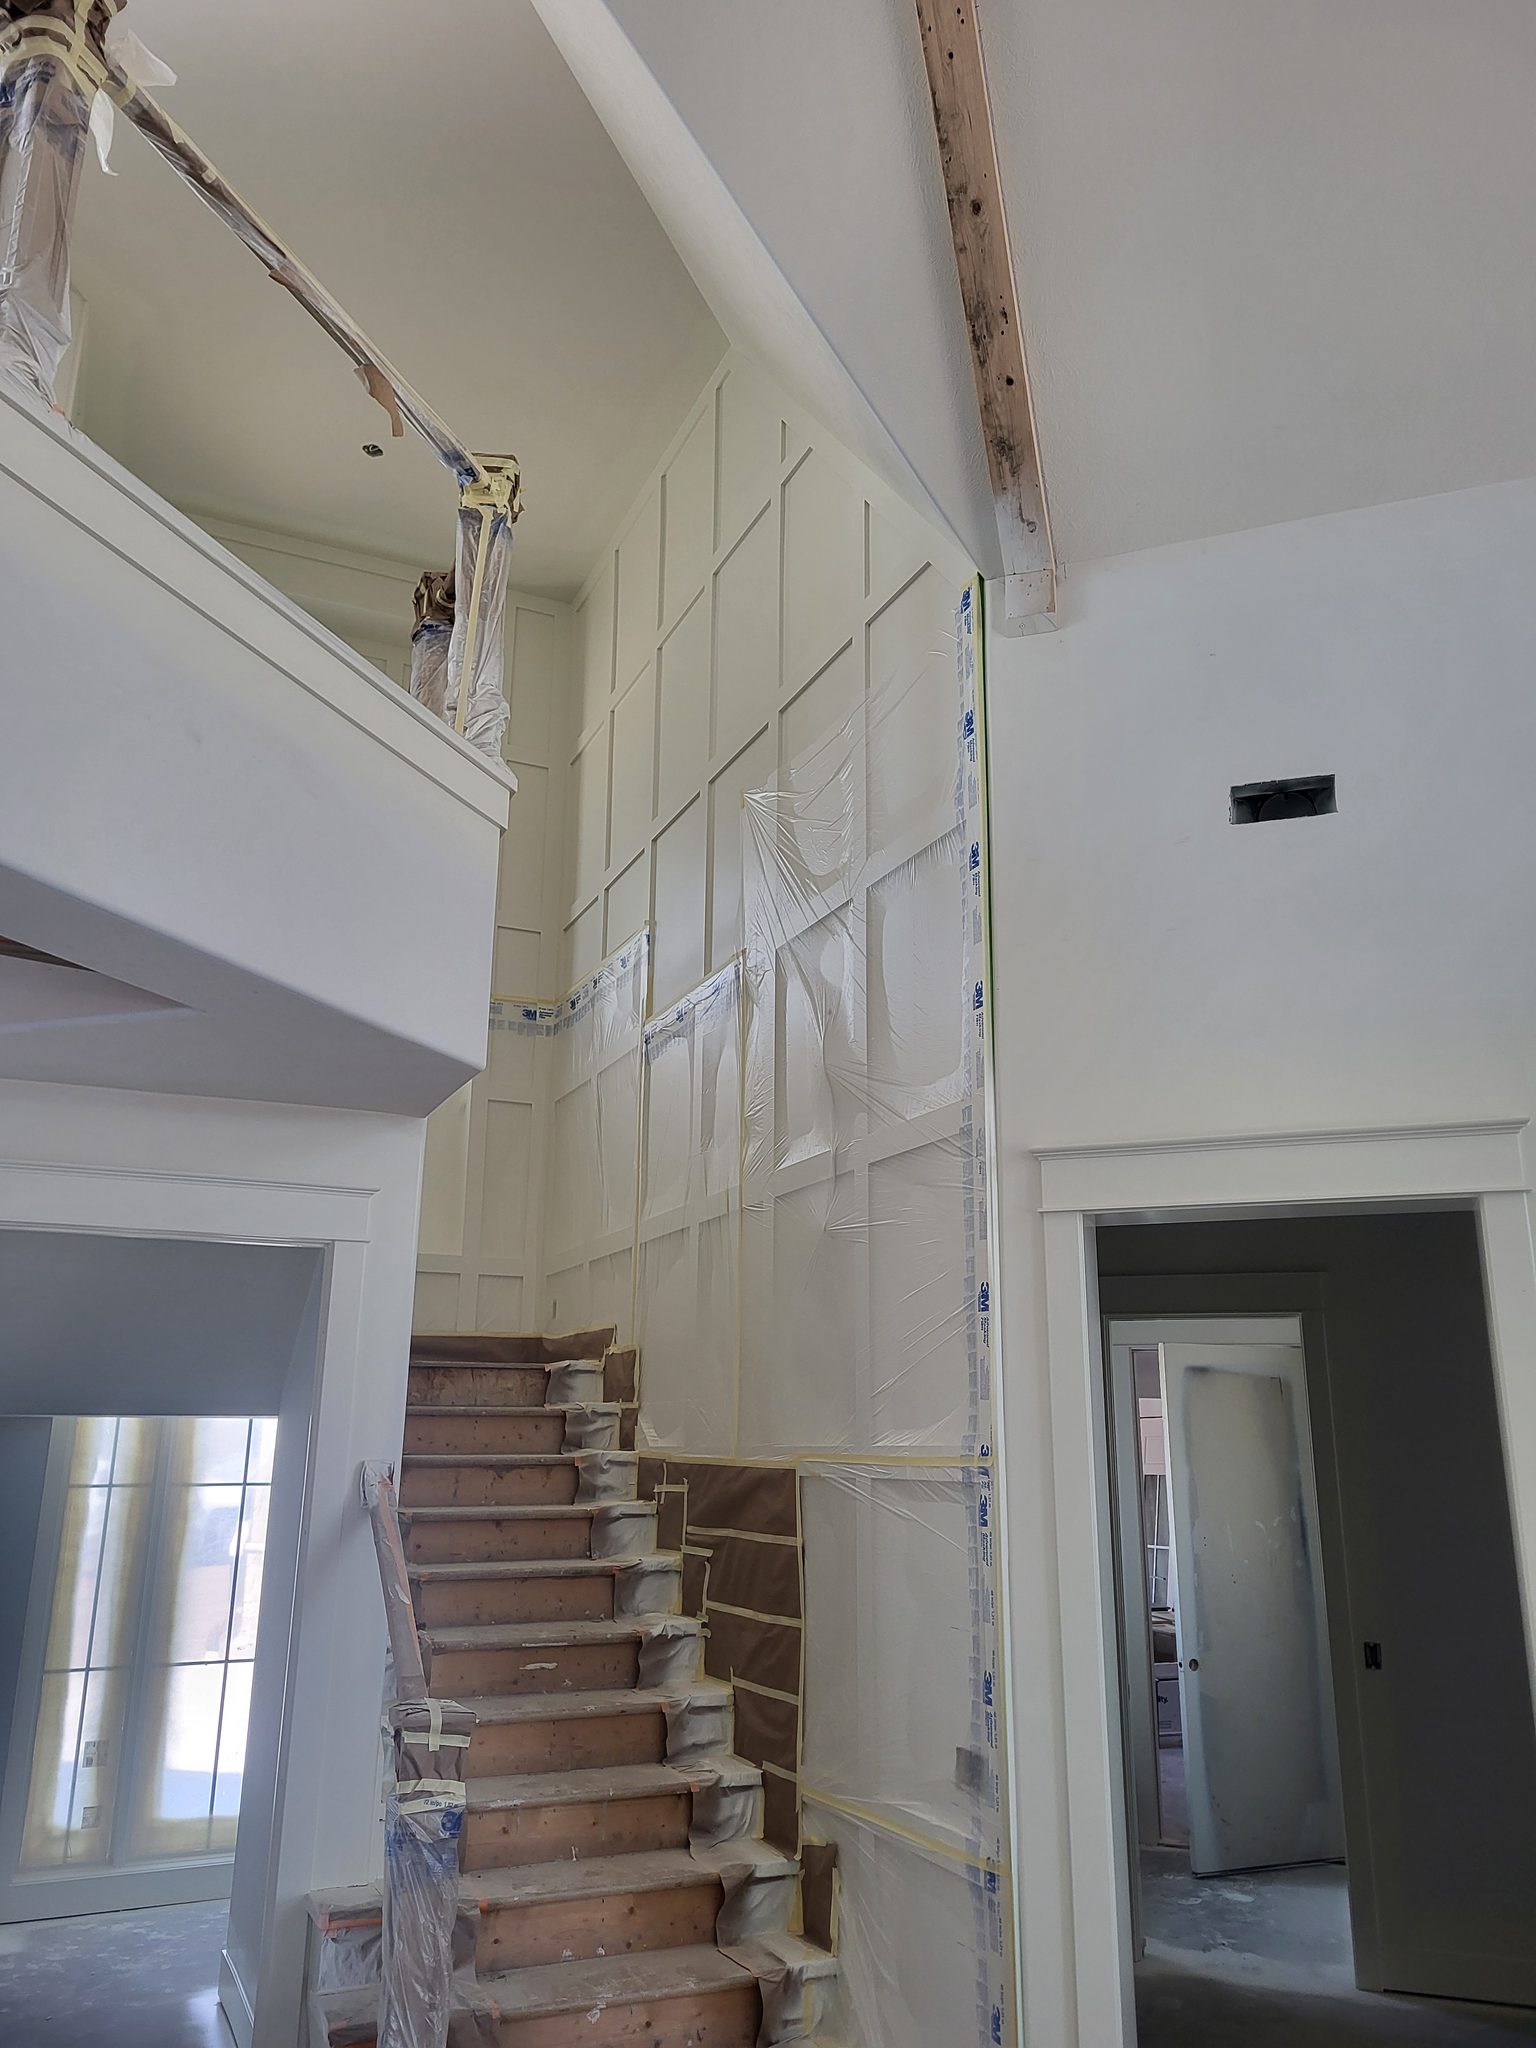
Paneled wall with plastic sheeting taped for protection, staircase visible below.
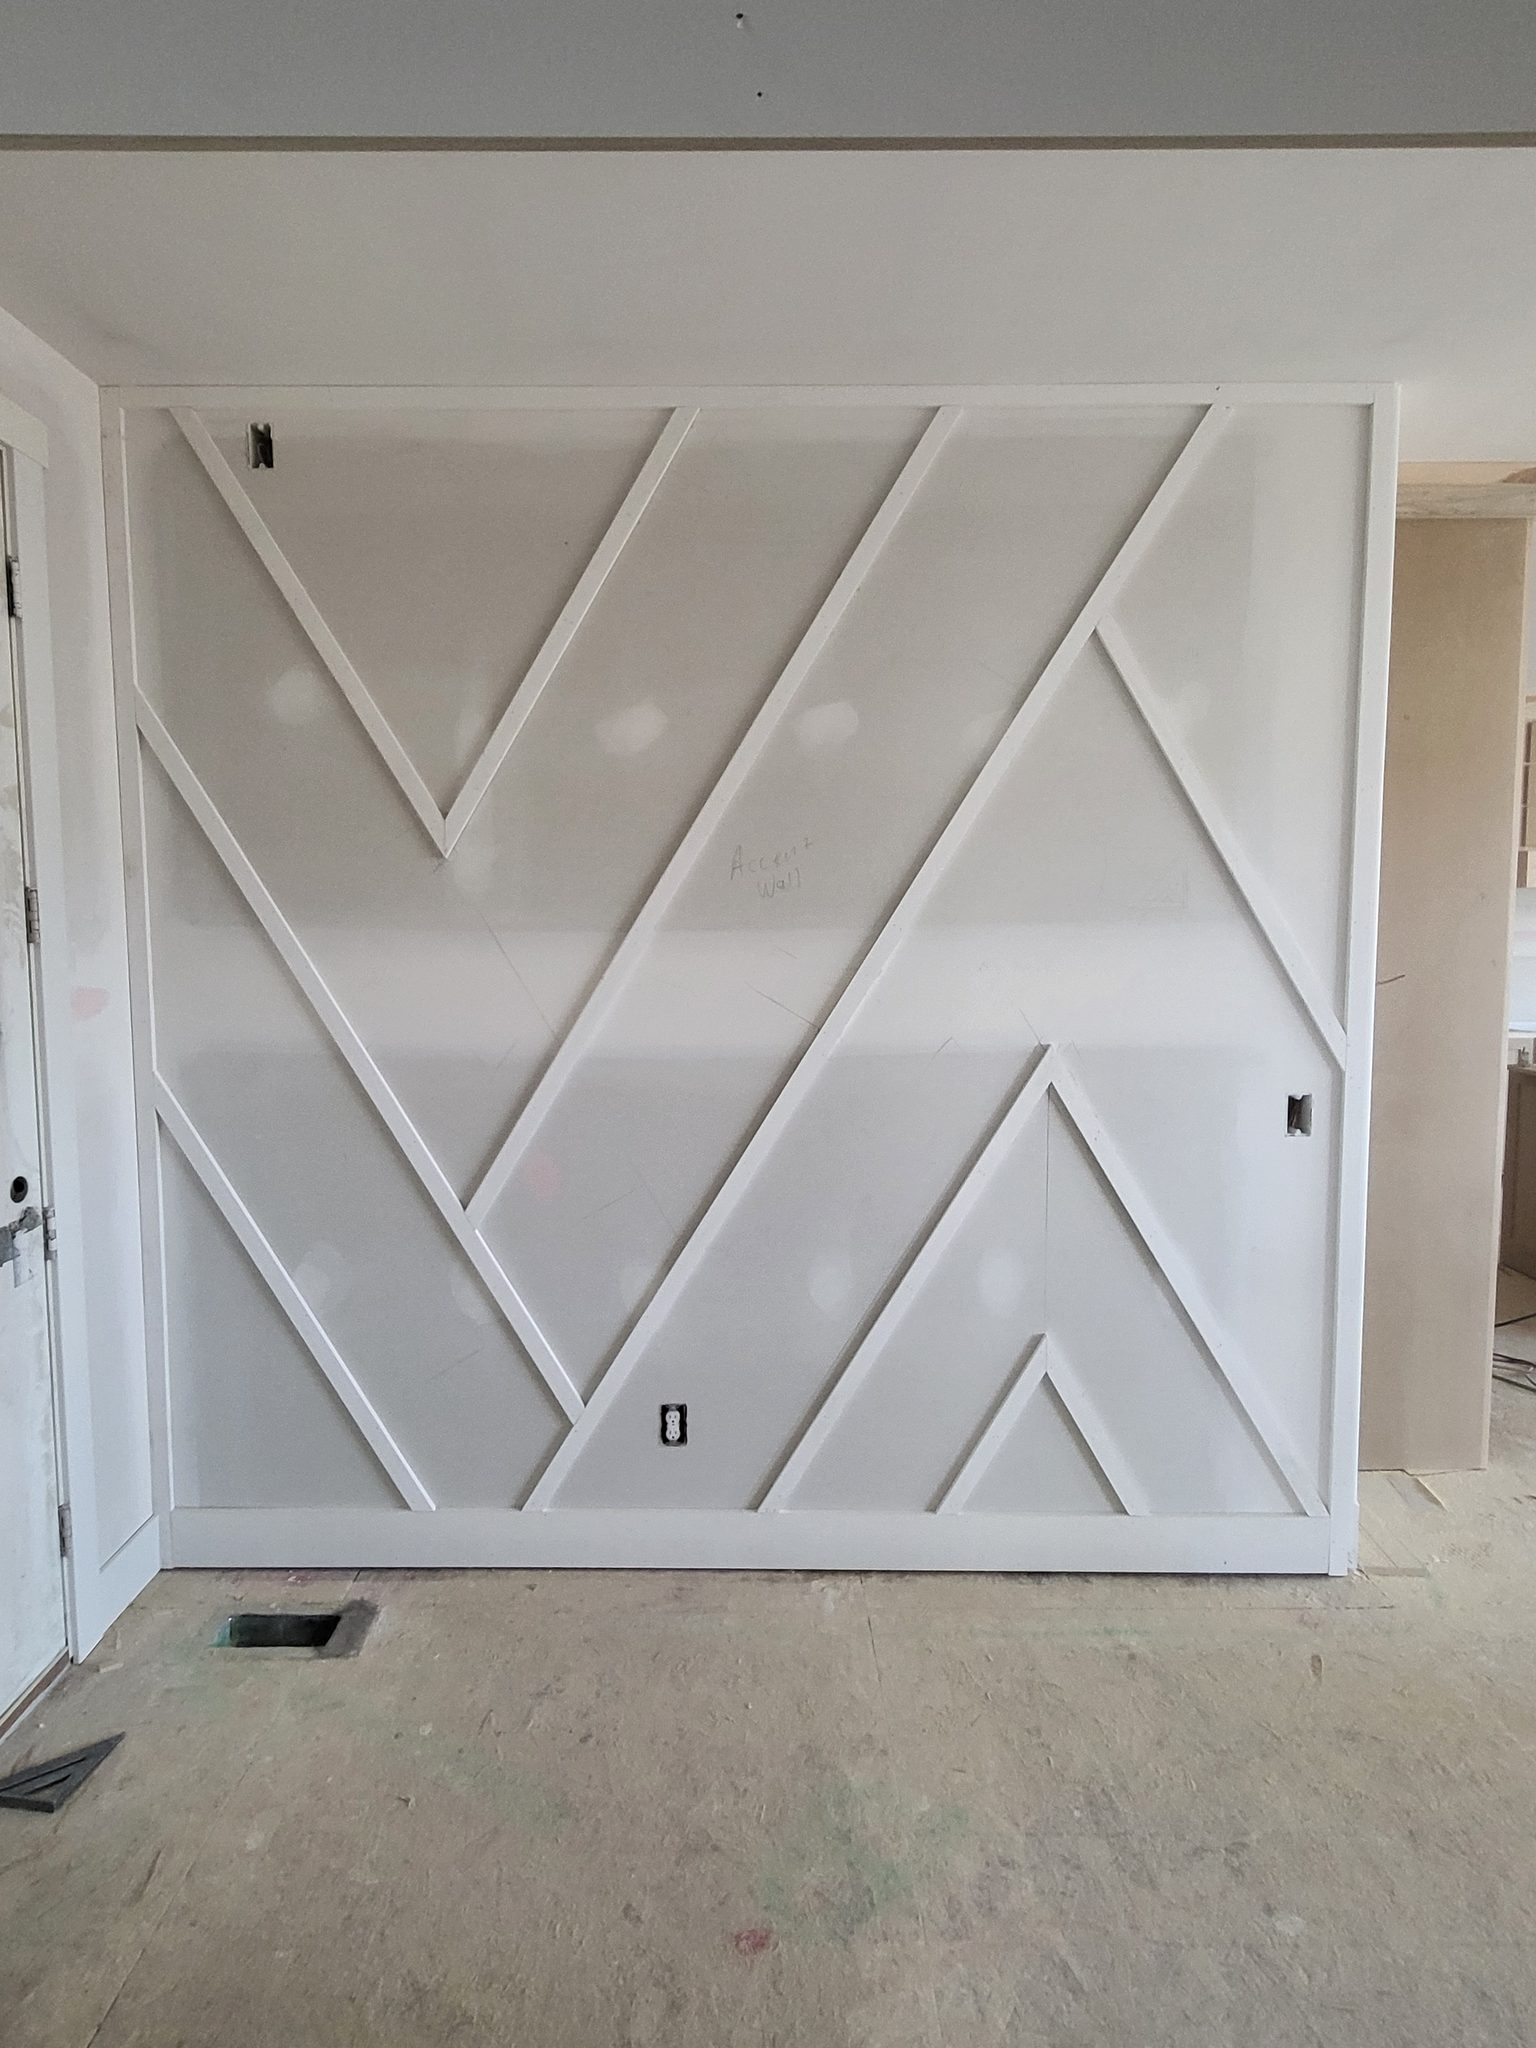
Chevron pattern accent wall with applied wood strips, primed white and ready for final paint
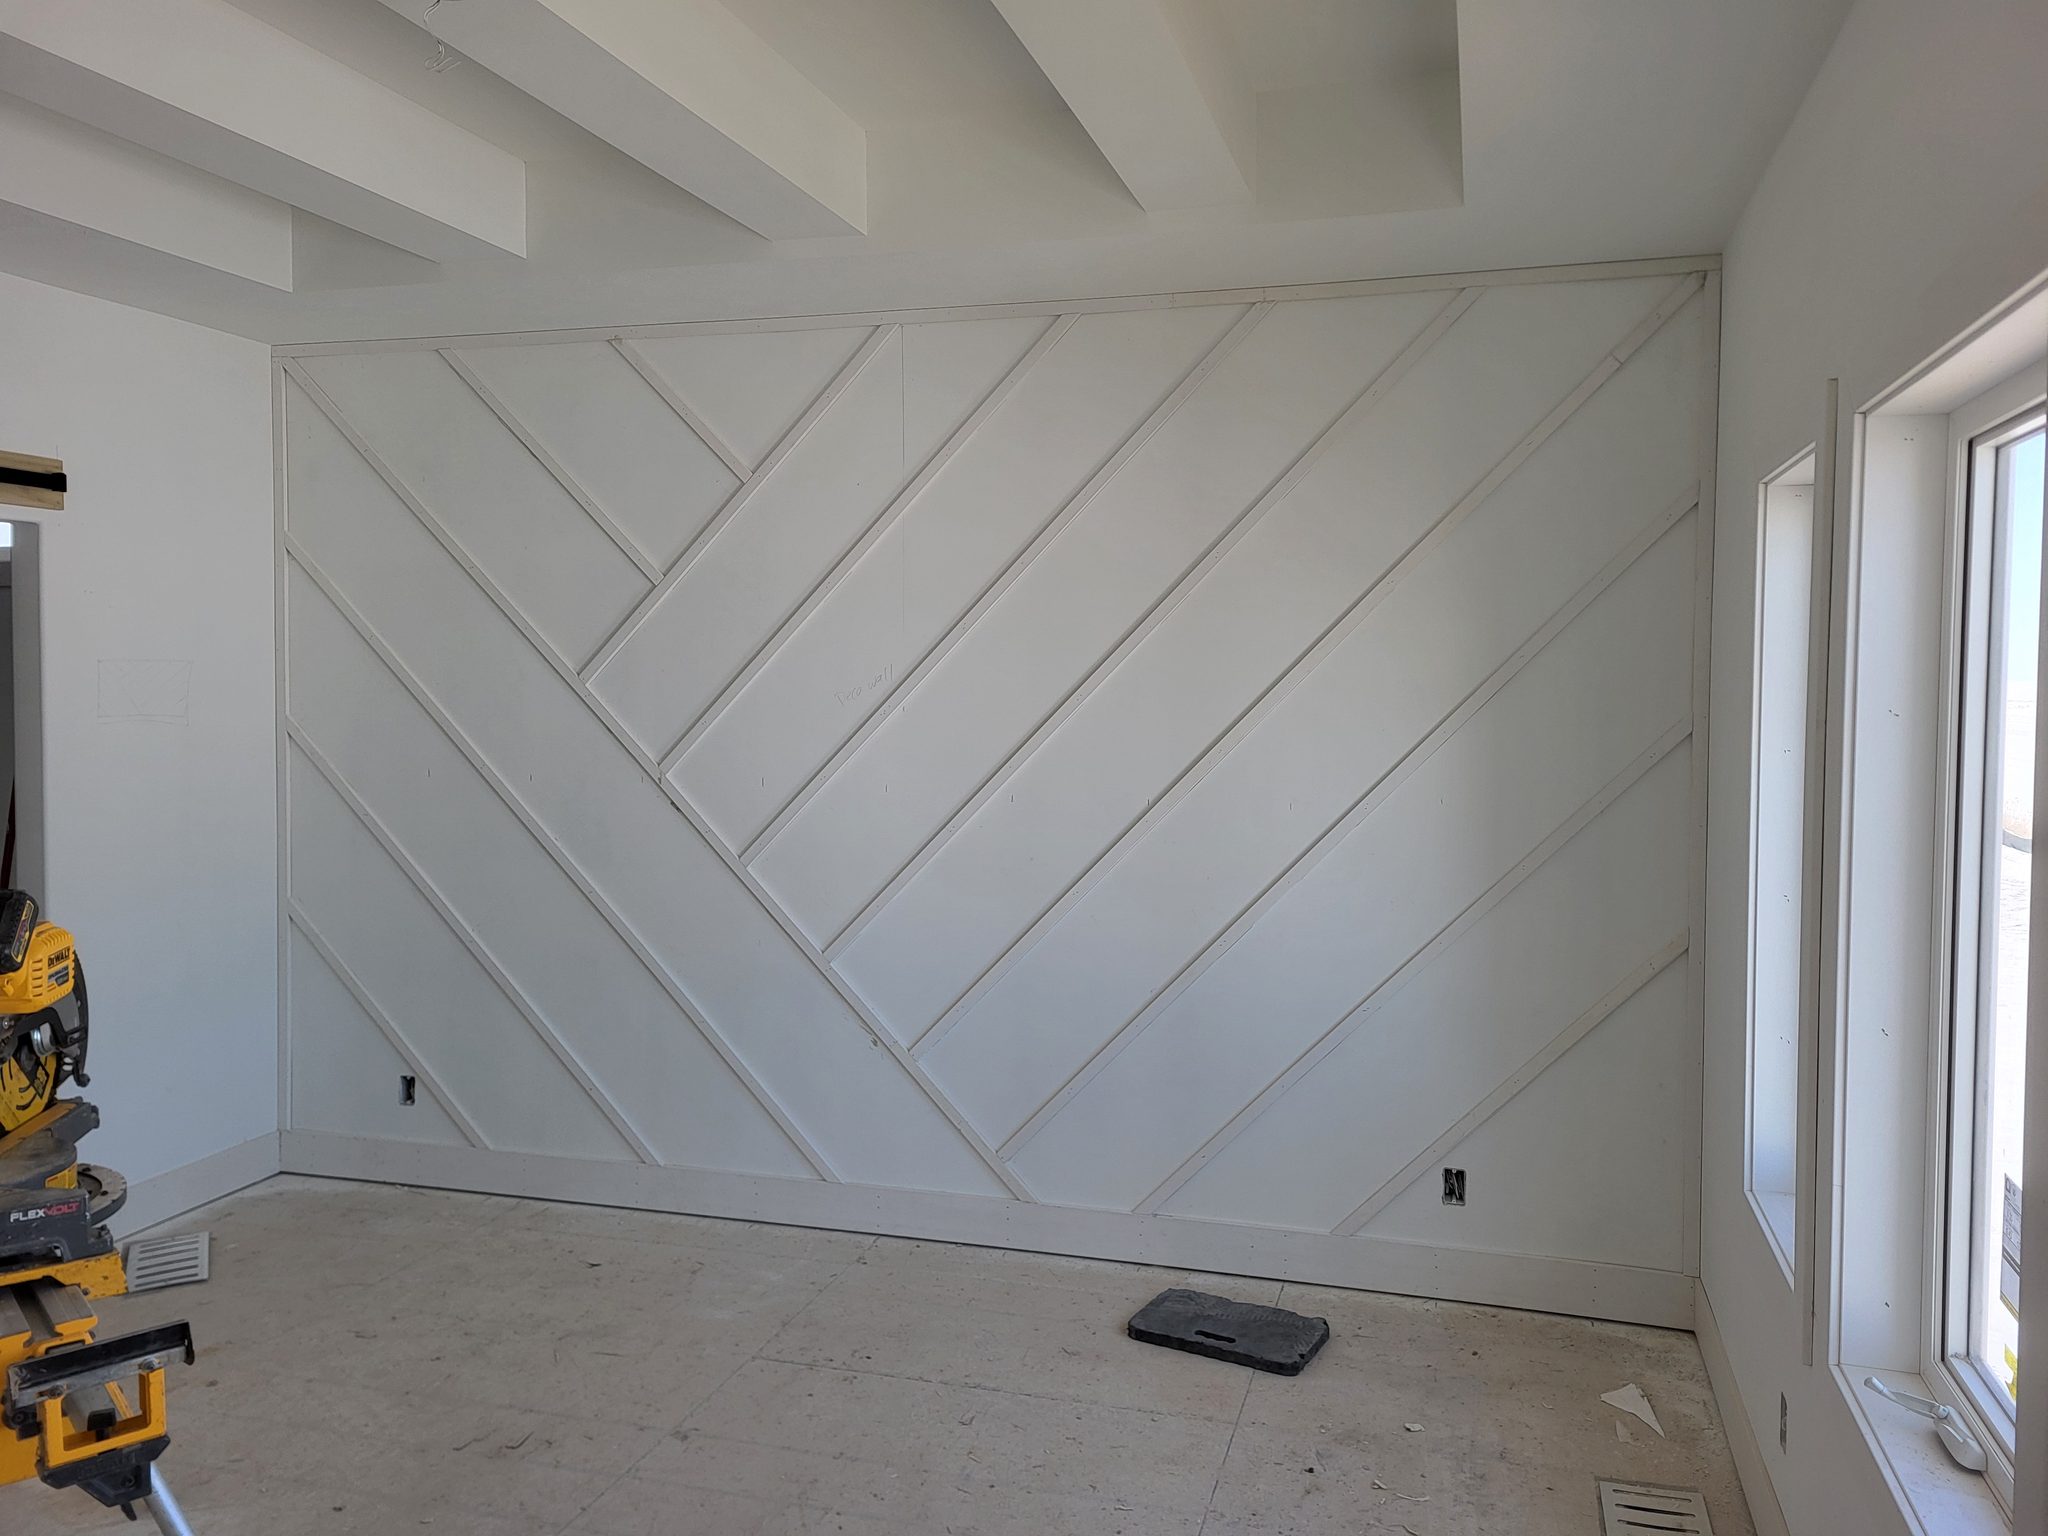
Diagonal wood plank accent wall, fully painted white with evenly spaced parallel lines
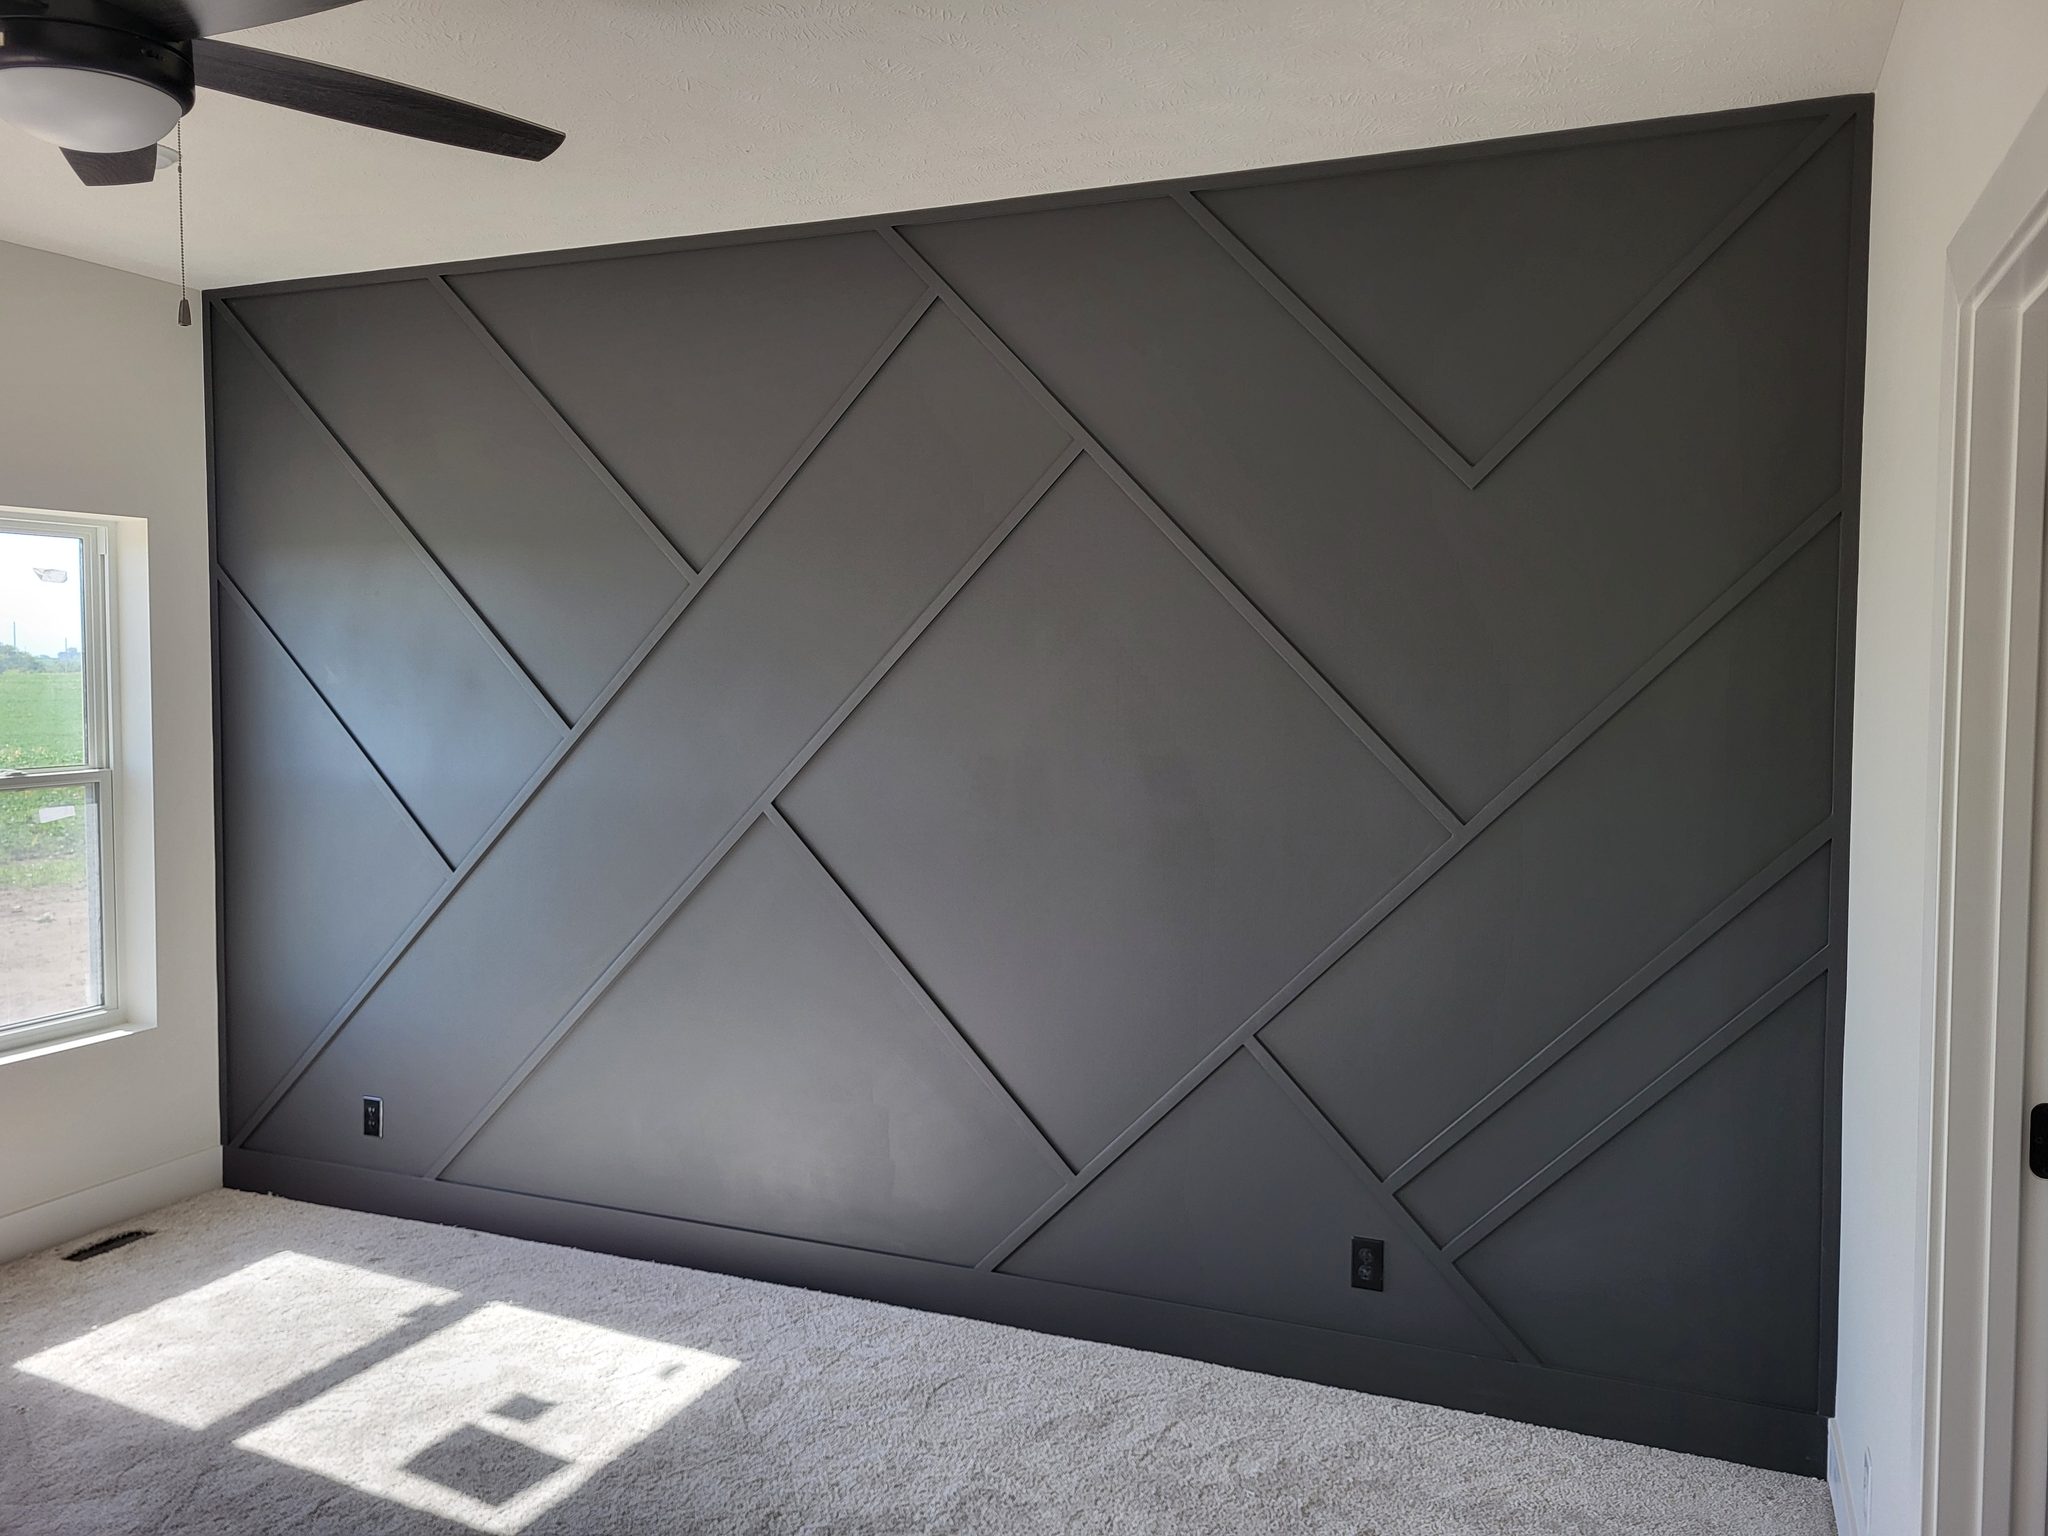
Chevron pattern accent wall painted dark gray, fully finished with carpet flooring and a ceiling fan
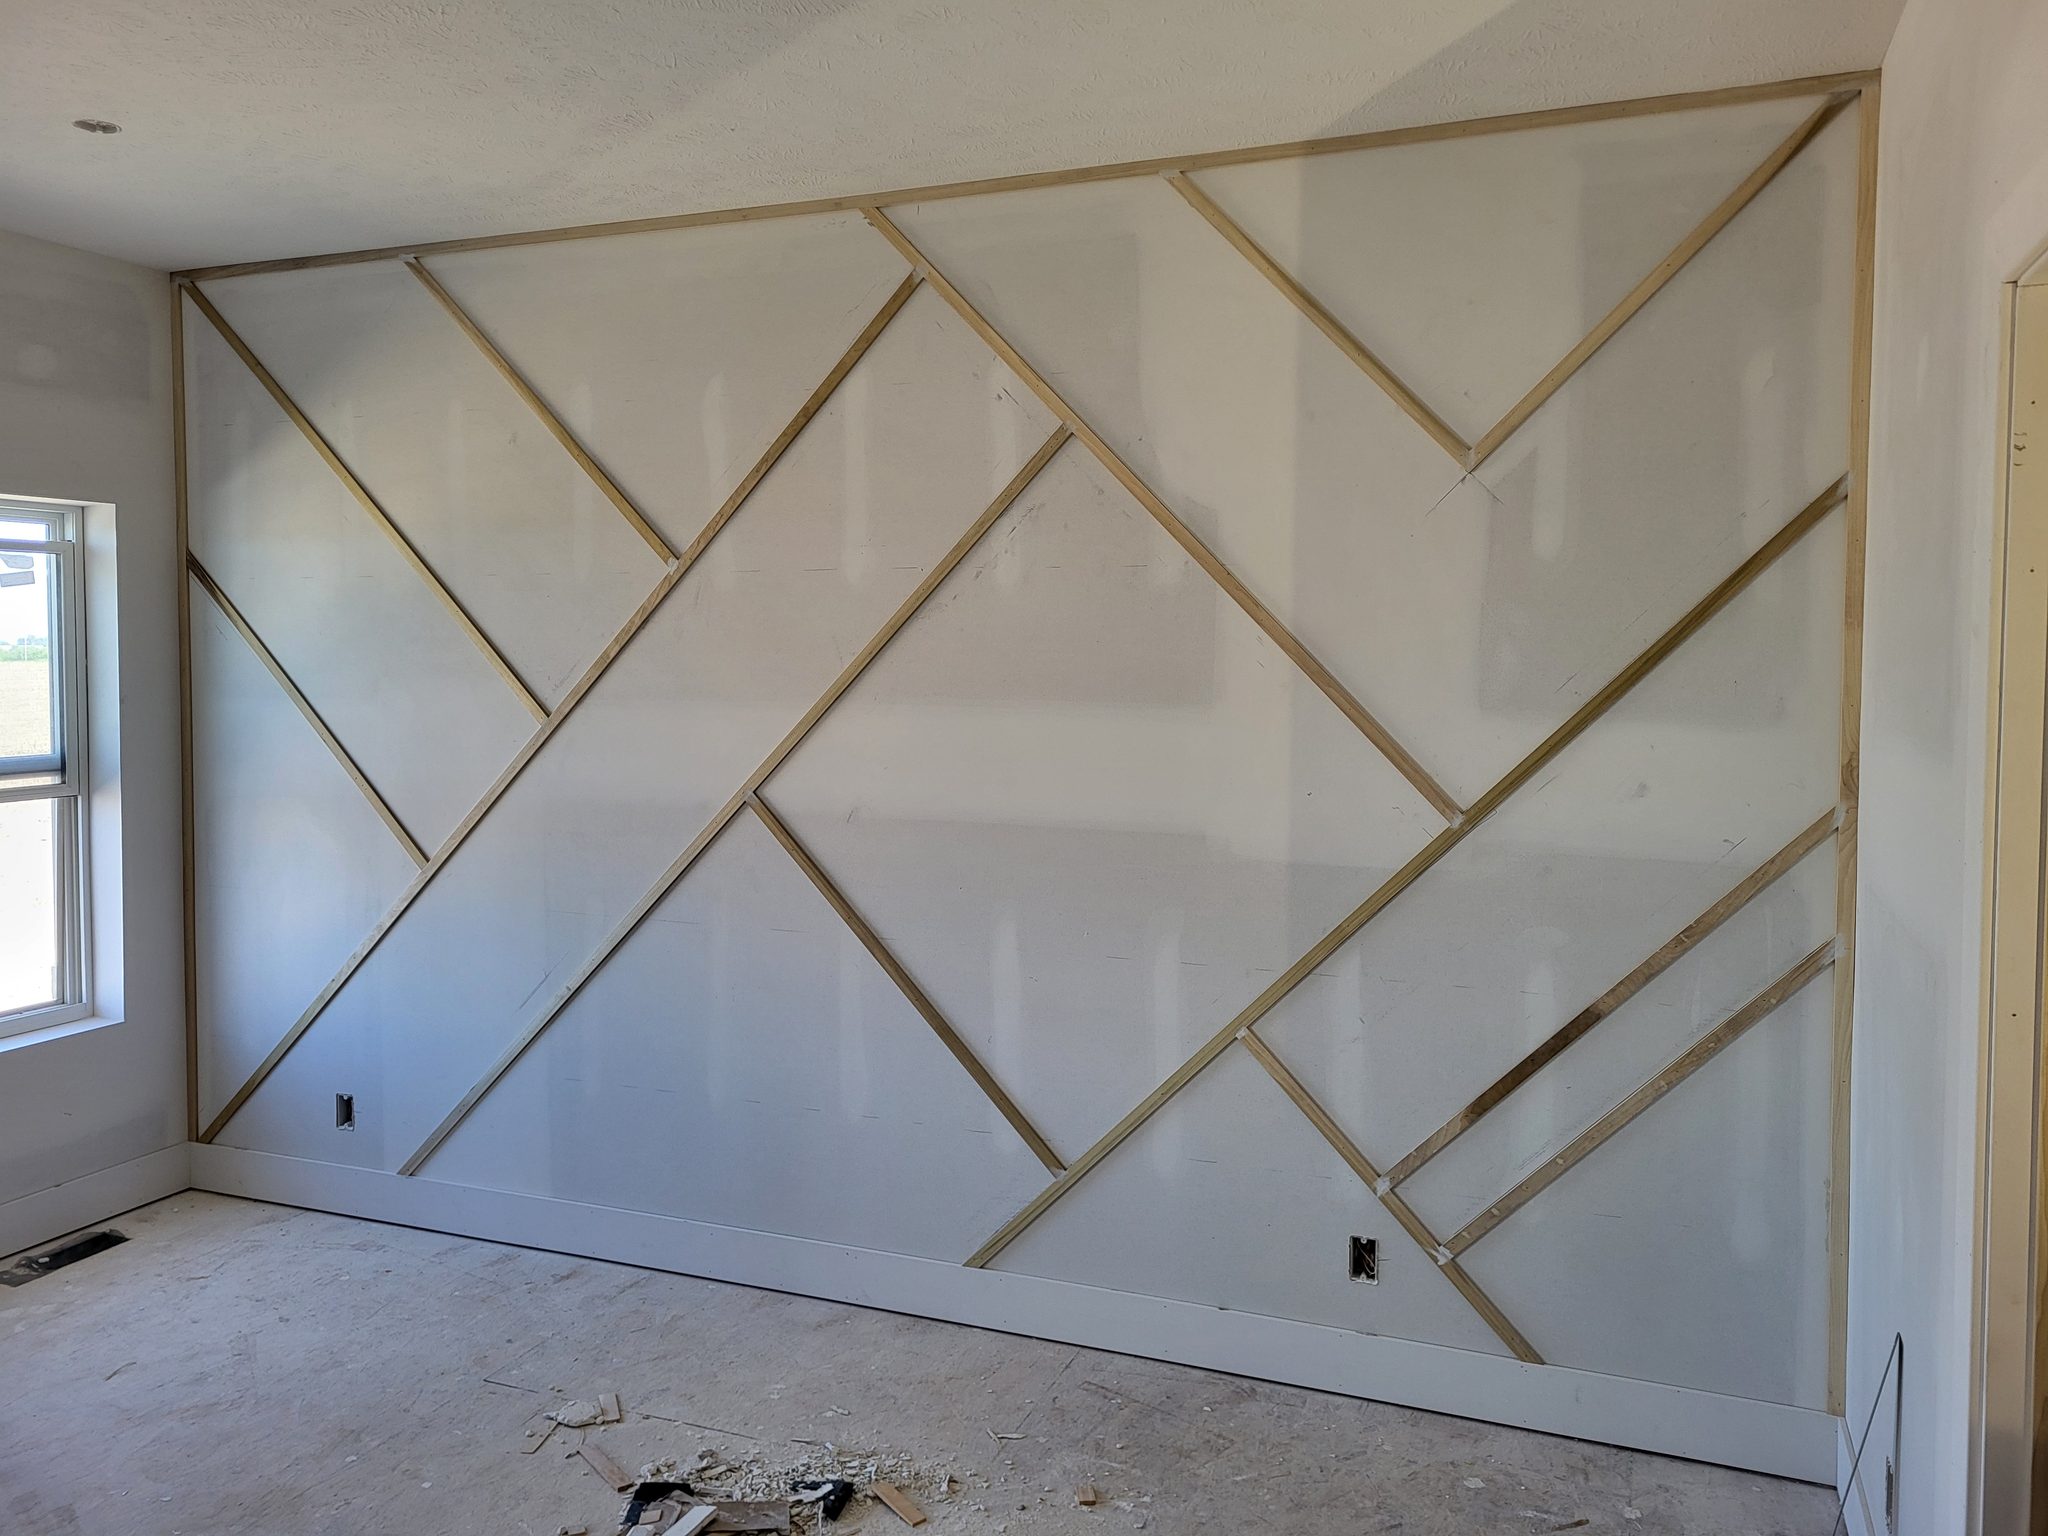
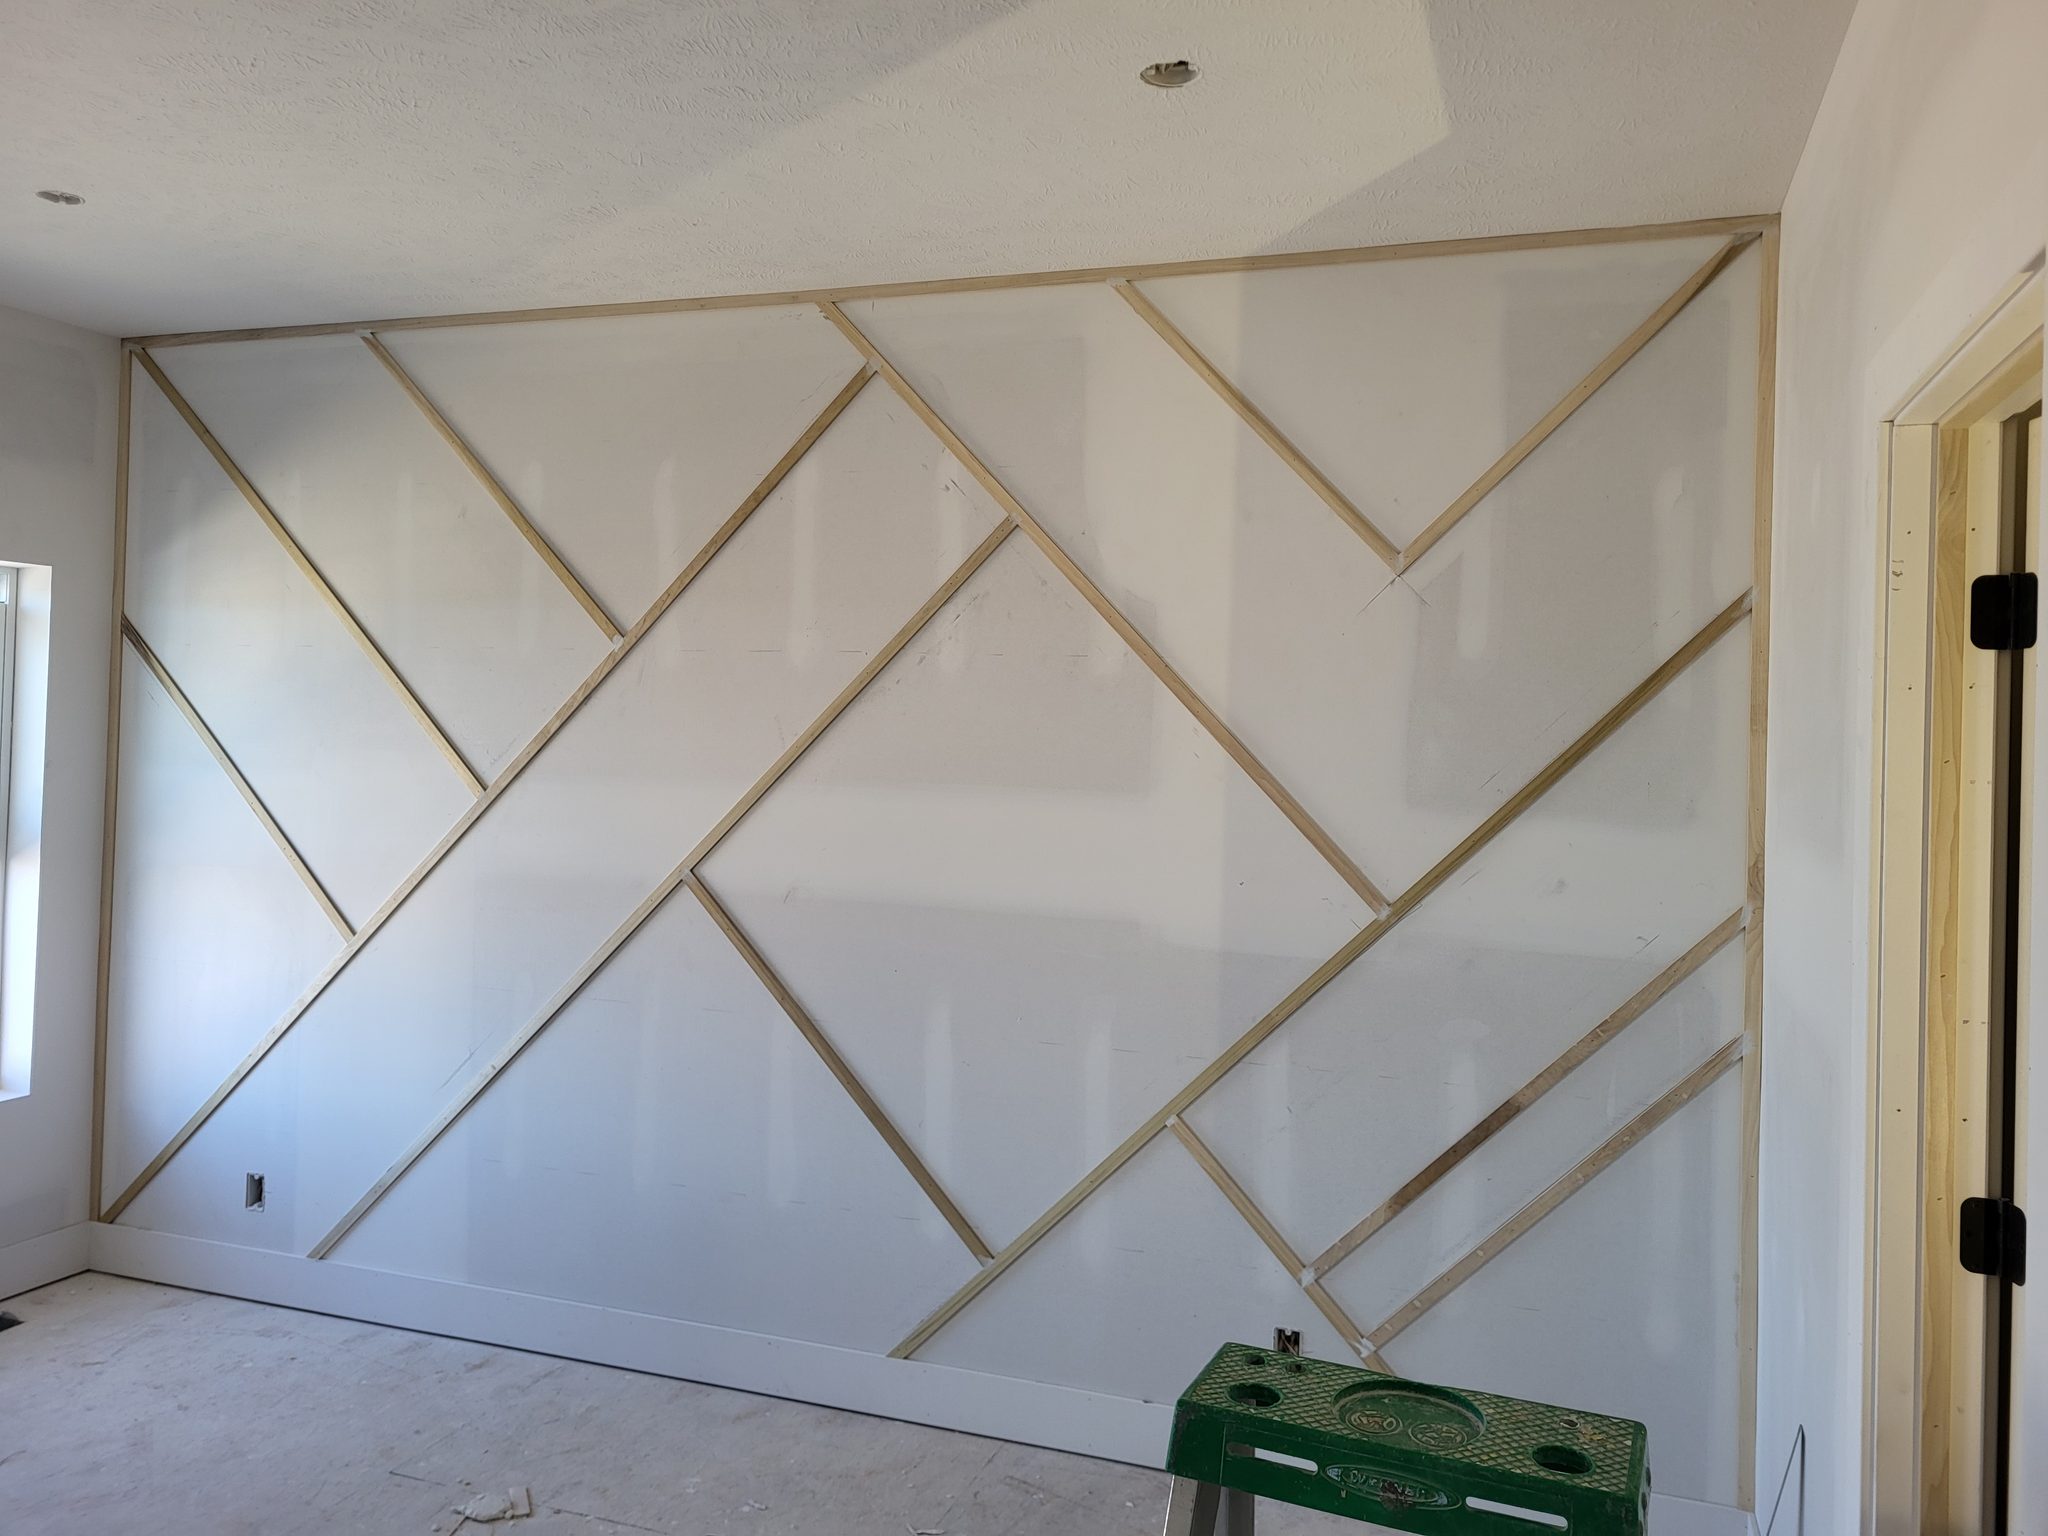
Chevron pattern accent wall with raw wood strips over drywall, unfinished and unpainted
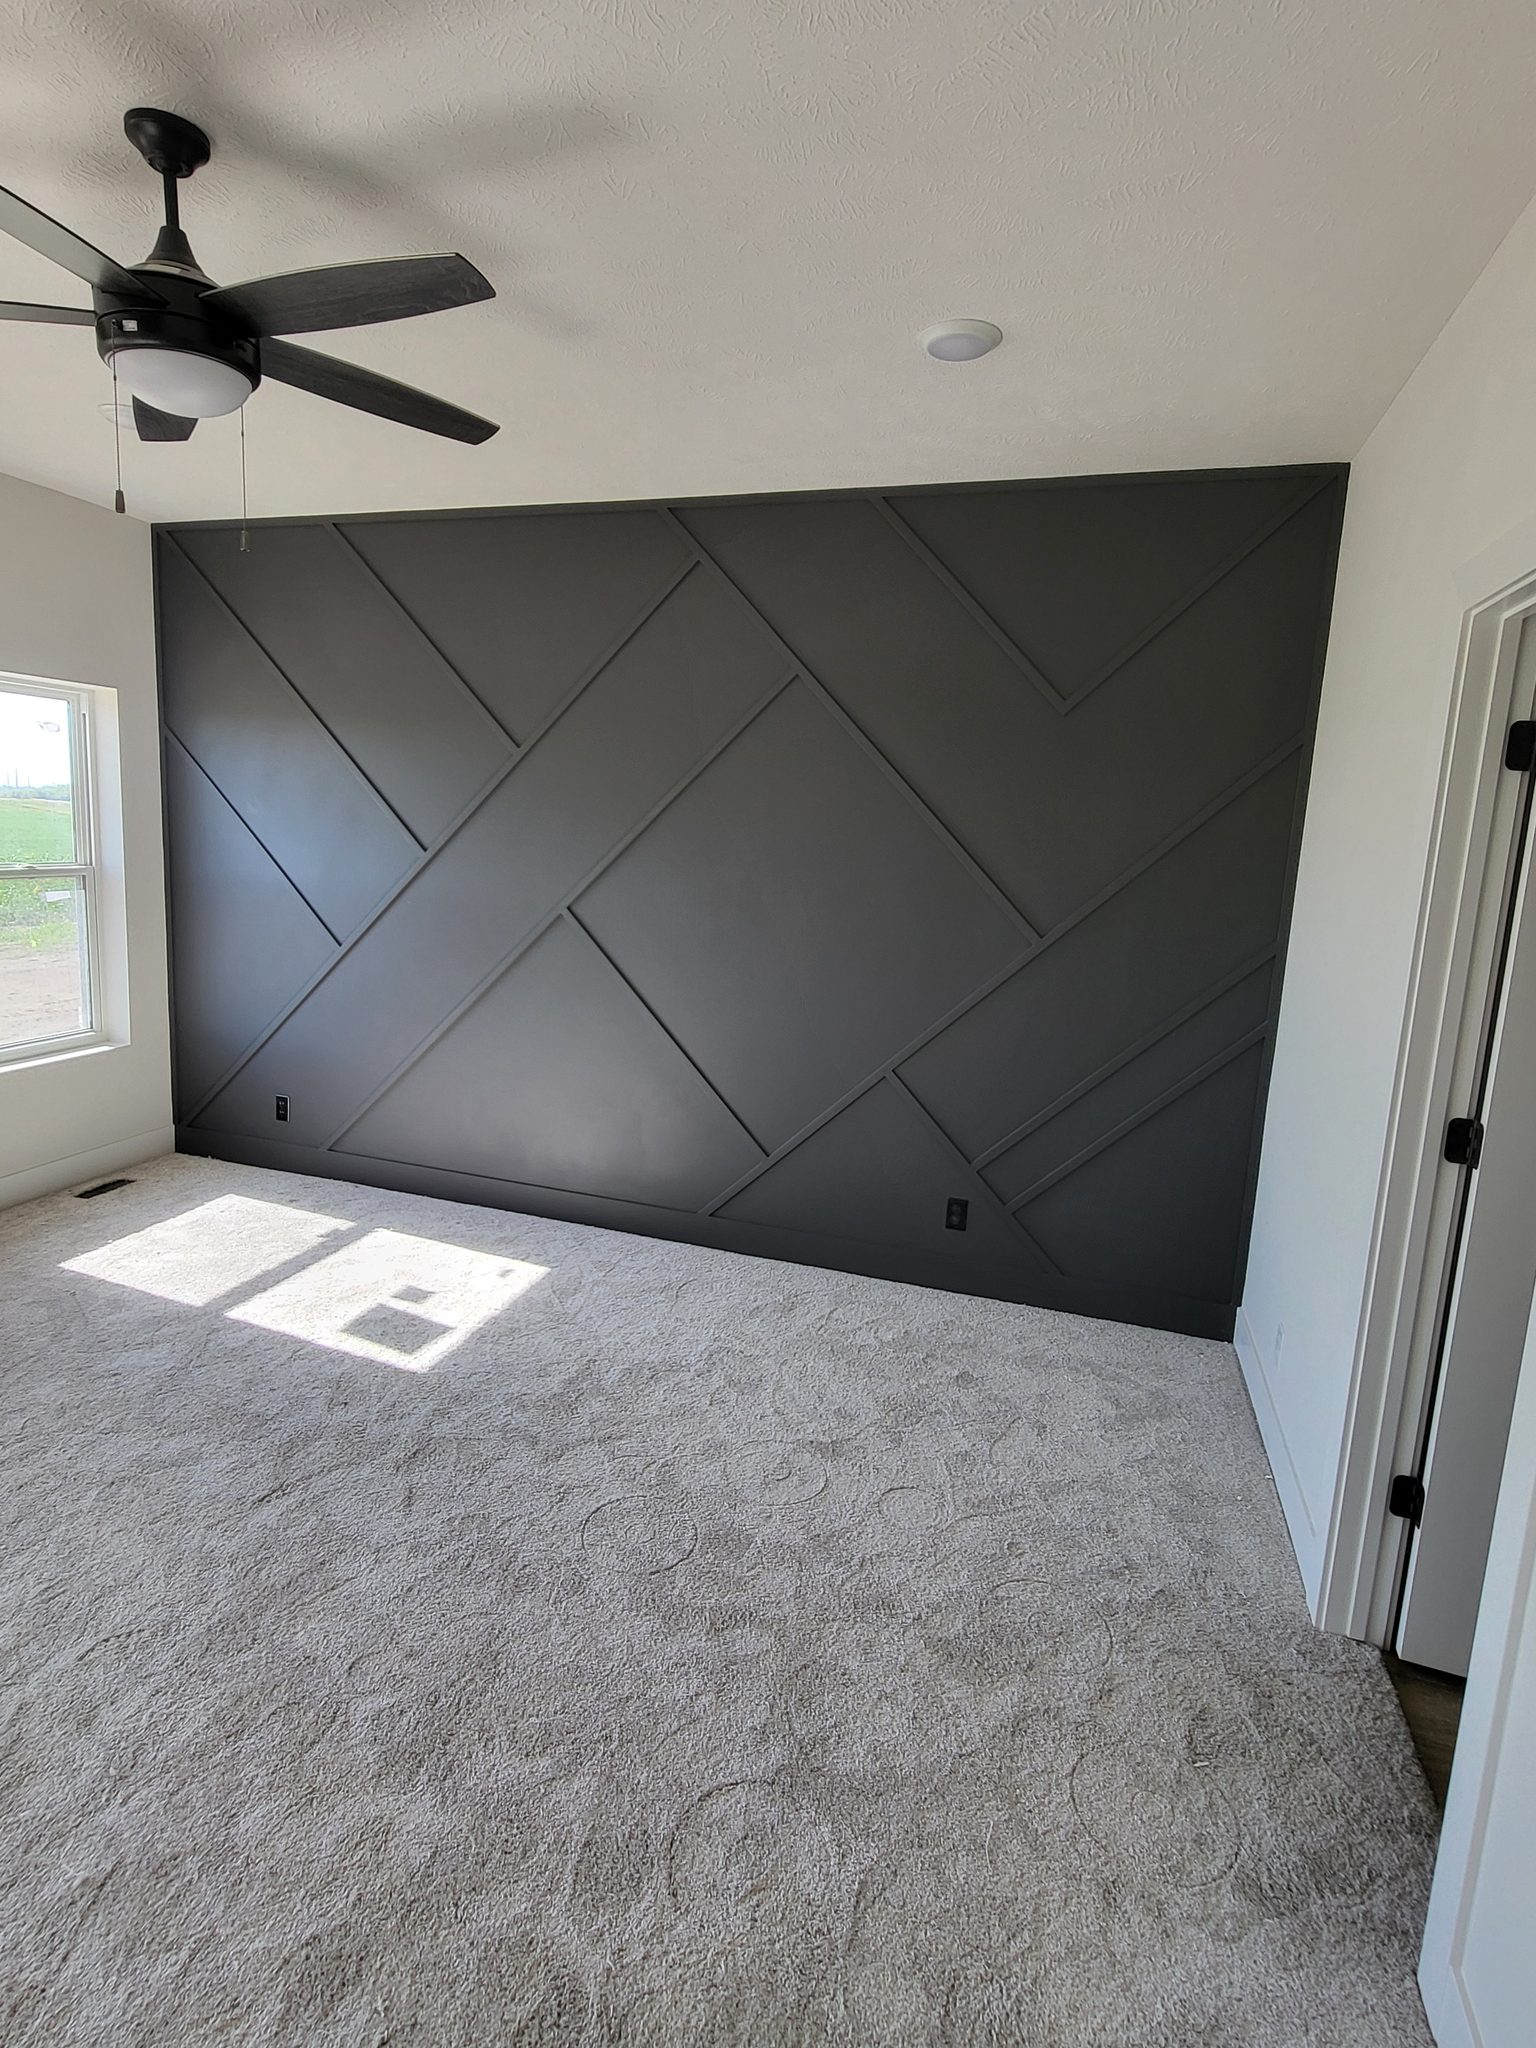
Geometric diagonal pattern accent wall painted dark gray, fully finished with two windows and a ceiling fan
Chevron pattern accent wall with raw wood strips over drywall, unfinished and not yet painted
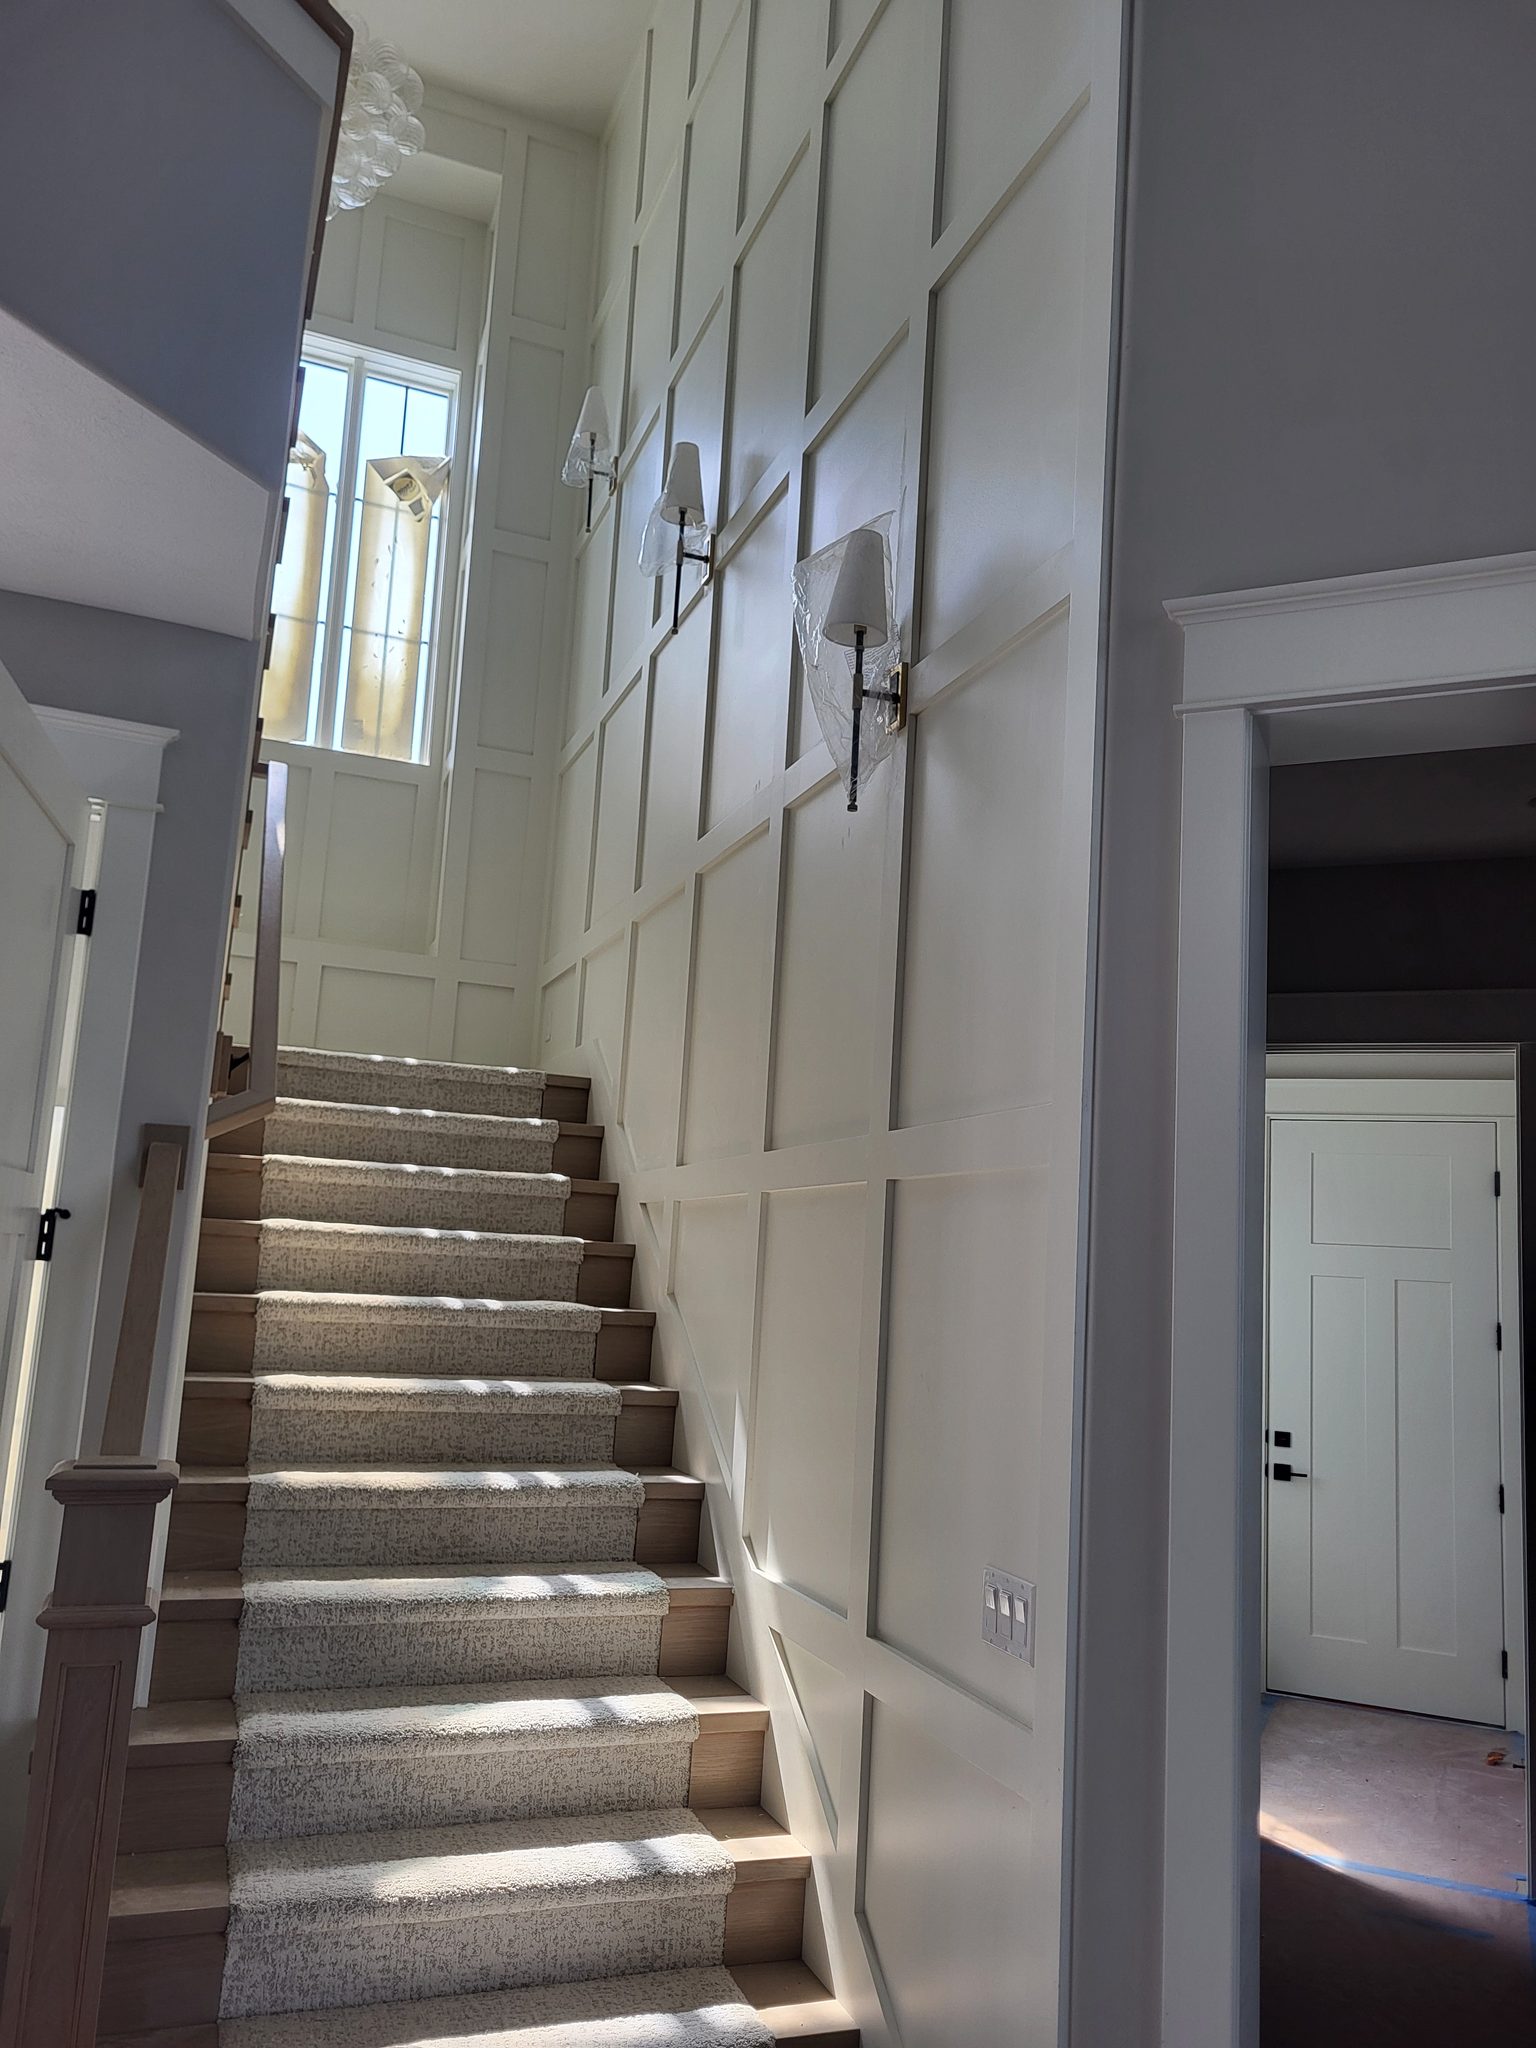
Painted geometric wall paneling installed along a staircase, with wall sconces and carpeted stair treads
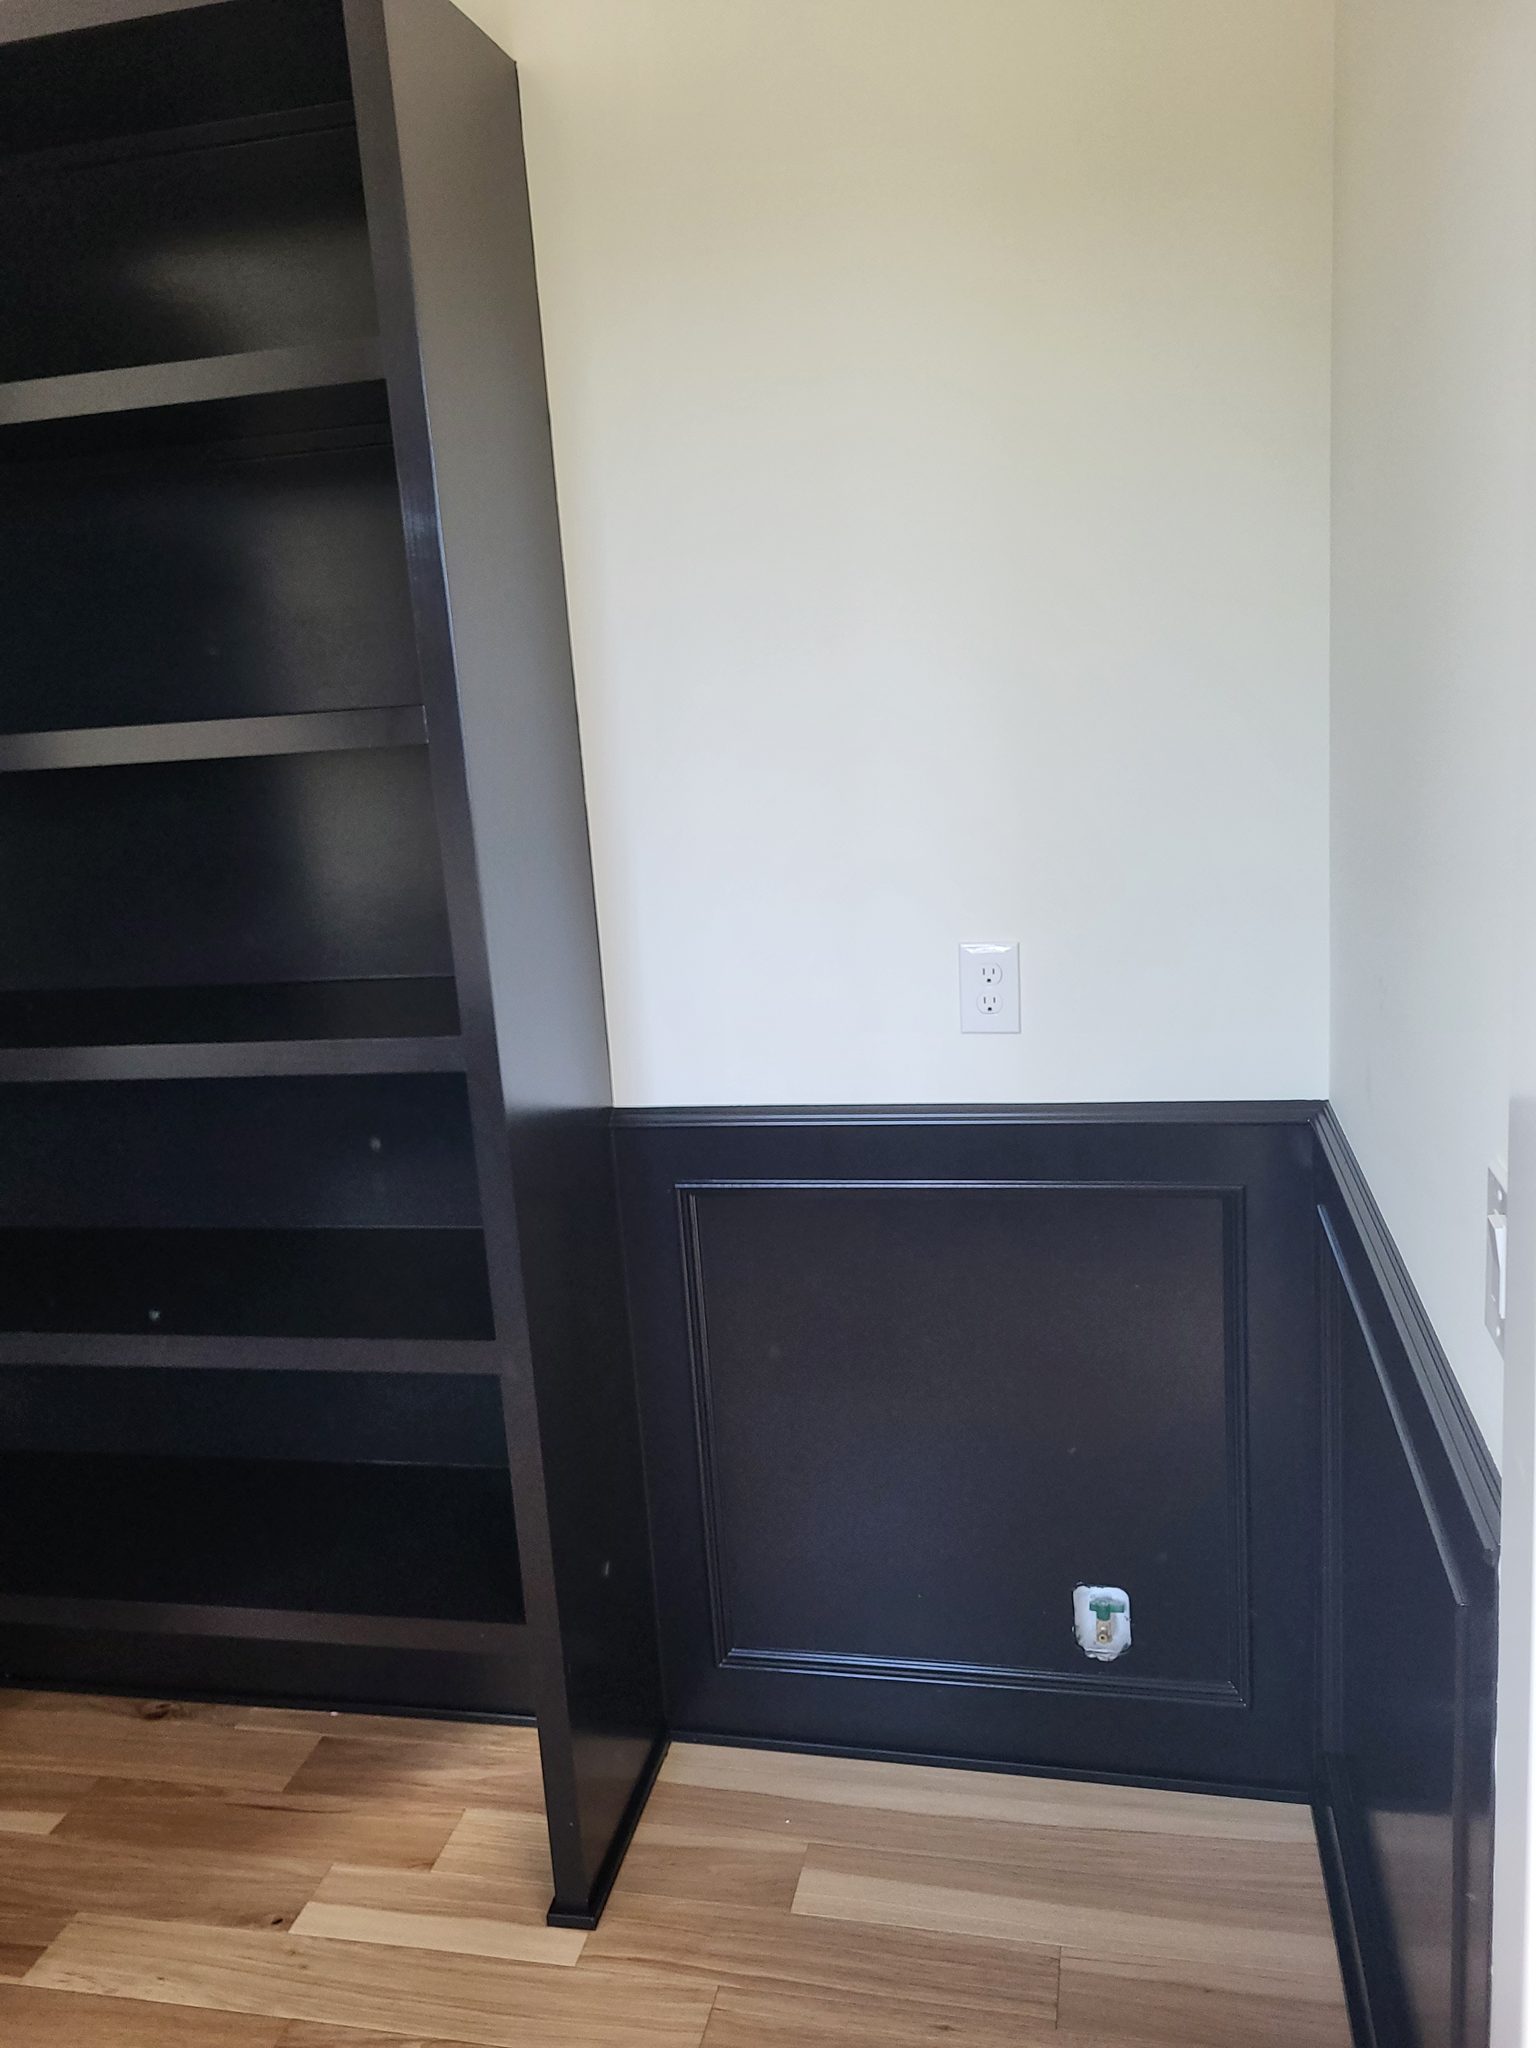
Dark painted wainscoting with frame detail on the lower wall above a hardwood floor
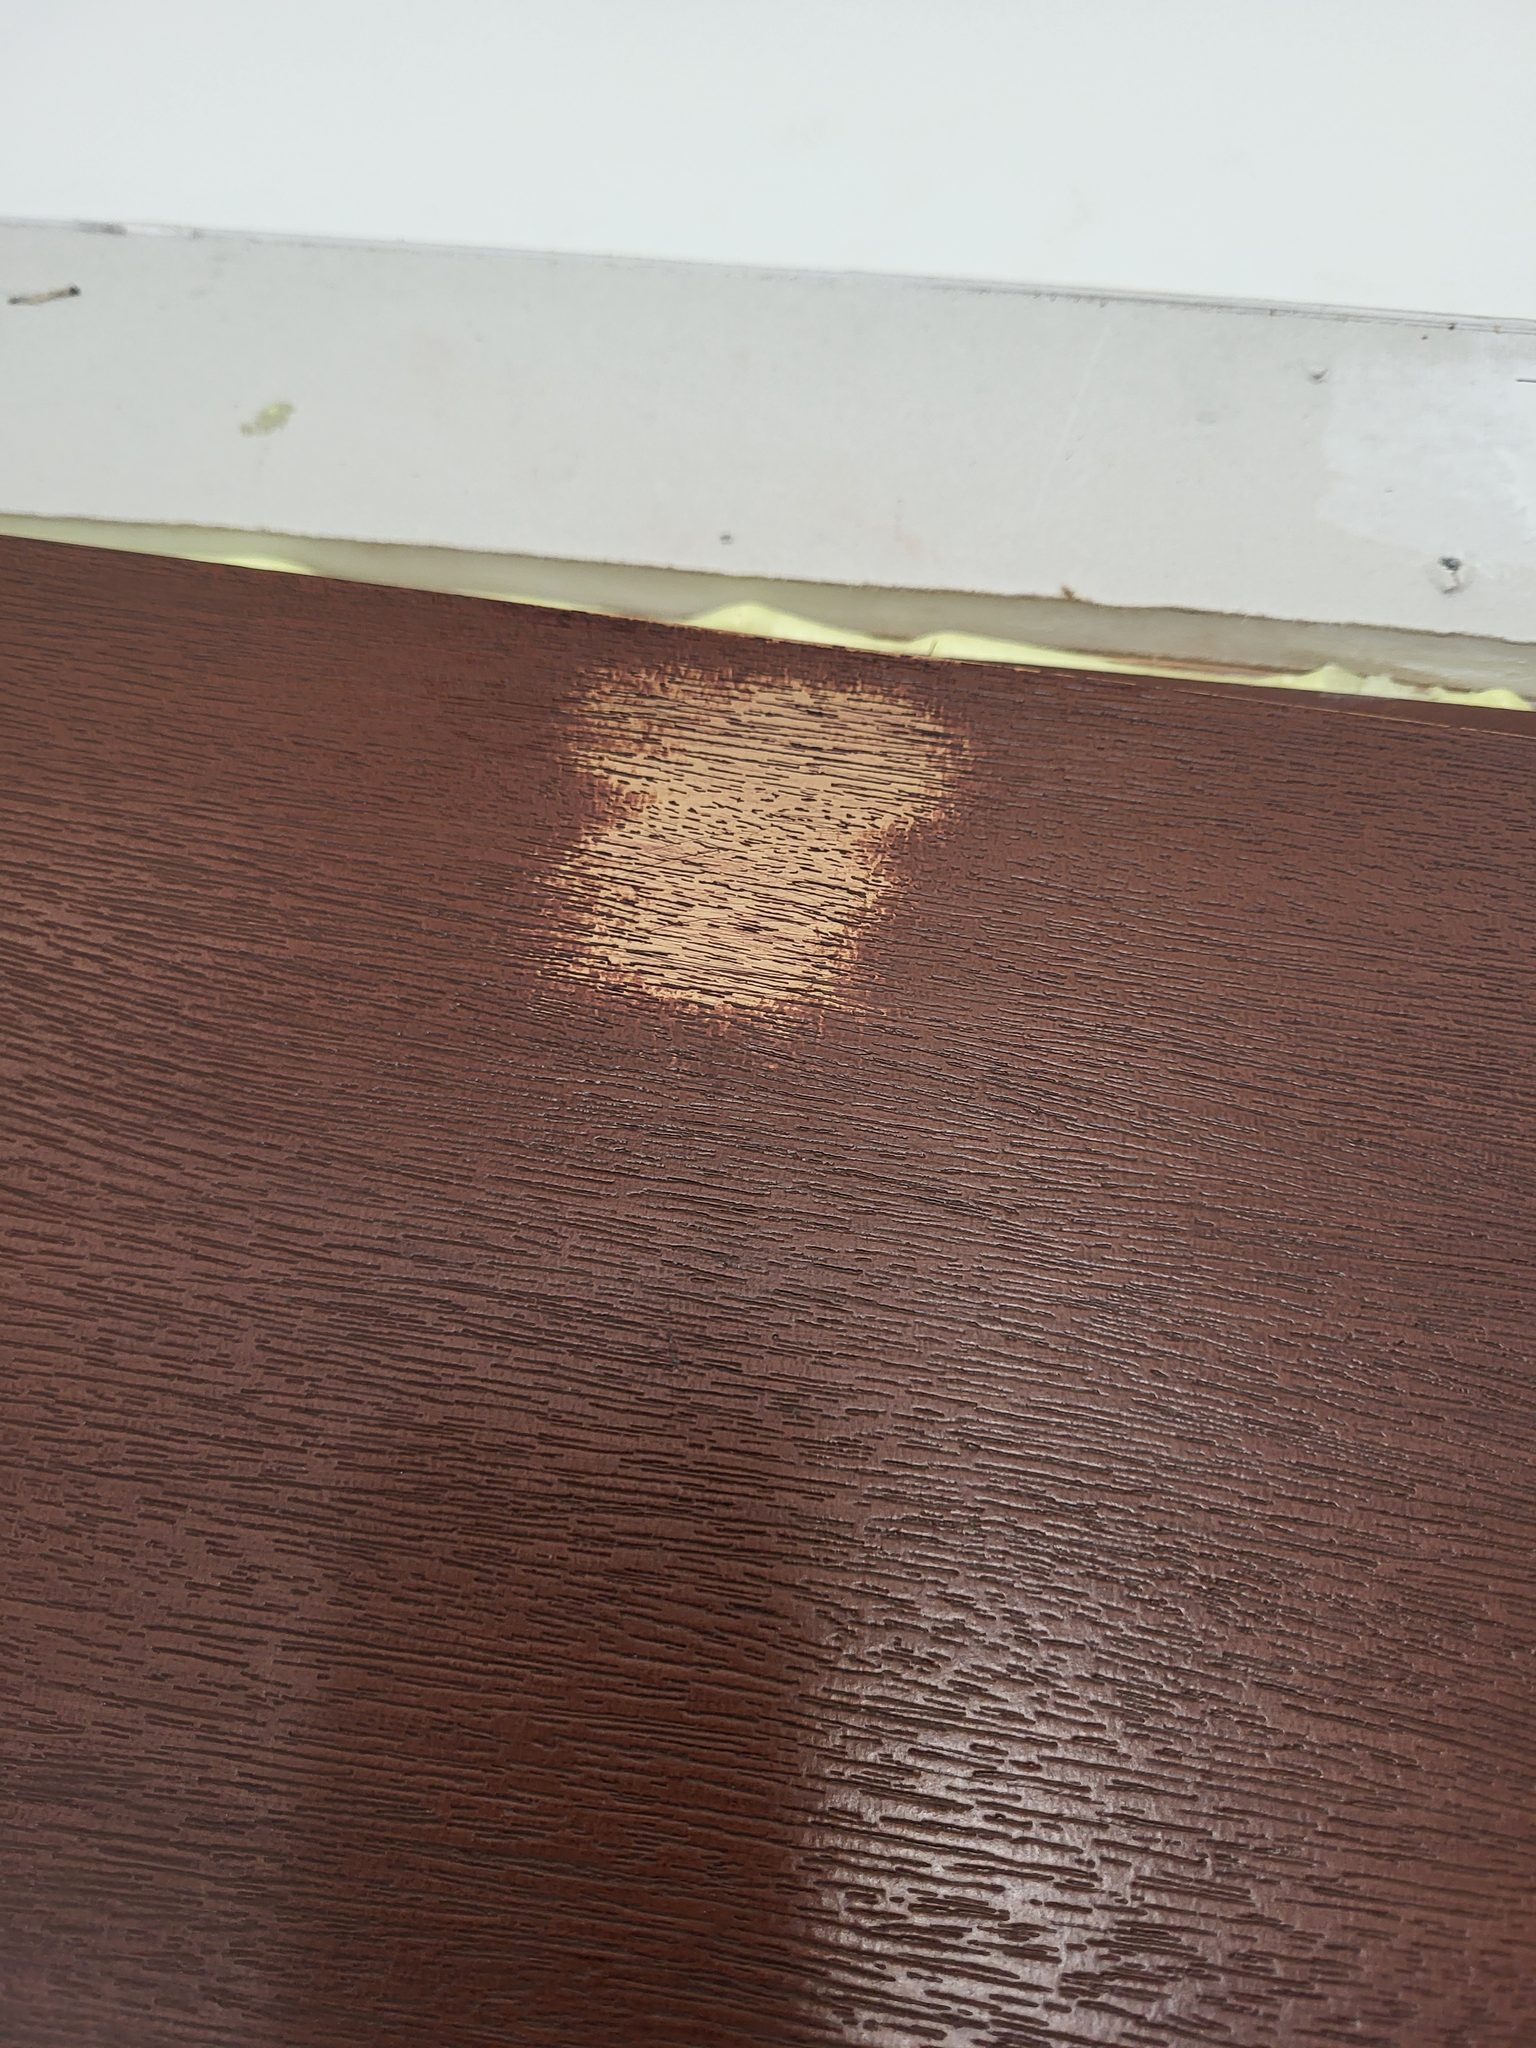
Dark stained wood surface meets a white trim piece with adhesive at the seam.
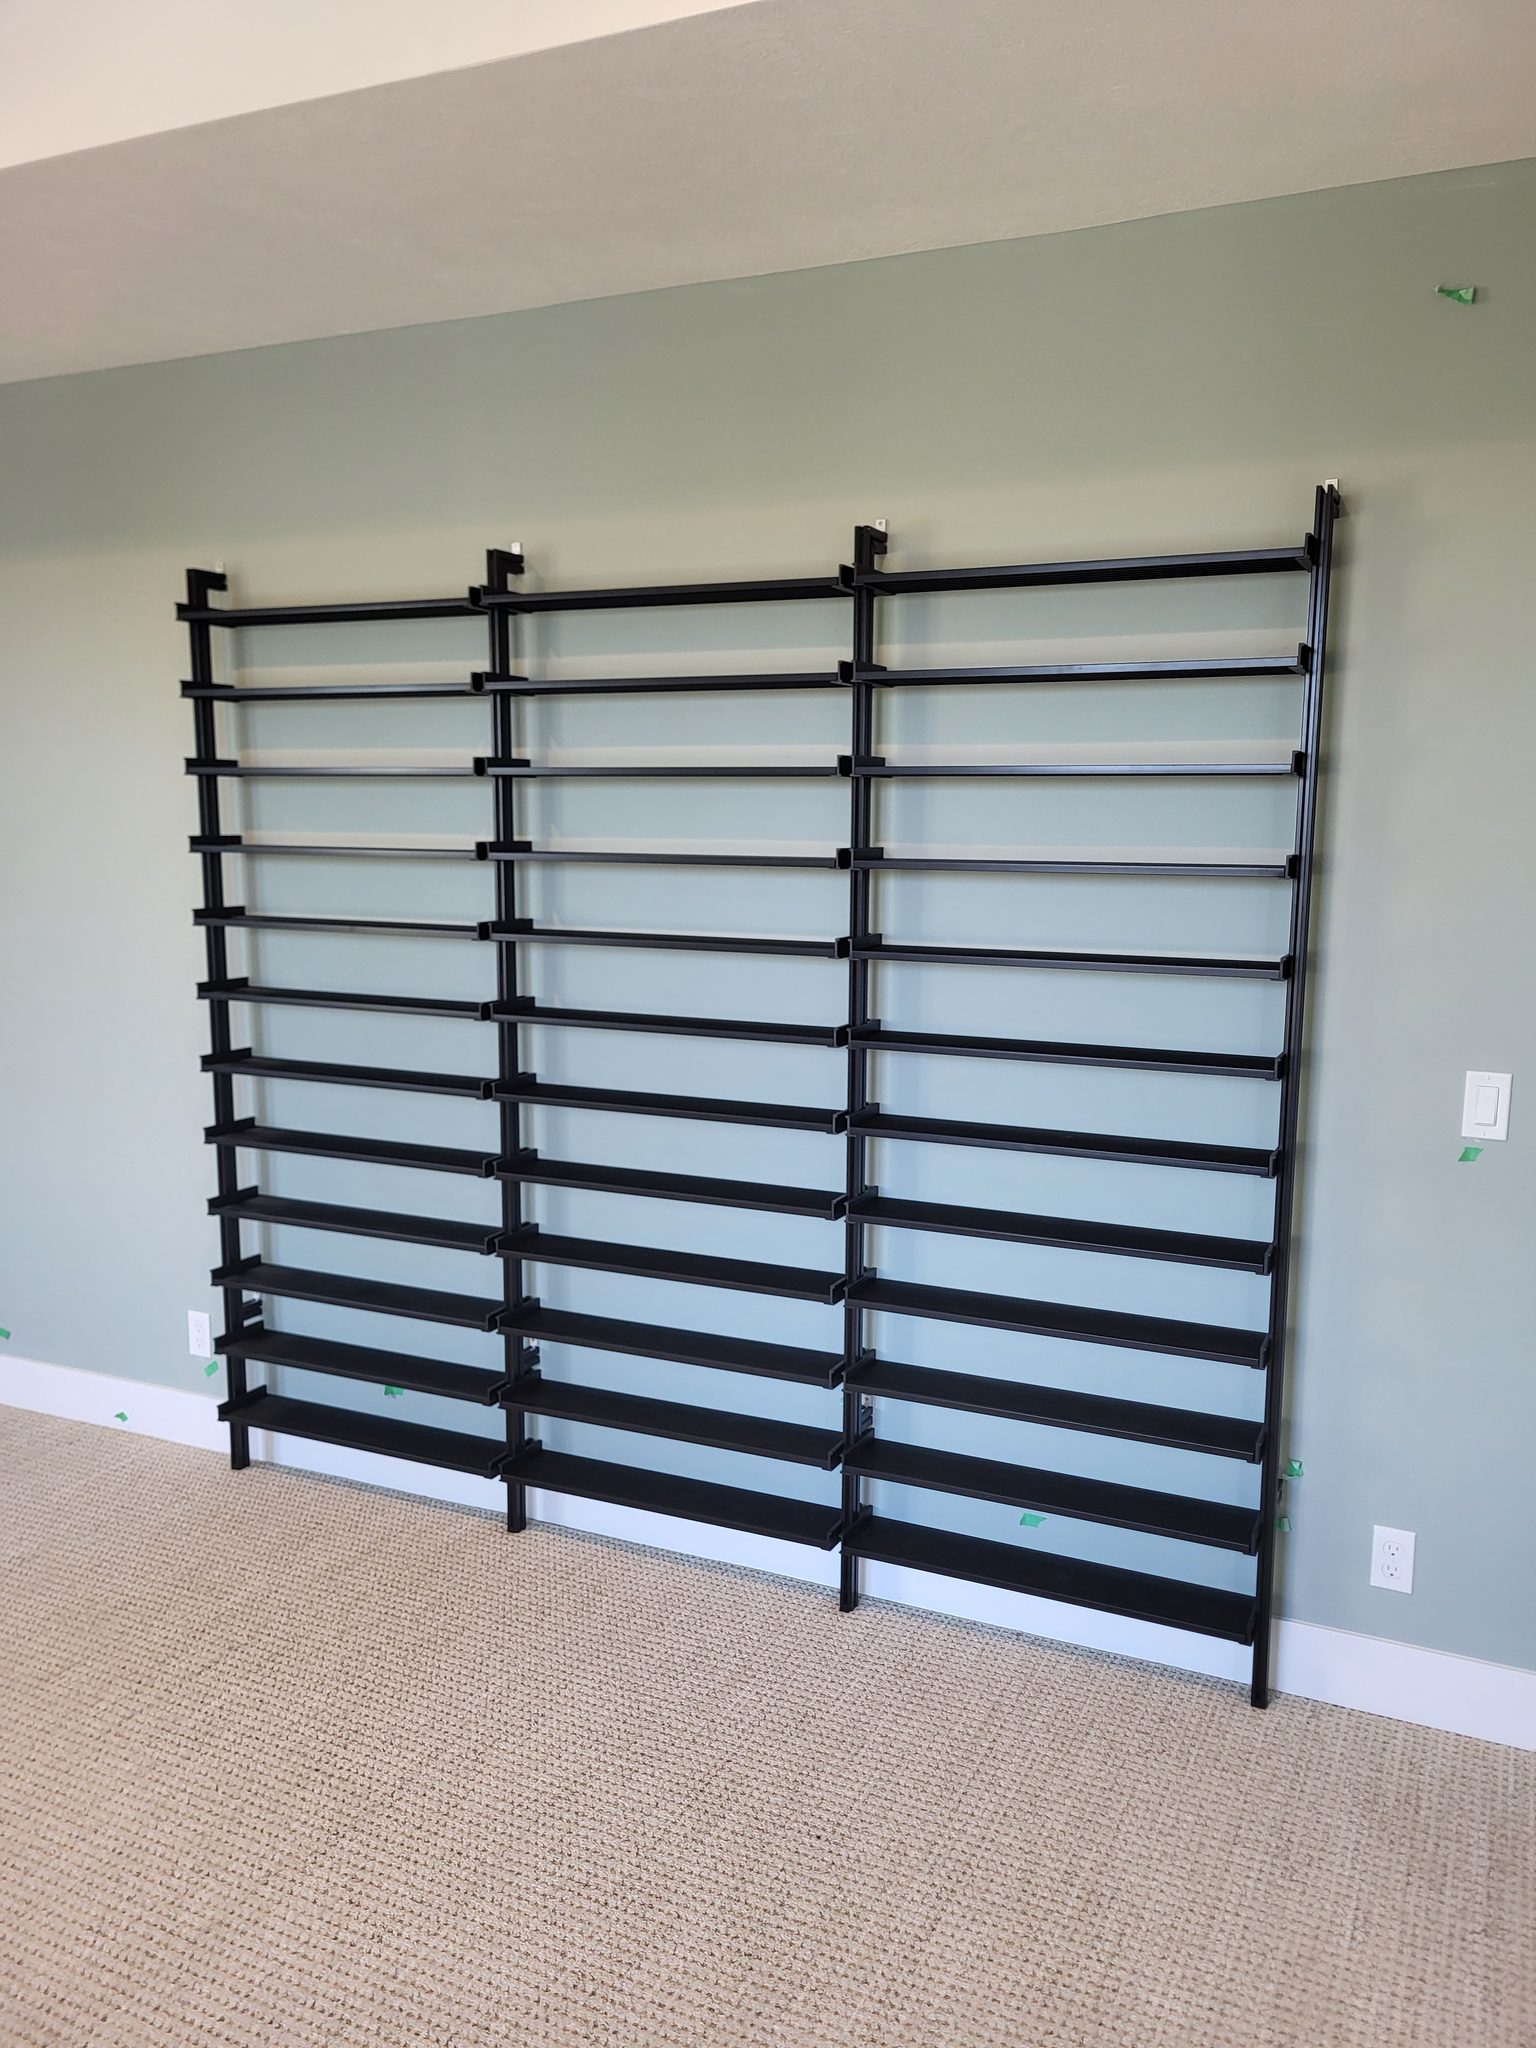
Finished black horizontal-bar wall panels mounted on a painted wall above carpet flooring.
× ‹ ›

Written by David Hospodka, Sun’s Up Construction

David Hospodka learned finish carpentry from his father, alongside his brother Joel, and worked his way through college trimming houses. He then spent about ten years as a railroad bridge engineer, handling design, construction, maintenance and project management. He came back to finish carpentry full time in 2017.

About Let’s Build Stuff

Level 2
What are your Feelings

Share This Article :

  • Facebook
  • X
  • LinkedIn
  • Pinterest
Still stuck? How can we help?

Still stuck? How can we help?

Updated on September 26, 2026
How to Build a Floating ShelfHow to Install Ceiling Beams

Leave a Reply Cancel reply

Your email address will not be published. Required fields are marked *

Table of Contents
  • Introduction
  • Before You Begin
    • Prerequisites
    • What You Need To Know
  • Tools Required
    • Power Tools
    • Hand Tools
    • Supplies
    • Materials
  • How to Install Decorative Wall Treatments Step by Step
    • Step 1: Confirm the Style and Lay Out the Wall
    • Step 2: Dry-Lay the Pattern
    • Step 3: Cut the Field Boards or Battens
    • Step 4: Fasten the Field Boards
    • Step 5: Install the Cap or Rail
    • Step 6: Finish the Corners and Ends
  • Close-Out
  • Quality Check
  • Troubleshooting
    • Gap drifts wider or narrower across the wall
    • A board falls between studs at the end of a run
    • Wall is not flat behind the treatment
  • Related Guides
  • Reference Photos
Let's Build Stuff
  • Glossary
  • Learn
  • Blog
  • About
  • Contact
  • Affiliate Disclosure
  • Privacy Policy

© 2026 Let's Build Stuff - Interior Finish Carpentry Experts

  • Home
  • Start Here
  • Glossary
  • Learn
  • Blog
  • About
  • Contact
  • Browse the guides