Skip to content

Let's Build Stuff

  • Home
  • Start Here
  • Glossary
  • Learn
  • Blog
  • About
  • Contact
  • Browse the guides
Let's Build Stuff

How can we help you?

Closets

7
  • Closet and Cabinet Trim Parts
  • How to Install a Wire Shelf in a Closet
  • How to Install Granite Support
  • How to Install a Closet Countertop Shelf
  • How to Build Basic Closet Shelves - Part 1 of 3 (Standards)
  • How to Build Basic Closet Shelves - Part 2 of 3 (Layout Design)
  • How to Build Basic Closet Shelves - Part 3 of 3 (Building)

Doors & Openings

29
  • Door and Window Parts
  • How to Install a Knock-Down Hollow Metal Frame
  • Installing a Weather-Exposed Exterior Door: The Extra Steps
  • How to Install a Pocket Door Frame
  • How to Install Door Blinds
  • How to Resize a Door Opening
  • How to Install a Welded Hollow Metal Frame
  • How to Install a Door Bump
  • How to Install an Exterior Finish Slab
  • How to Install an 8'0" Pocket Door
  • How to Install an 8'0" Solid Core Pre-Hung Interior Door
  • How to Install an 8'0" Hollow Core Pre-Hung Interior Door
  • How to Install a 6'8" Solid Core Pre-Hung Interior Door
  • How to Install a 6'8" Cased Opening
  • How to Finish a Bypass Door Install
  • How to Install 8'0" Bi-Fold or Bypass Door Slabs
  • How to Install 6'8" Bi-Fold or Bypass Door Slabs
  • How to Install an 8'0" Bi-Fold or Bypass Door Frame
  • How to Install a 6'8" Bi-Fold or Bypass Door Frame
  • How to Install an Apartment Entry Slab Door with a Sweep
  • How to Install a Pre-Hung Door
  • How to Install a House-to-Garage Door
  • How to Install a Cased Opening
  • How to Install a Pocket Door for a Perfect Finish
  • How to Install Bifold Doors
  • How to Adjust an Exterior Door
  • How to Install Barn Doors
  • How to Install Bypass Doors
  • How to Install an Interior Center-Opening or French Door

General Carpentry

13
  • Which Material and Profile Goes Where
  • Exterior Trim Materials
  • Framing and Treated Lumber for the Trim Carpenter
  • Lumber Sizing, Grading, and Milling
  • Sheet Goods and Engineered Materials
  • Wood Species Field Guide
  • Choosing Nail Guns and Air Tools for Finish Carpentry
  • How the Guide Library Is Organized
  • Difficulty Levels Explained: What Levels 1, 2, and 3 Mean
  • Carpenter Hand Tools: What to Buy for Your Own Bag
  • Finish Carpentry Cheat Sheets and Printable References
  • How to Set a Barn Door Floor Guide
  • How to Trim a House, Start to Finish

Hardware

10
  • How to Install a Peep Sight
  • How to Install Privacy Pocket Door Hardware
  • How to Install Cabinet Hardware
  • How to Install a Window Blind in an Apartment
  • How to Install a Shower Rod in an Apartment Unit
  • How to Install Self-Closing Hinges
  • How to Install a Coat Hook
  • How to Install Address Numbers Total
  • How to Install Bath Accessories
  • How to Install a Lockset on a Door

Miscellaneous

2
  • How to Install Stock Trim Material
  • How to Install a Fire Extinguisher Cabinet

Moldings

28
  • Wall Treatments and Fireplace Trim Vocabulary
  • Trim Profiles: Casing, Base, and the Molding Families
  • How to Case Ganged Windows
  • How to Install Baby Shoe at Stair Nosing
  • How to Build a Custom Decorative Header
  • How to Install Crown Molding
  • How to Install an Interior Window Sill or Stool
  • How to Install a Transom Window Above a Door
  • Install Pre-Cut Shoe Molding, Nail Down
  • Make a Plinth Block
  • Install a Plinth Block at the Base of Casing
  • How to Install a Mullion Strip
  • Interior Window Frame for Tall Openings (120″ and Above)
  • Interior Window Frame for Medium-Tall Openings (90″ to 119″)
  • How to Install an Interior Window Frame
  • Window Jamb Extension for Tall Windows (120″ and Above)
  • Window Jamb Extension for Medium-Tall Windows (90″ to 119″)
  • How to Install a Window Jamb Extension Like a Pro
  • How to Case Tall Windows (10 Feet and Above)
  • Window Casing for Medium-Tall Windows (90″ to 119″)
  • How to Case One Side of an 8'0" Door
  • How to Case One Side of a 6'8" Door
  • How to Build an Attic Access Cover
  • How to Install Baseboard
  • How to Case One Side of an Exterior Door
  • How to Install Base Shoe
  • How to Case a Window
  • How to Install a Door Jamb Extension

Specialty

21
  • How to Install Vertical Shiplap
  • How to Install Herringbone Shiplap
  • How to Install Diagonal Shiplap
  • How to Install Chevron Shiplap
  • How to Hang a Mantel
  • How to Install LVP Flooring
  • How to Build a Floating Shelf
  • How to Install Decorative Wall Treatments
  • How to Install Ceiling Beams
  • How to Install a Butcher Block Countertop
  • How to Install a Mirror
  • How to Install Cabinets
  • How to Install Shiplap on a 3-Sided Fireplace Under 10'
  • How to Install Shiplap, 0' to 7'
  • How to Install Shiplap on a Ceiling
  • How to Install Shiplap 3 side fireplace wrap above 15'
  • How to Install Shiplap 3 side fireplace wrap 10'-15'
  • How to Install Shiplap on Walls Over 14 Feet Wide
  • How to Install Shiplap on a Wall 7 to 14 Feet Wide
  • How to Install a Locker Bench with Hooks
  • How to Install a Locker Bench with Cubbies

Stairs/Handrails

21
  • Stair Parts and Railing Vocabulary
  • How to Install Horizontal Bar Railing
  • How to Build a Handrail for Metal Balusters Like a Pro
  • How to Install a Wood Wall Cap
  • How to Install Wood Nosing
  • How to Install a False Tread Stair End Cap
  • How to Install Notched Skirt Boards
  • How to Install a Handrail Fitting
  • How to Install a Handrail Bracket
  • How to Install a Garage Step Handrail
  • How to Build Garage Steps with Closed Risers
  • How to Build Garage Steps with 3 Stringers (Open Risers)
  • How to Install a Straight Stair Riser
  • How to Install a Mitered Stair Riser
  • How to Secure and Finish a Stair Baluster
  • How to Install Stair Skirt Boards: Drop-In Method
  • How to Build a Wall-Mount Handrail
  • How to Mount a Handrail to the Wall
  • How to Install a Newel Post
  • How to Build Garage Steps with a Landing
  • How to Build Garage Steps: Safe, Code-Compliant Stairs
  • Home
  • Learn
  • Stairs/Handrails
  • How to Install Wood Nosing
View Categories

How to Install Wood Nosing

0:00 / 4:49
  • View as Markdown Open this page as plain Markdown (opens in a new tab)
  • Open in ChatGPT Ask questions about this page (opens in a new tab)
  • Open in Claude Ask questions about this page (opens in a new tab)
  • Open in Google AI Studio Ask questions about this page (Google account required) (opens in a new tab)
On this page
IntroductionBefore You BeginPrerequisitesWhat You Need To KnowToolsMaterialsInstallation StepsStep 1. Measure and Cut NosingStep 2. Apply AdhesiveStep 3. Position and Secure NosingStep 4. Check for Level and AlignmentStep 5. Clean Up Excess AdhesivePro TipsCommon MistakesQC / Punch ChecklistRelated Guides

Stairs/Handrails Skill Level: Advanced (Level 3) · Estimated Time: 15-20 Minutes Per Linear Foot

Introduction #

Installing wood nosing is a critical step in finishing stairs, whether you're working on new construction or a remodel. For background on stair parts and terms, This Old House keeps a solid stair reference library; this guide covers how we do it. The nosing not only enhances the visual appeal of the staircase but also provides a safe edge for foot traffic. In a production setting, speed and consistency are key, but the single most important concept to master is achieving a seamless fit between the nosing and the tread. This ensures longevity and reduces the likelihood of callbacks.

Wood nosing should be installed after the treads are in place and before any finish work on the risers or stringers. The goal is to create a smooth transition that is both aesthetically pleasing and functional. Properly installed nosing will align perfectly with the treads, providing a uniform reveal and a professional finish.

Before You Begin #

Before you install wood nosing, confirm that the following prerequisites are complete.

Prerequisites #

  • Treads are securely installed and level.
  • Stringers and risers are in place and plumb.
  • All rough framing is complete and inspected.

What You Need To Know #

When you install wood nosing, understanding these core techniques will save you time and prevent callbacks.

  • Ensure the nosing overhang is consistent, typically 1-1/4 inches.
  • Use a quality adhesive in addition to nails to prevent squeaks.
  • Align the grain direction of the nosing with the treads for a uniform look.

Tools #

  • Miter Saw - for precise cuts on nosing ends.
  • Brad Nailer - for securing the nosing to the tread.
  • Measuring Tape - to ensure accurate overhang and alignment.
  • Carpenter's Square - to check for squareness and alignment.

Materials #

  • Wood Nosing - typically oak or maple, sourced from lumber suppliers.
  • Construction Adhesive - for securing nosing to treads.
  • 1-1/4 inch Brad Nails - for fastening nosing to the tread.

Installation Steps #

Step 1. Measure and Cut Nosing #

Measure the width of each tread and cut the nosing to fit using a miter saw. Ensure the ends are square and the length is precise to avoid gaps.

  • Measure twice to confirm accuracy.
  • Cut with the grain direction in mind for aesthetics.

Step 2. Apply Adhesive #

Apply a bead of construction adhesive along the top edge of the tread where the nosing will sit. This helps prevent squeaks and ensures a strong bond.

  • Use a consistent bead to avoid excess squeeze-out.

Step 3. Position and Secure Nosing #

Place the nosing onto the tread, ensuring the overhang is consistent. Use a brad nailer to secure the nosing, driving nails every 8-10 inches.

  • Check alignment frequently to maintain a straight line.
  • Adjust as needed before the adhesive sets.

Step 4. Check for Level and Alignment #

Use a carpenter's square to ensure the nosing is level and aligned with the tread and adjacent nosing pieces.

  • Adjust if necessary while the adhesive is still pliable.

Step 5. Clean Up Excess Adhesive #

Wipe away any excess adhesive that may have squeezed out during installation to ensure a clean finish.

  • Wipe it off with your finger. We do not carry damp cloths on a trim job.

Pro Tips #

Pro Tip: Use a scrap piece of nosing as a template to check the fit before cutting the final piece. This saves time and material.

Pro Tip: If working with pre-finished nosing, use painter's tape along the cut line to prevent chipping.

Common Mistakes #

  • Mistake: Inconsistent overhang - leads to uneven appearance and potential tripping hazard.
  • Mistake: Insufficient adhesive - can cause squeaks and movement over time.
  • Mistake: Poor alignment - results in an unprofessional finish and may require rework.

QC / Punch Checklist #

  • Check that all nosing pieces are securely attached with no movement.
  • Verify that the overhang is consistent across all steps.
  • Ensure there are no visible gaps between the nosing and the tread.
  • Inspect for any adhesive residue and clean as needed.

Related Guides #

  • How to Install Baby Shoe at Stair Nosing
  • How to Install a Mitered Stair Riser
  • How to Install Stair Skirt Boards: Drop-In Method
  • How to Install Notched Skirt Boards
  • How to Install a False Tread Stair End Cap

Reference Photos #

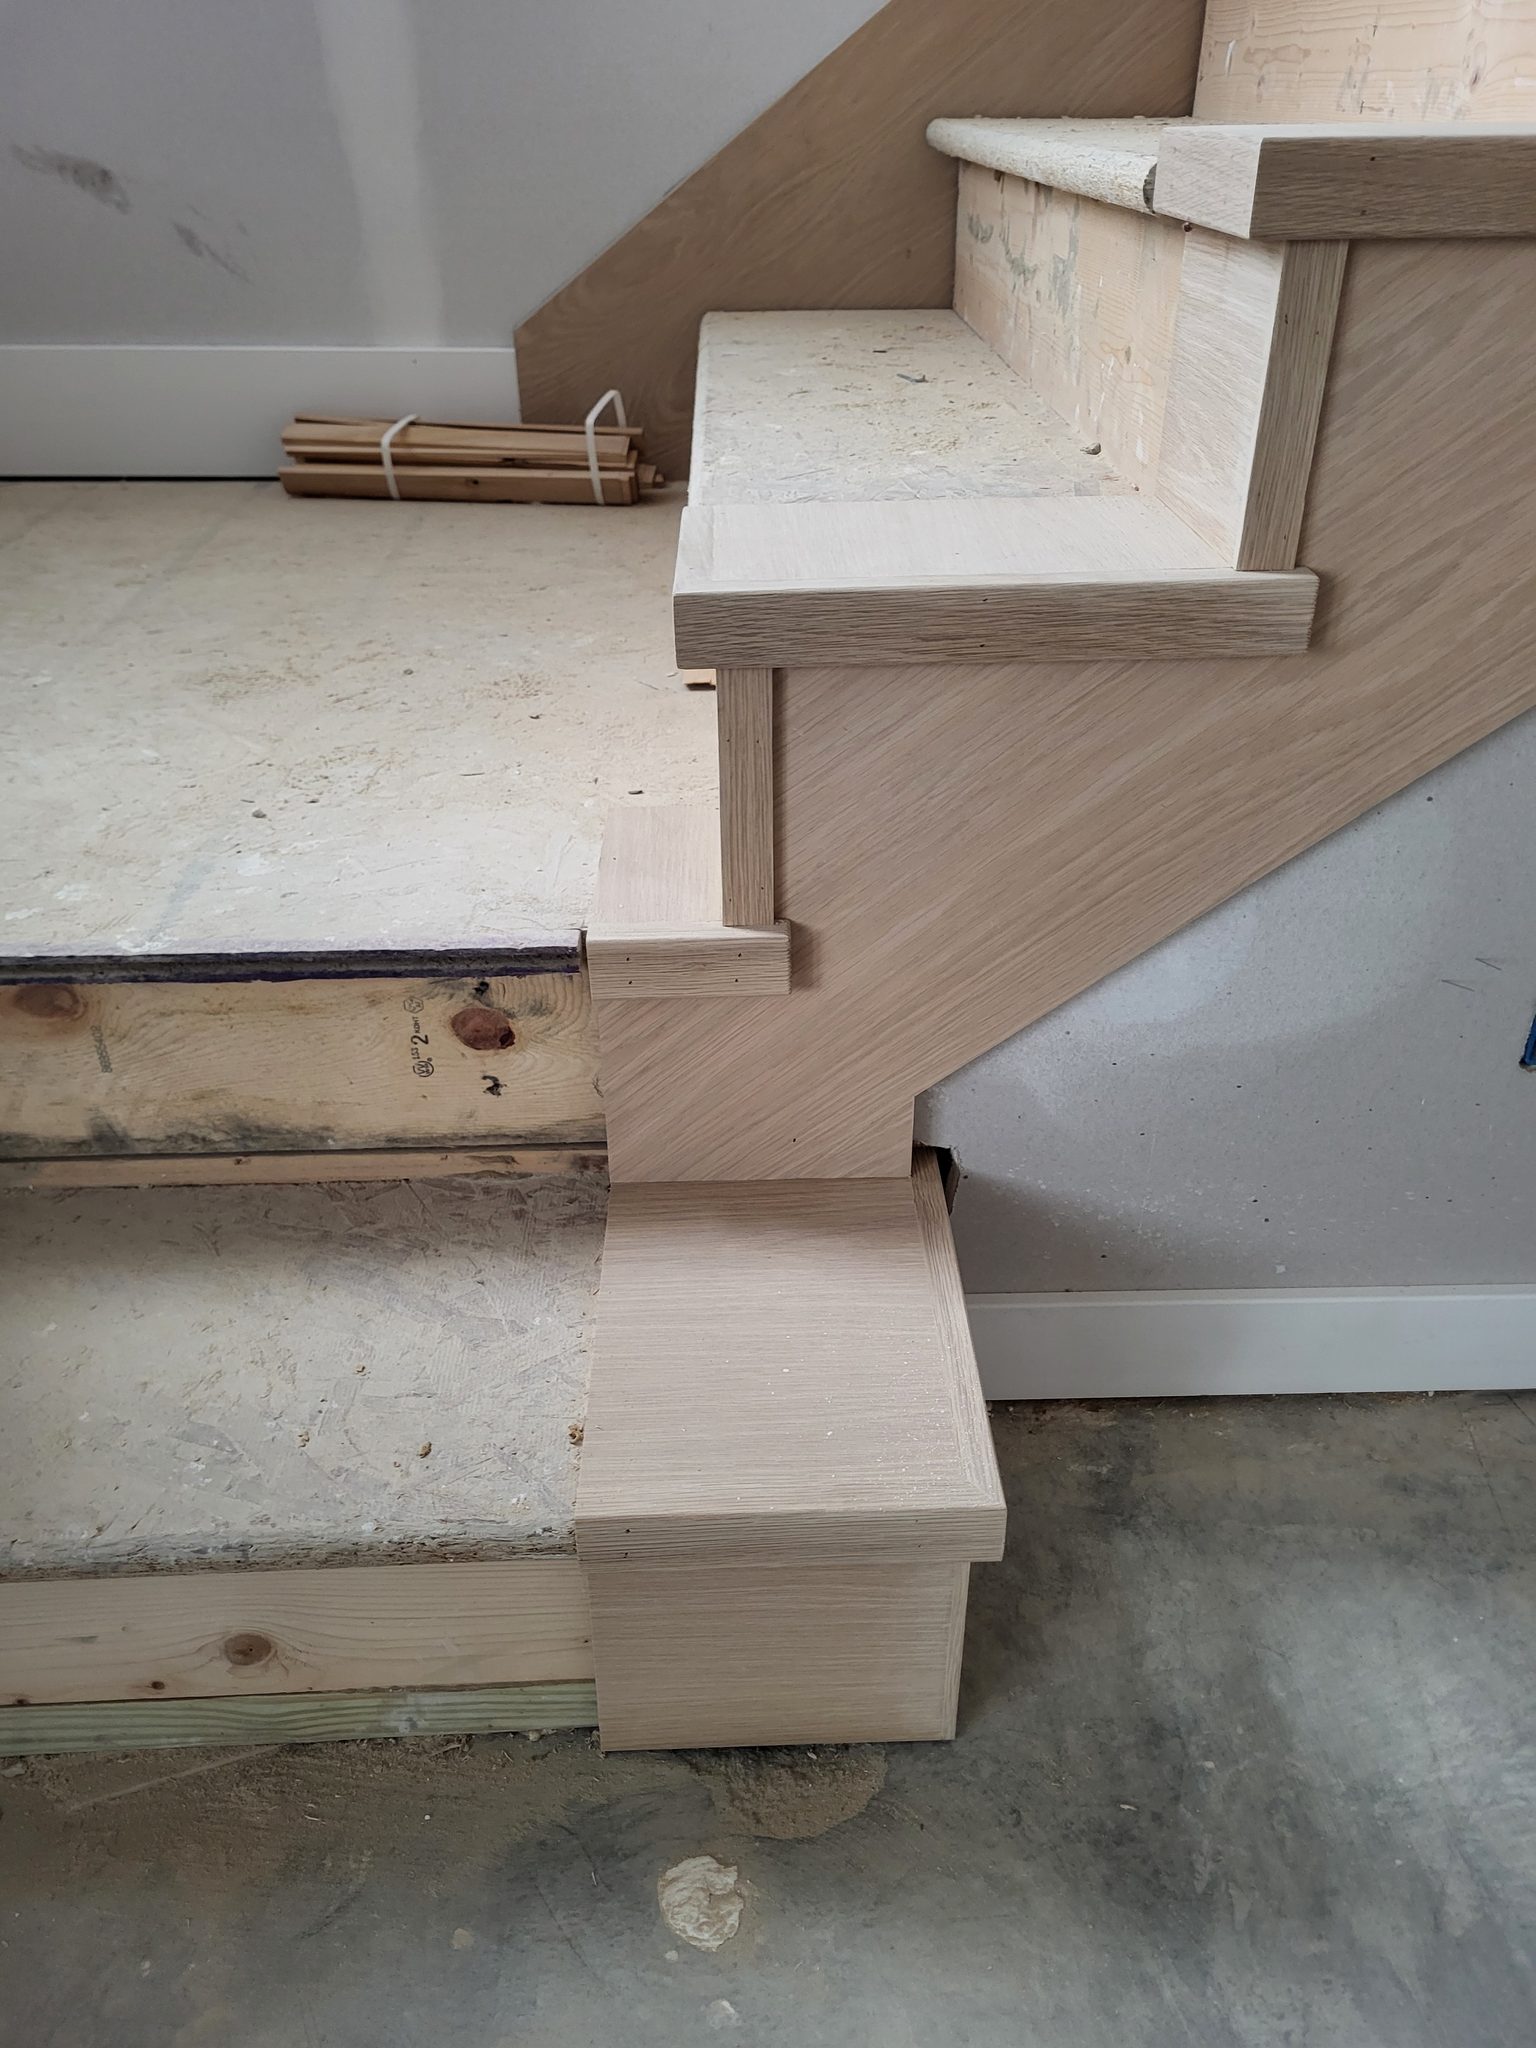
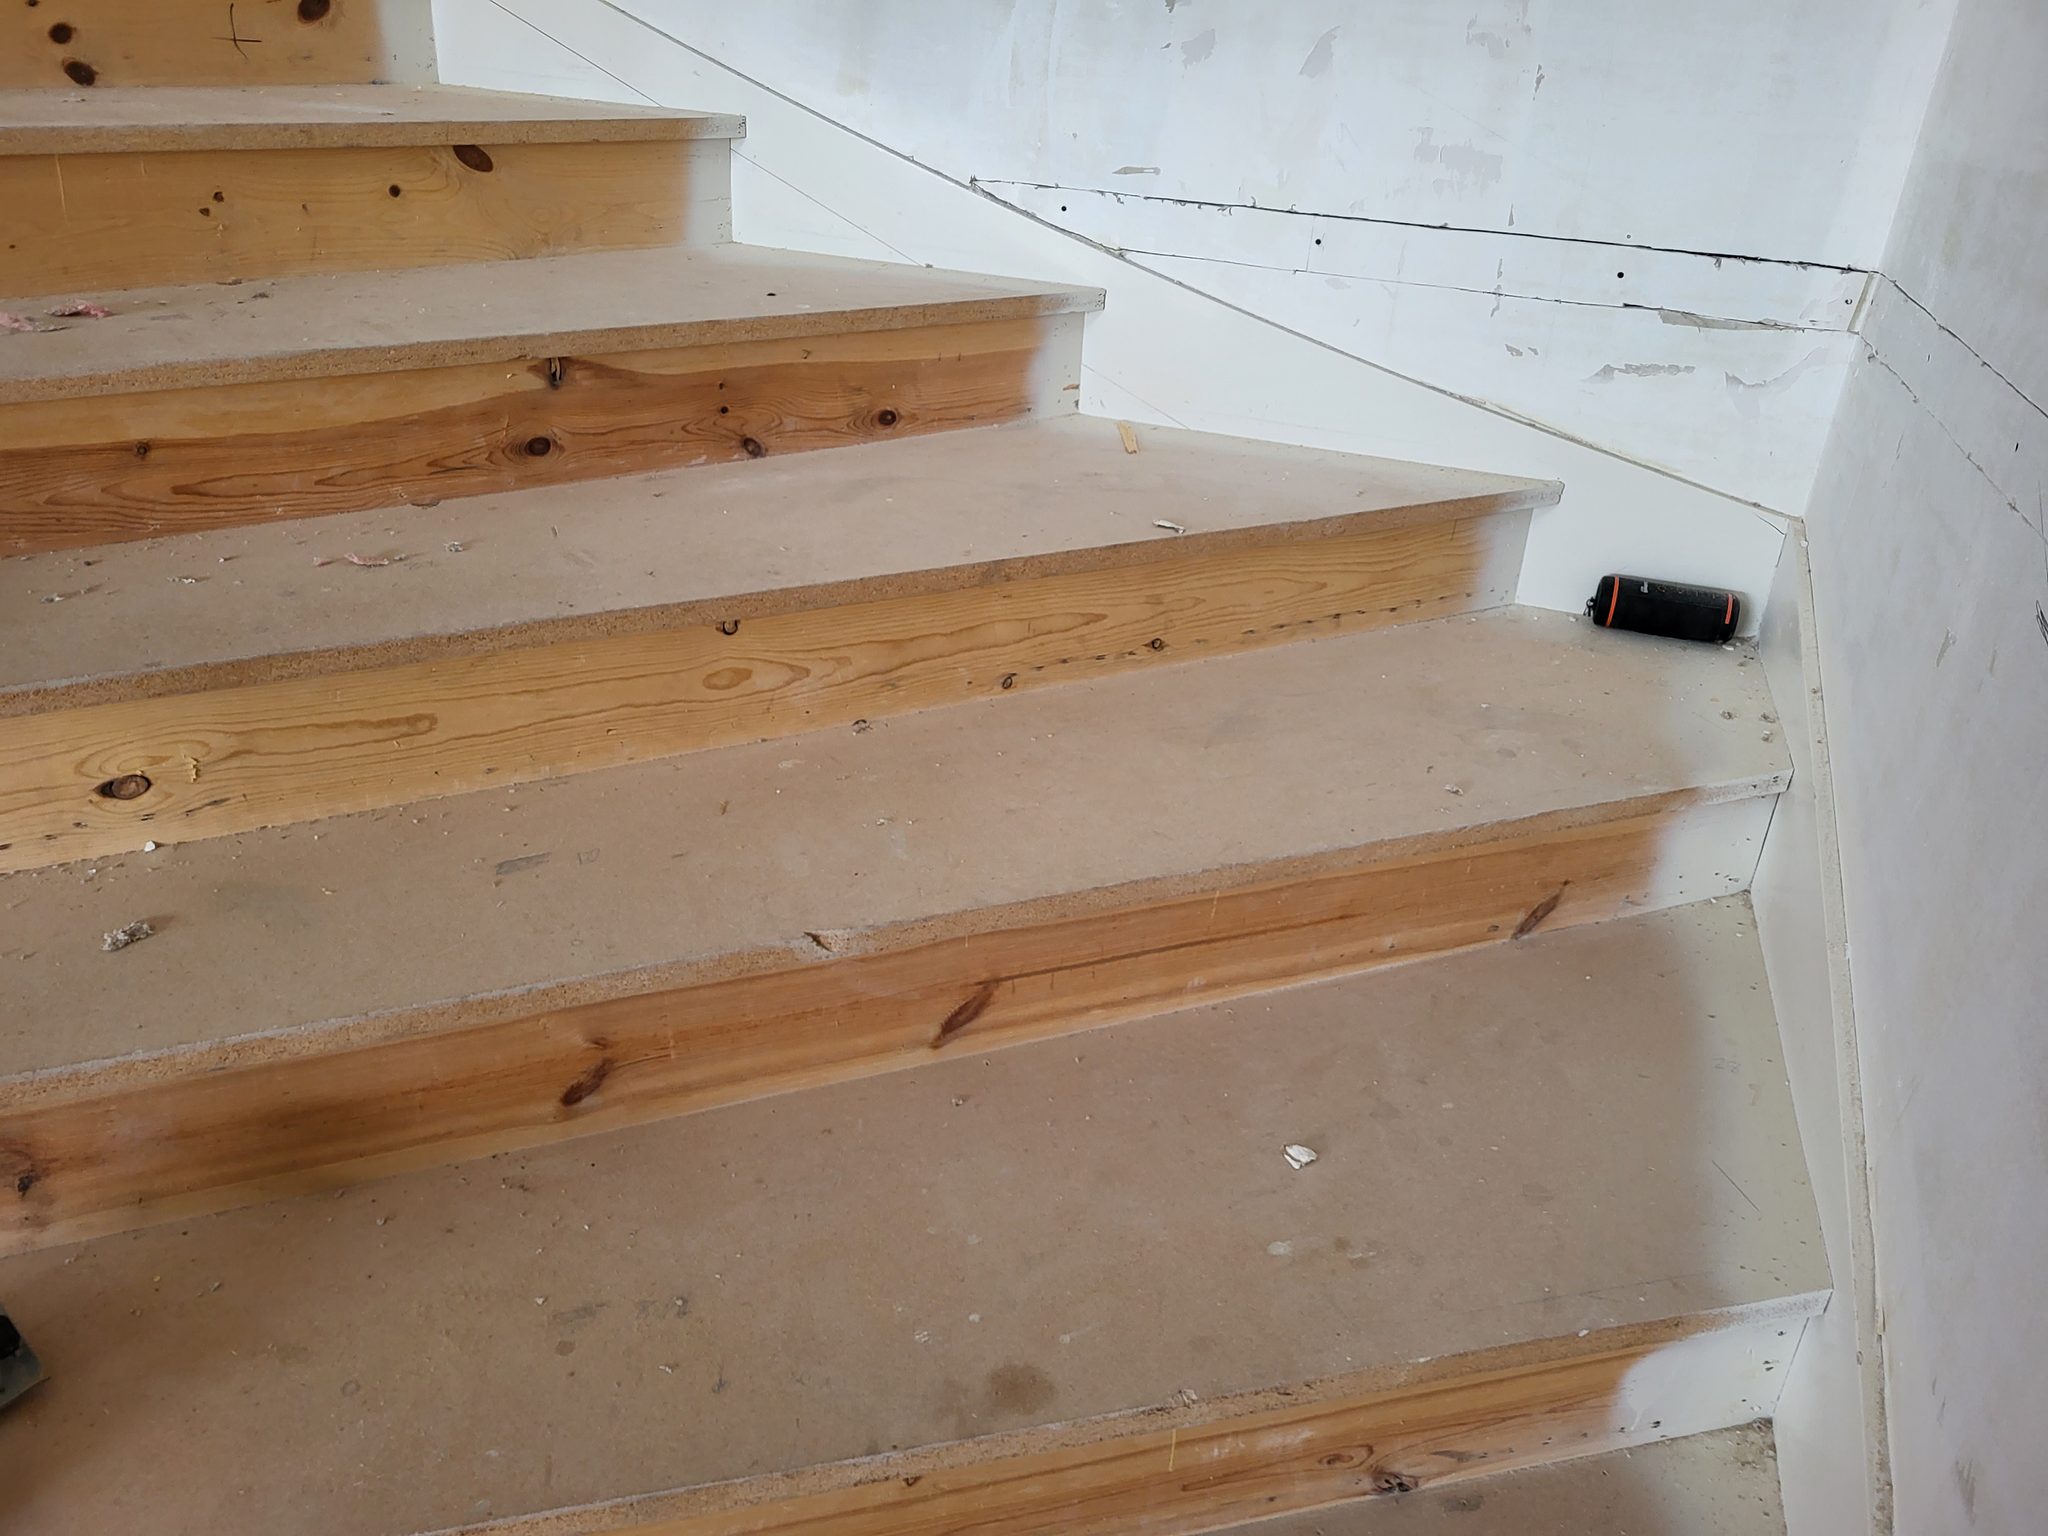
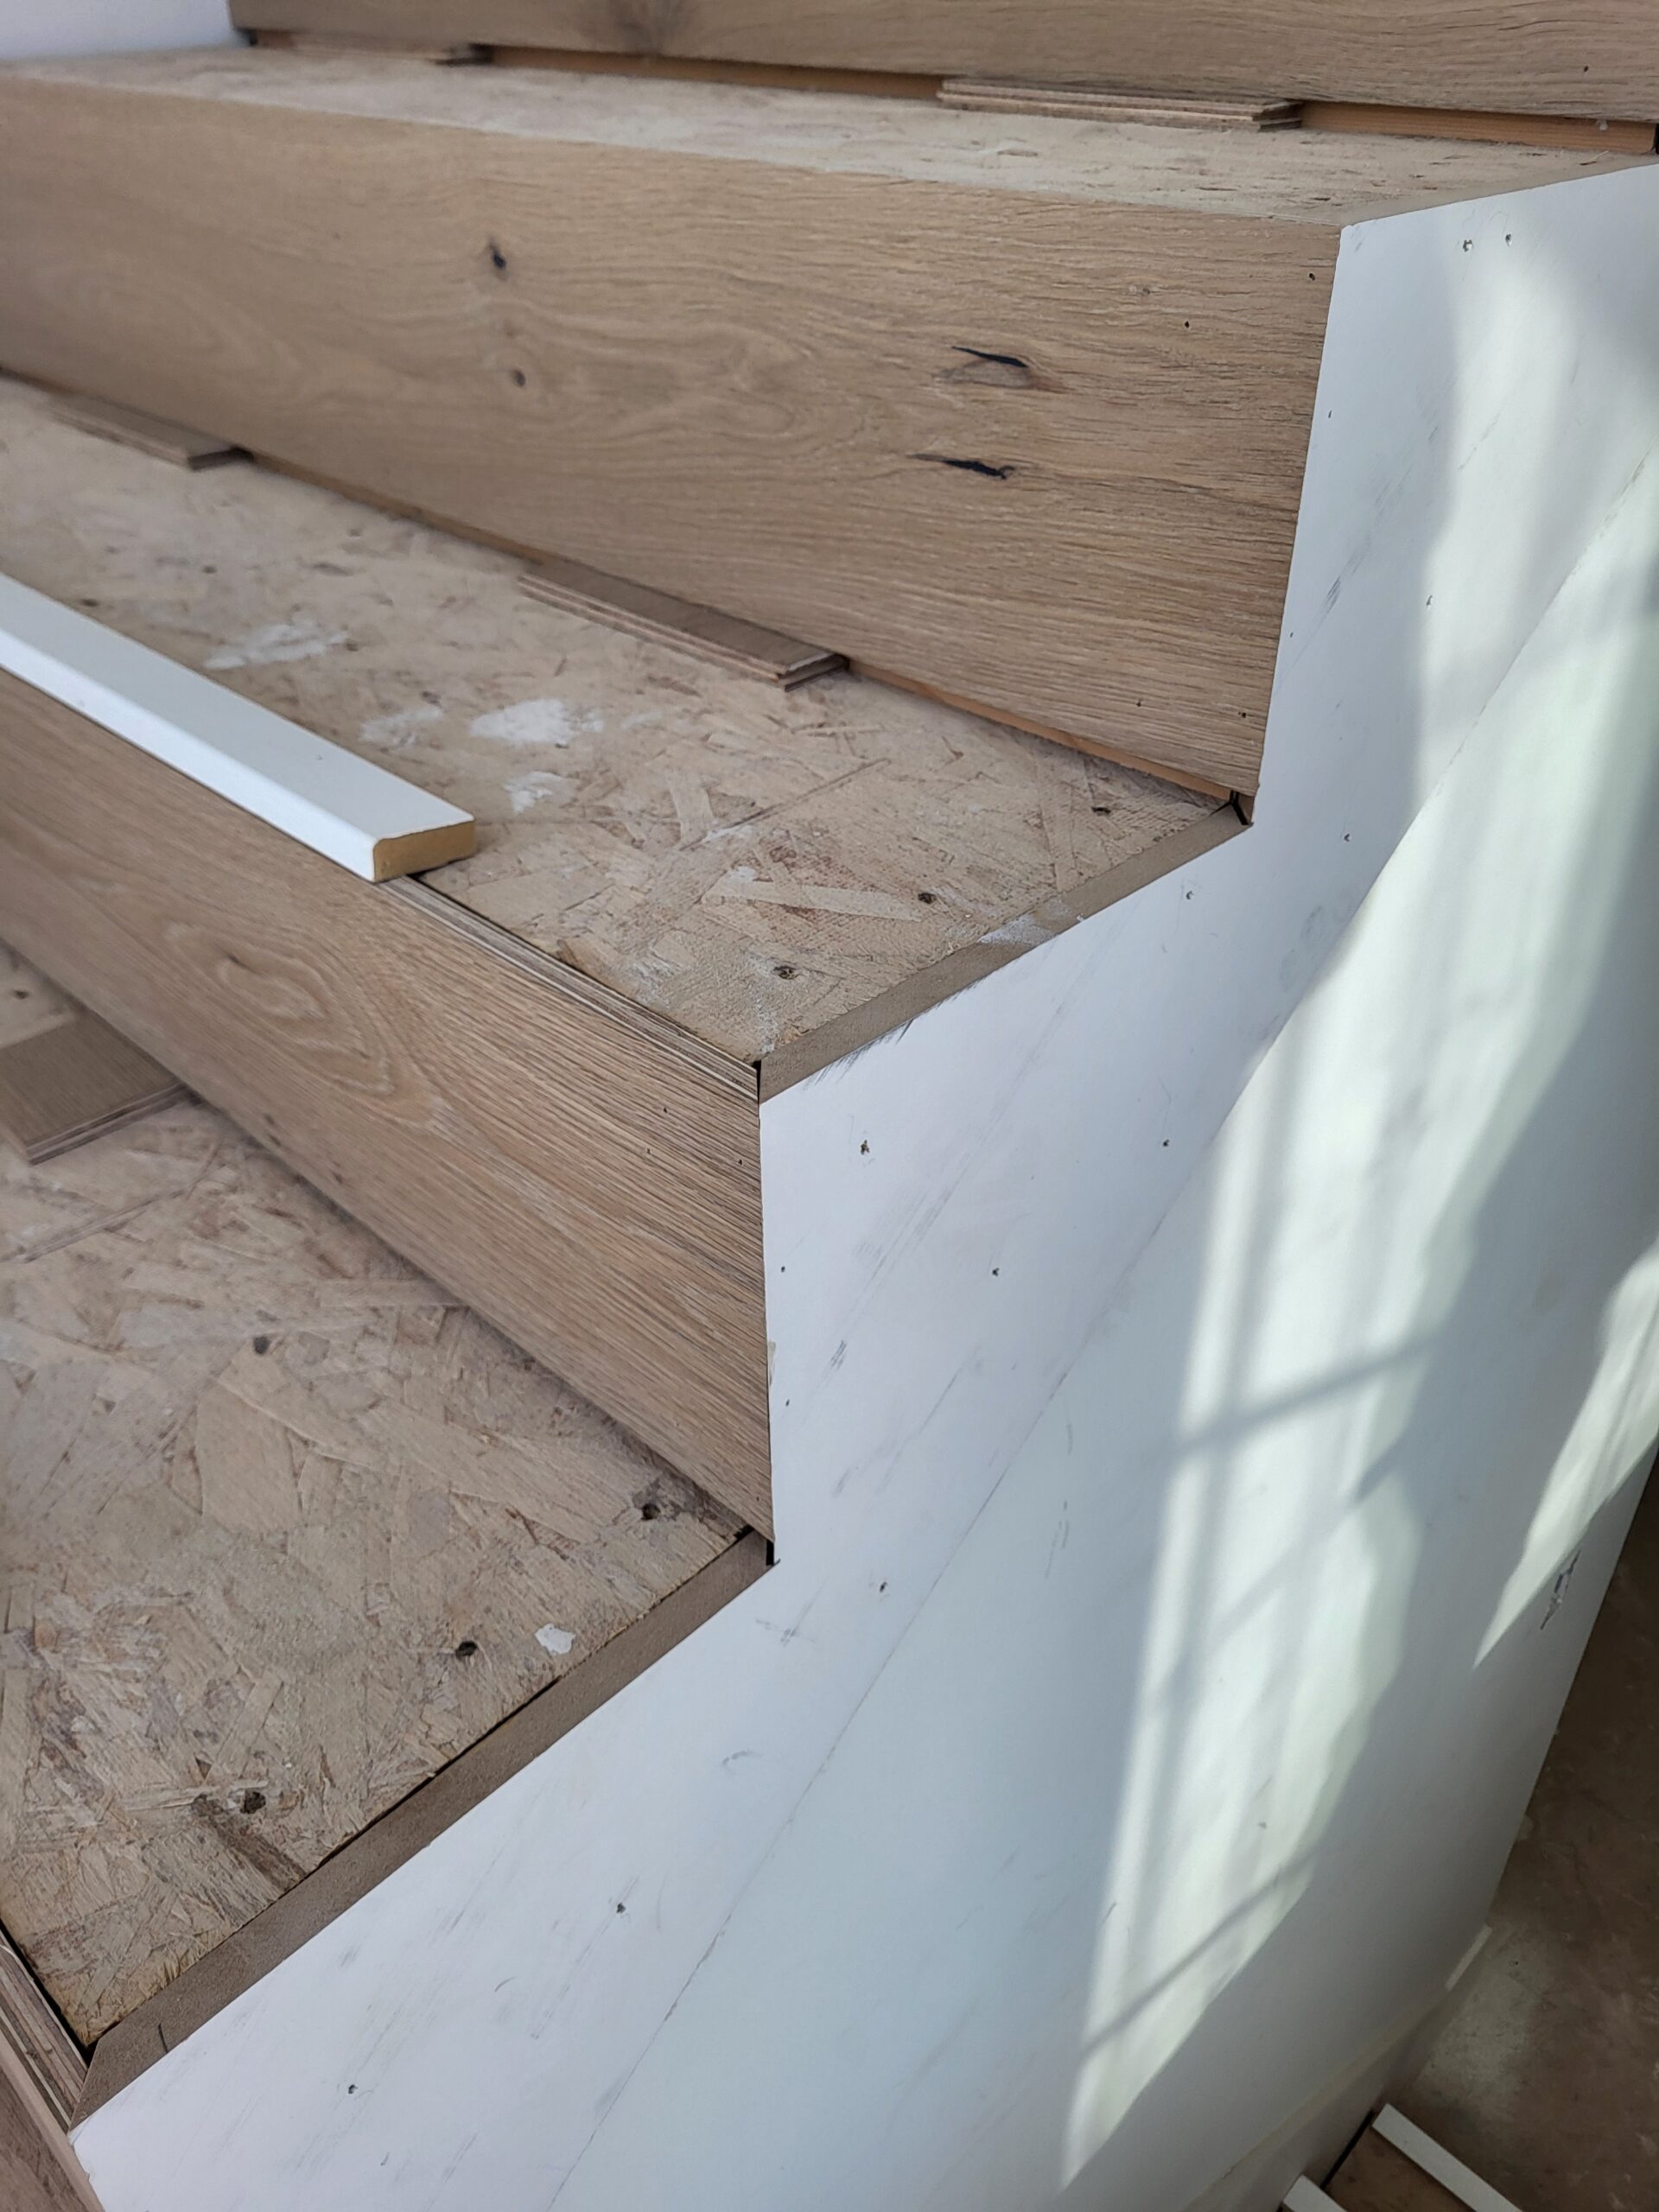
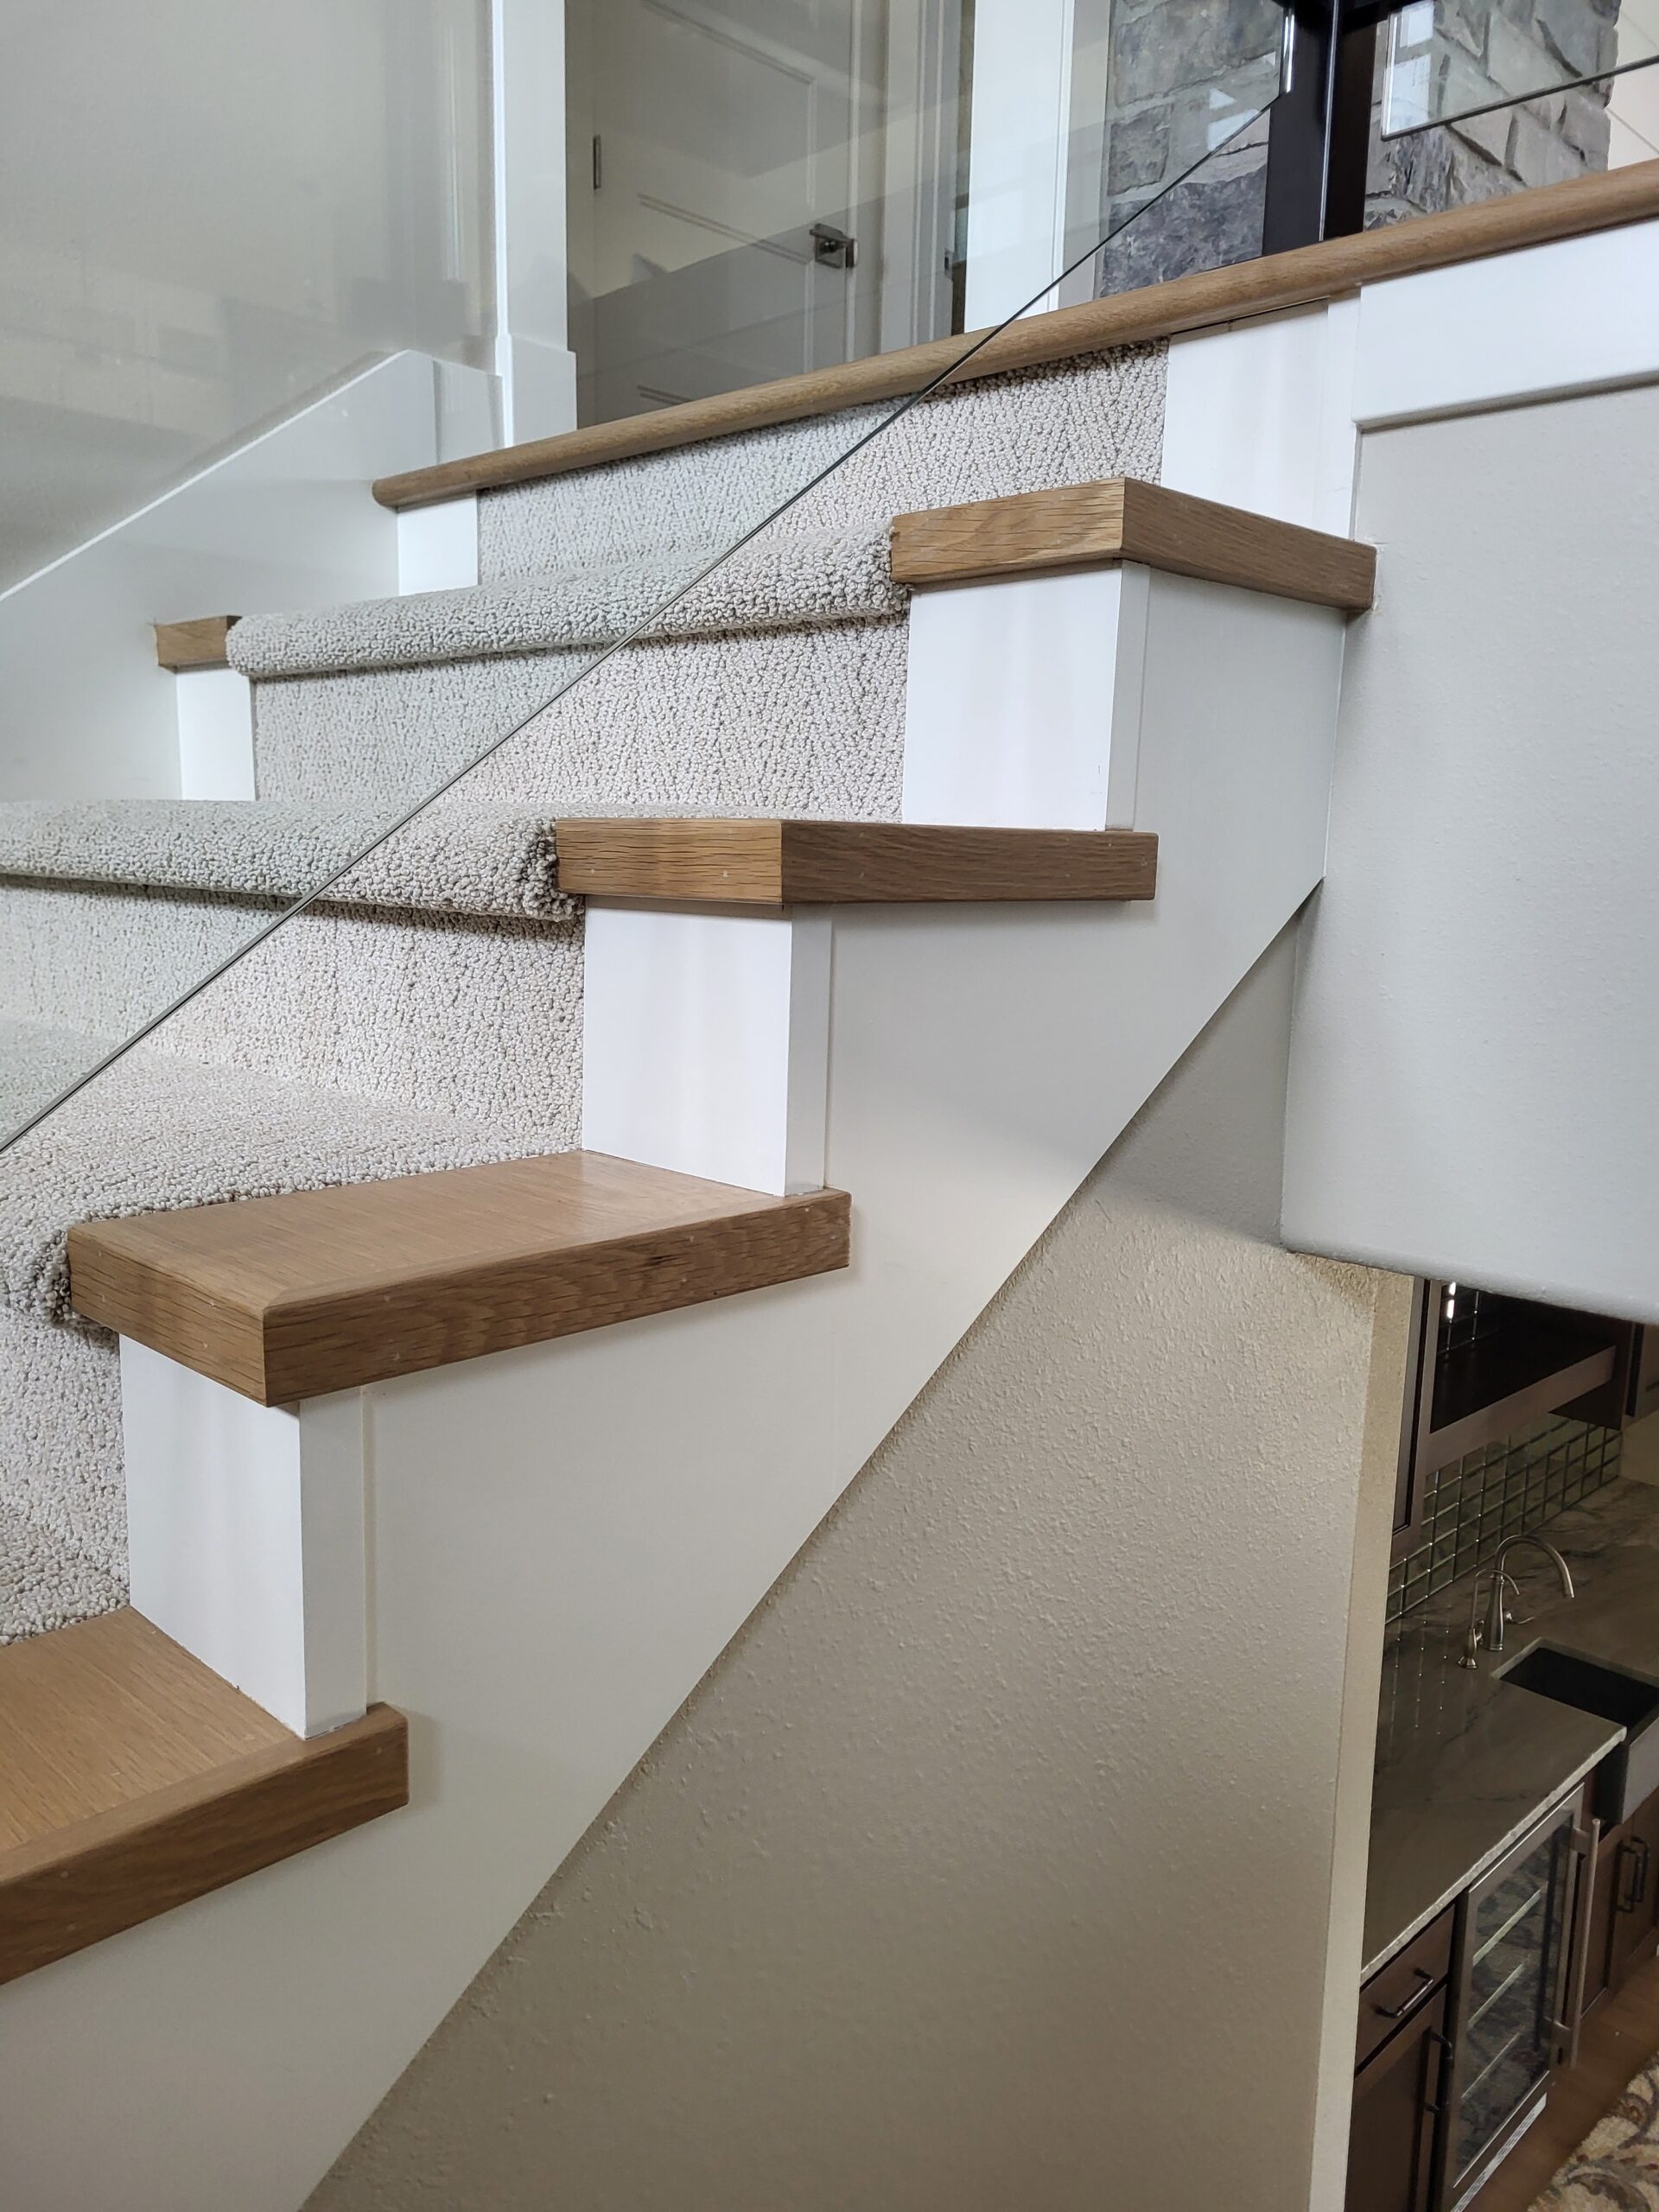
The following photos show examples of this type of work completed in the field. These serve as visual references for quality standards, proper installation techniques, and finished results.

Showing 9 of 9 photos
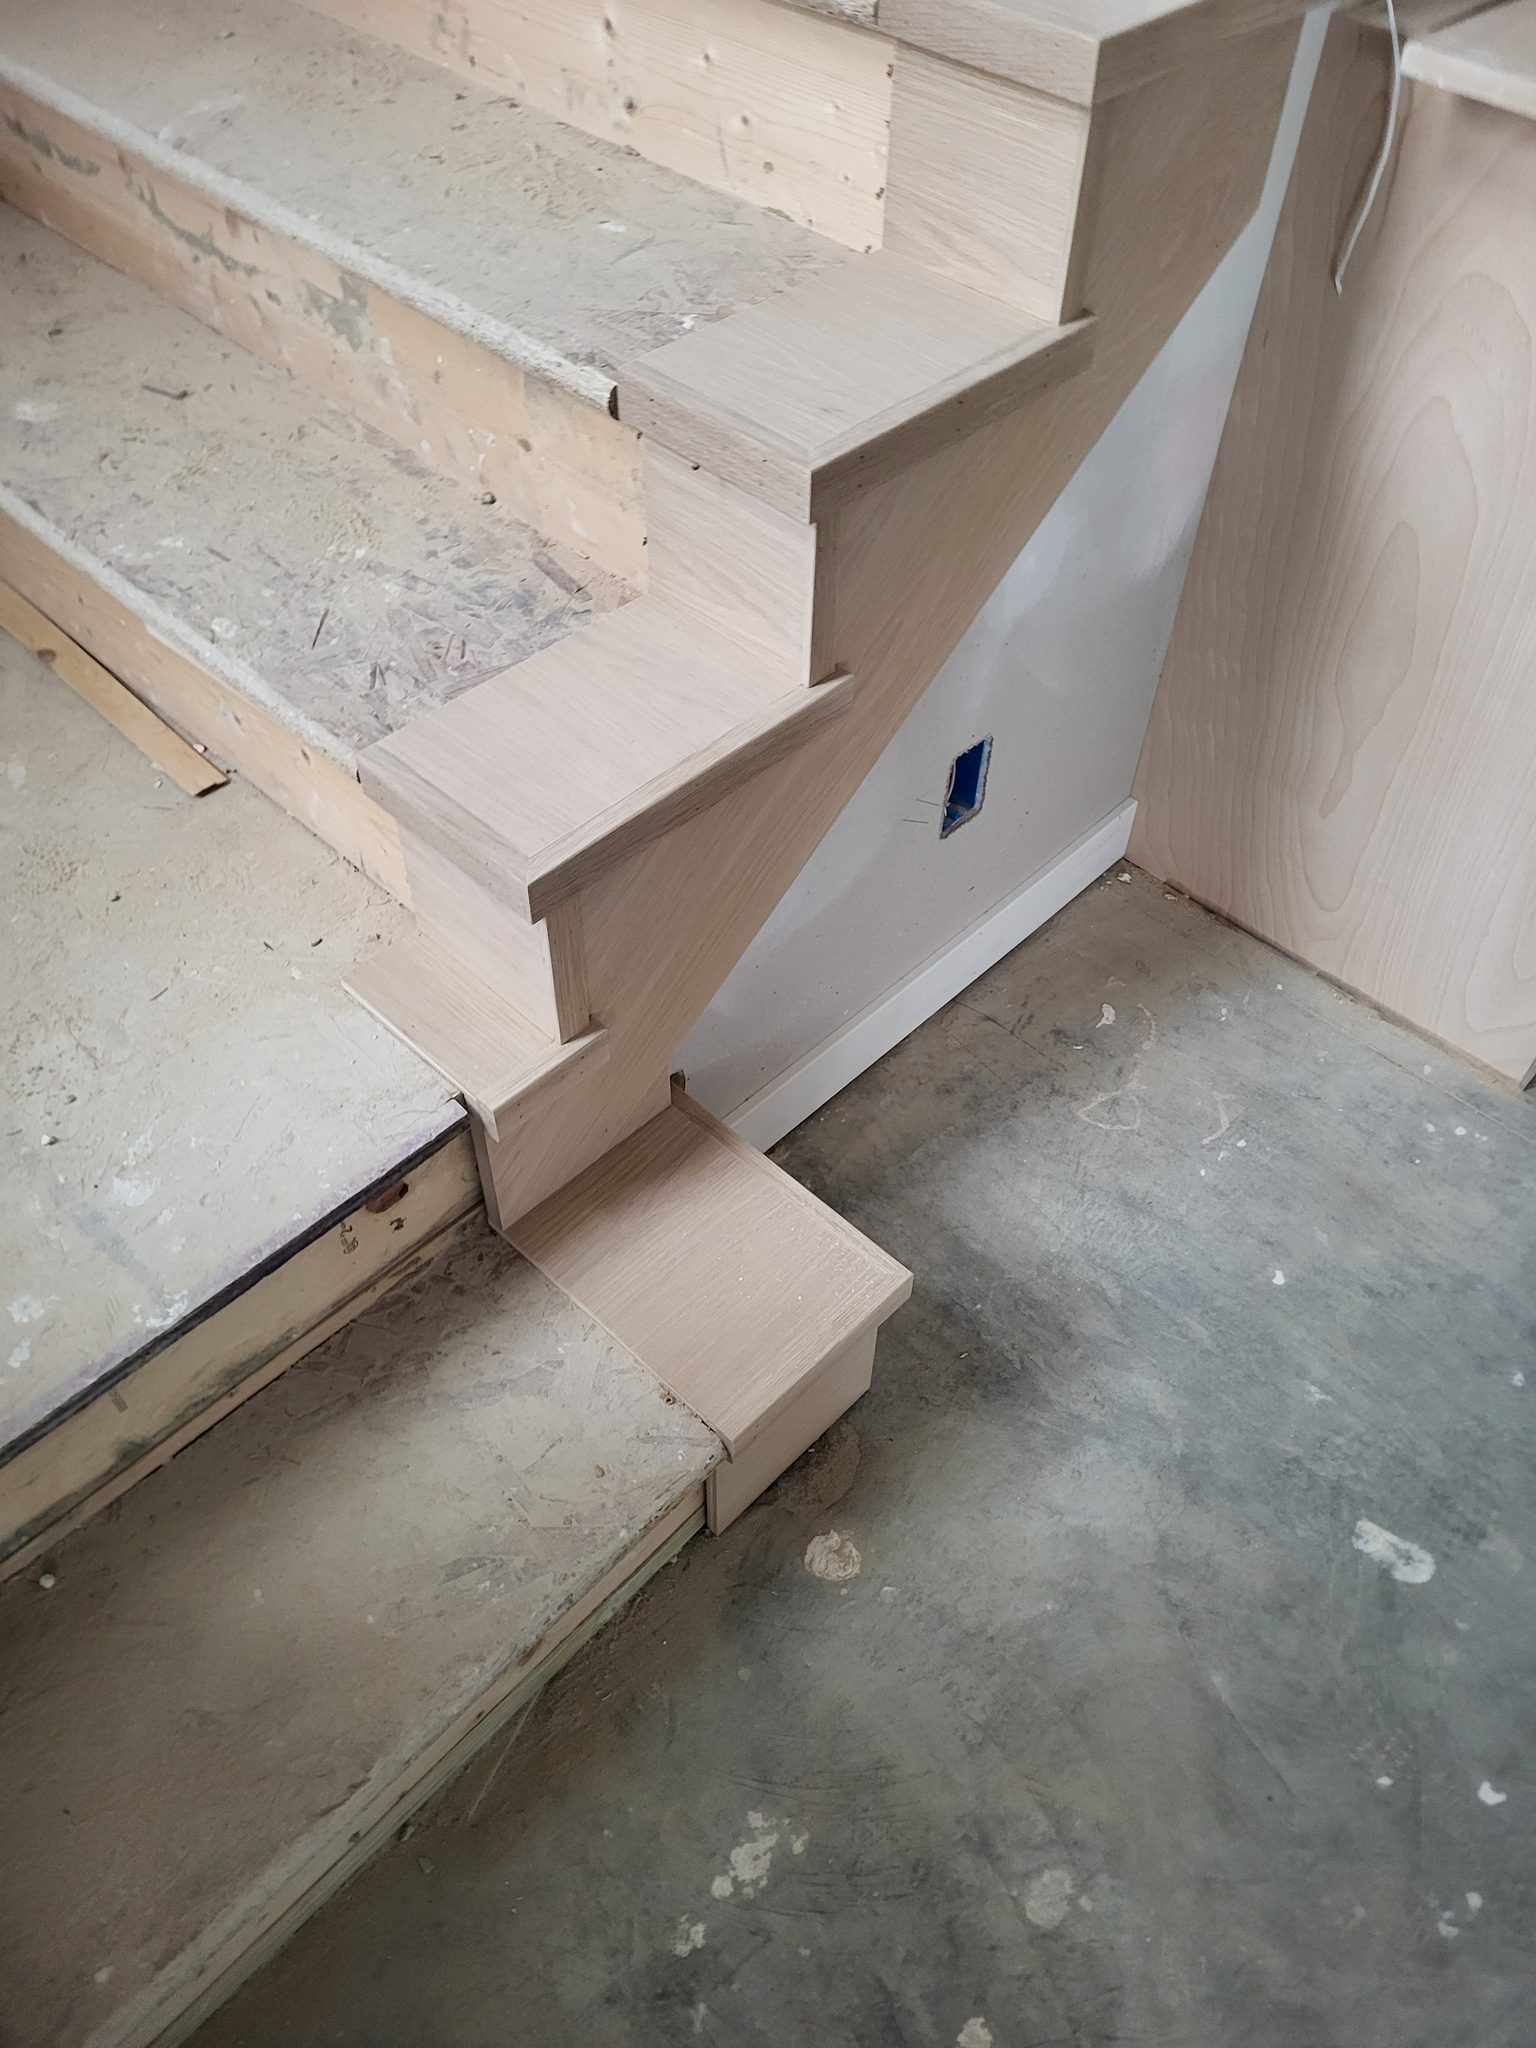
Unfinished wood stair treads turning along the staircase, with a painted wall and a low boxed step below
Unfinished wood stair treads with a mitered step end return at the bottom of the staircase
Raw wood stair treads installed along a straight run, ready for stain
Wood nosing installed on stair tread edge over OSB subfloor, primed trim piece visible nearby
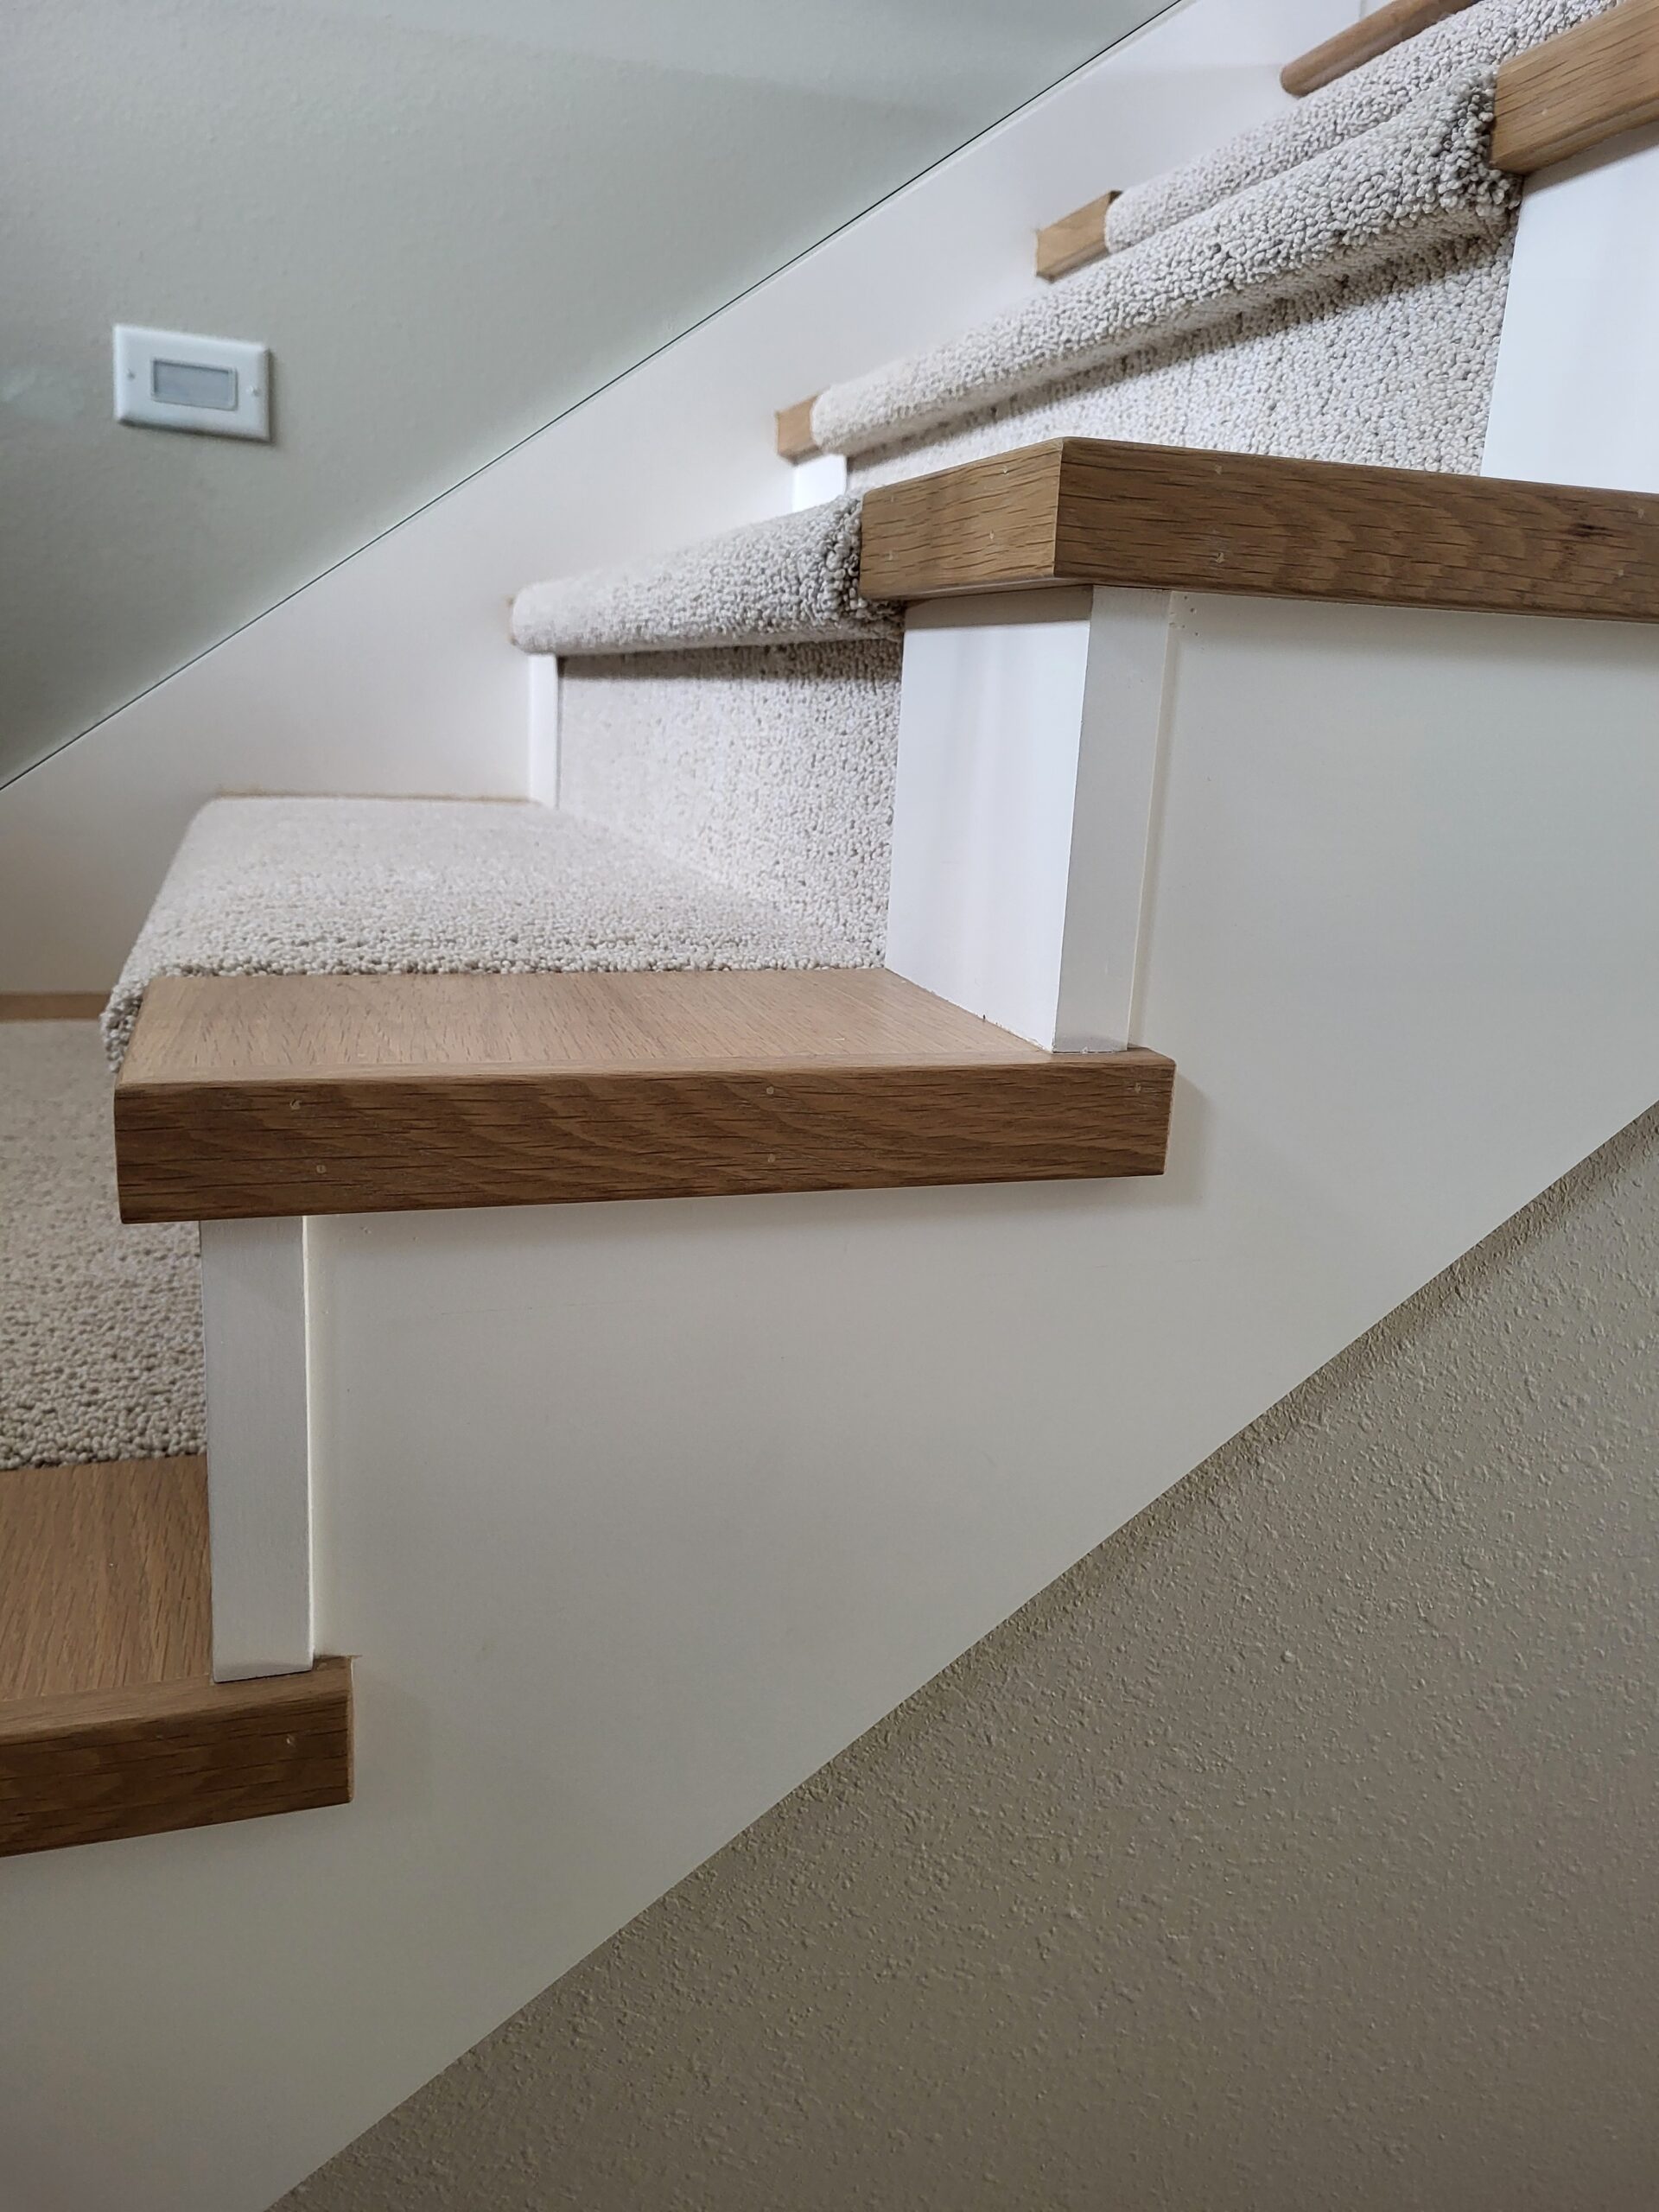
Finished stair with carpet treads, wood nosing caps, glass railing, and painted white risers
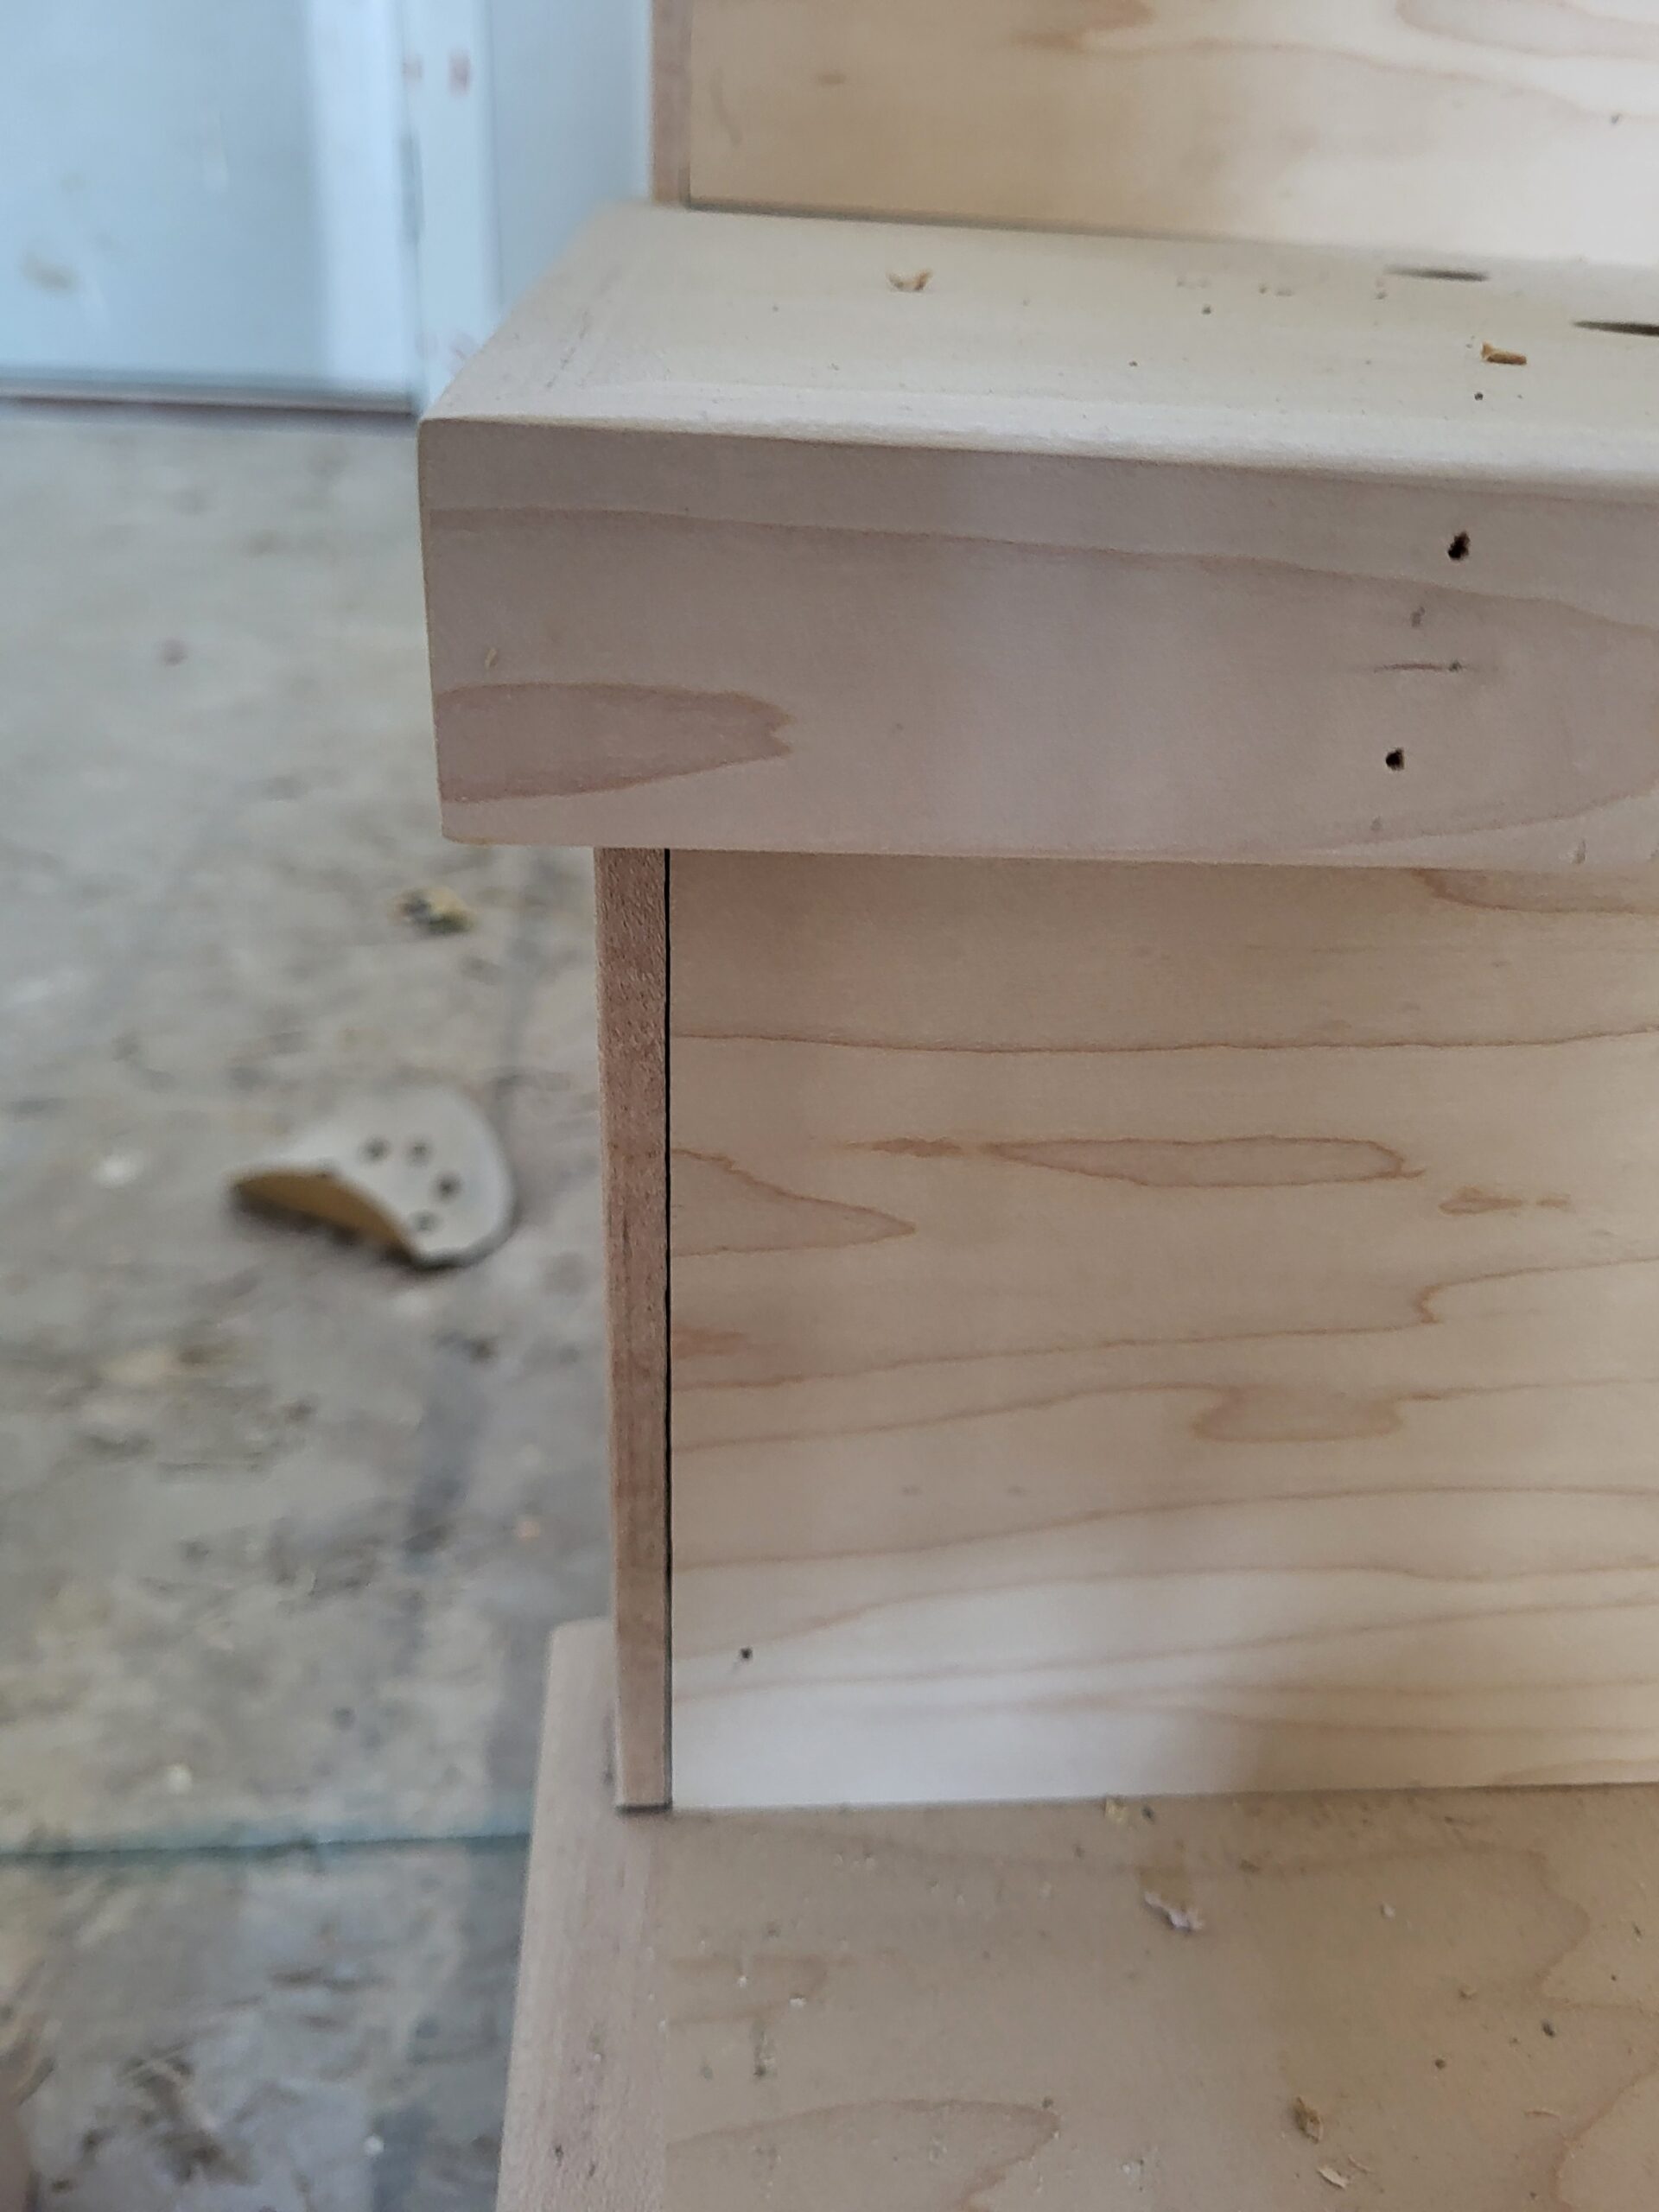
Unfinished wood corner joint with drilled fastener holes, raw construction detail
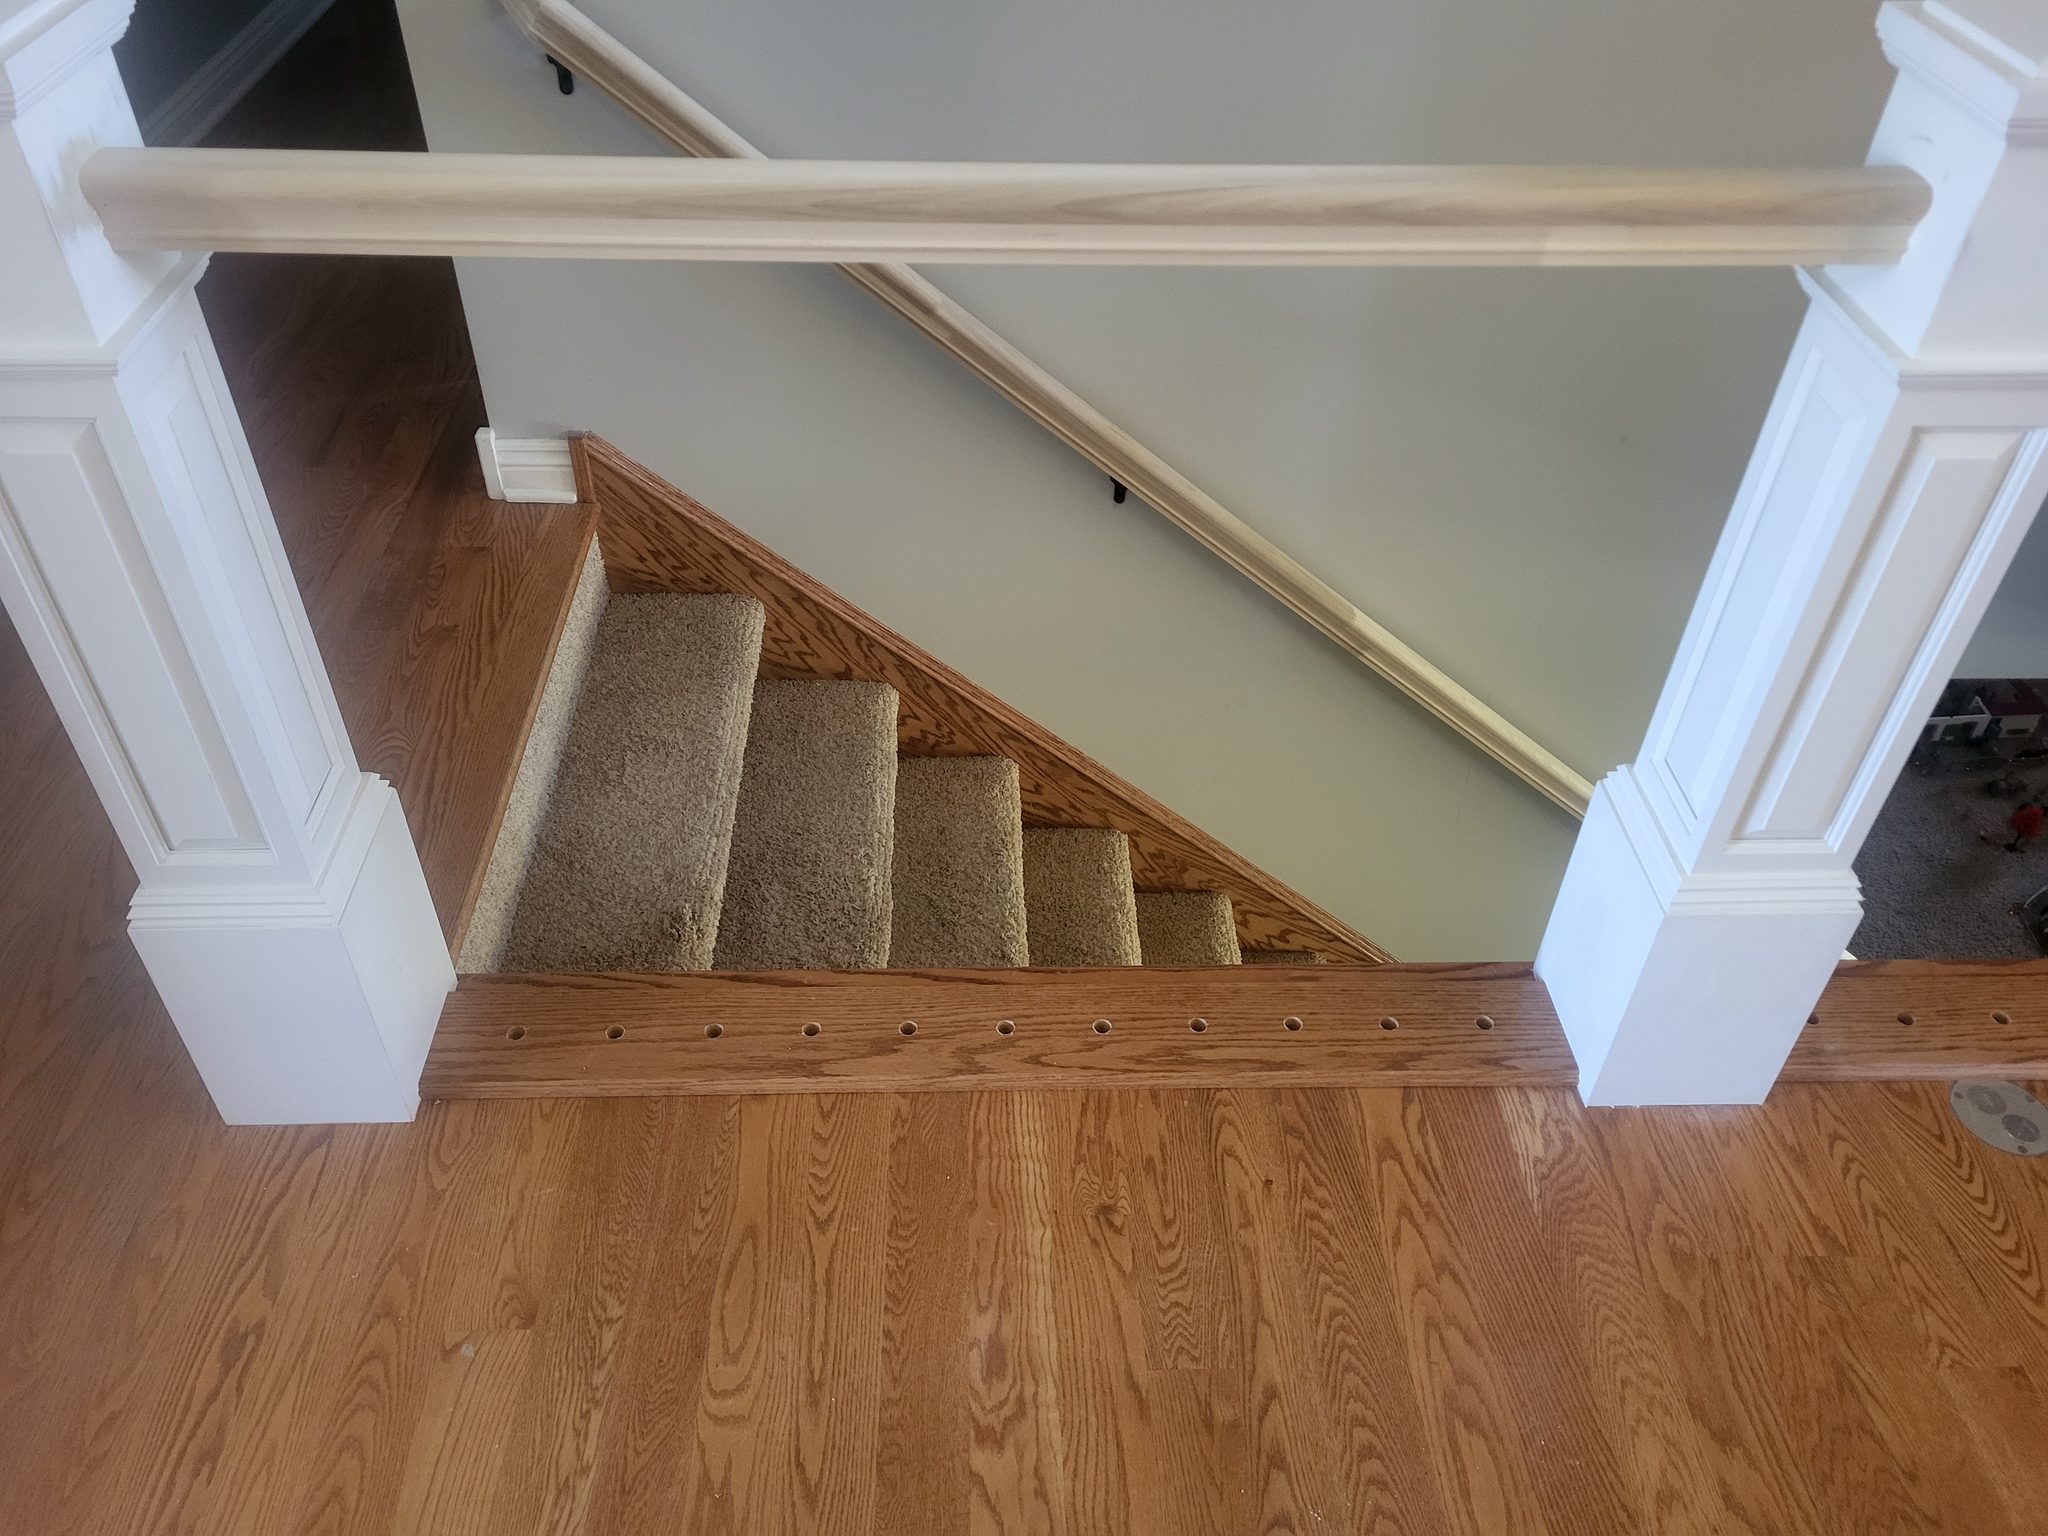
Wood trim at the stair opening with a plugged nail pattern, finished newel posts nearby
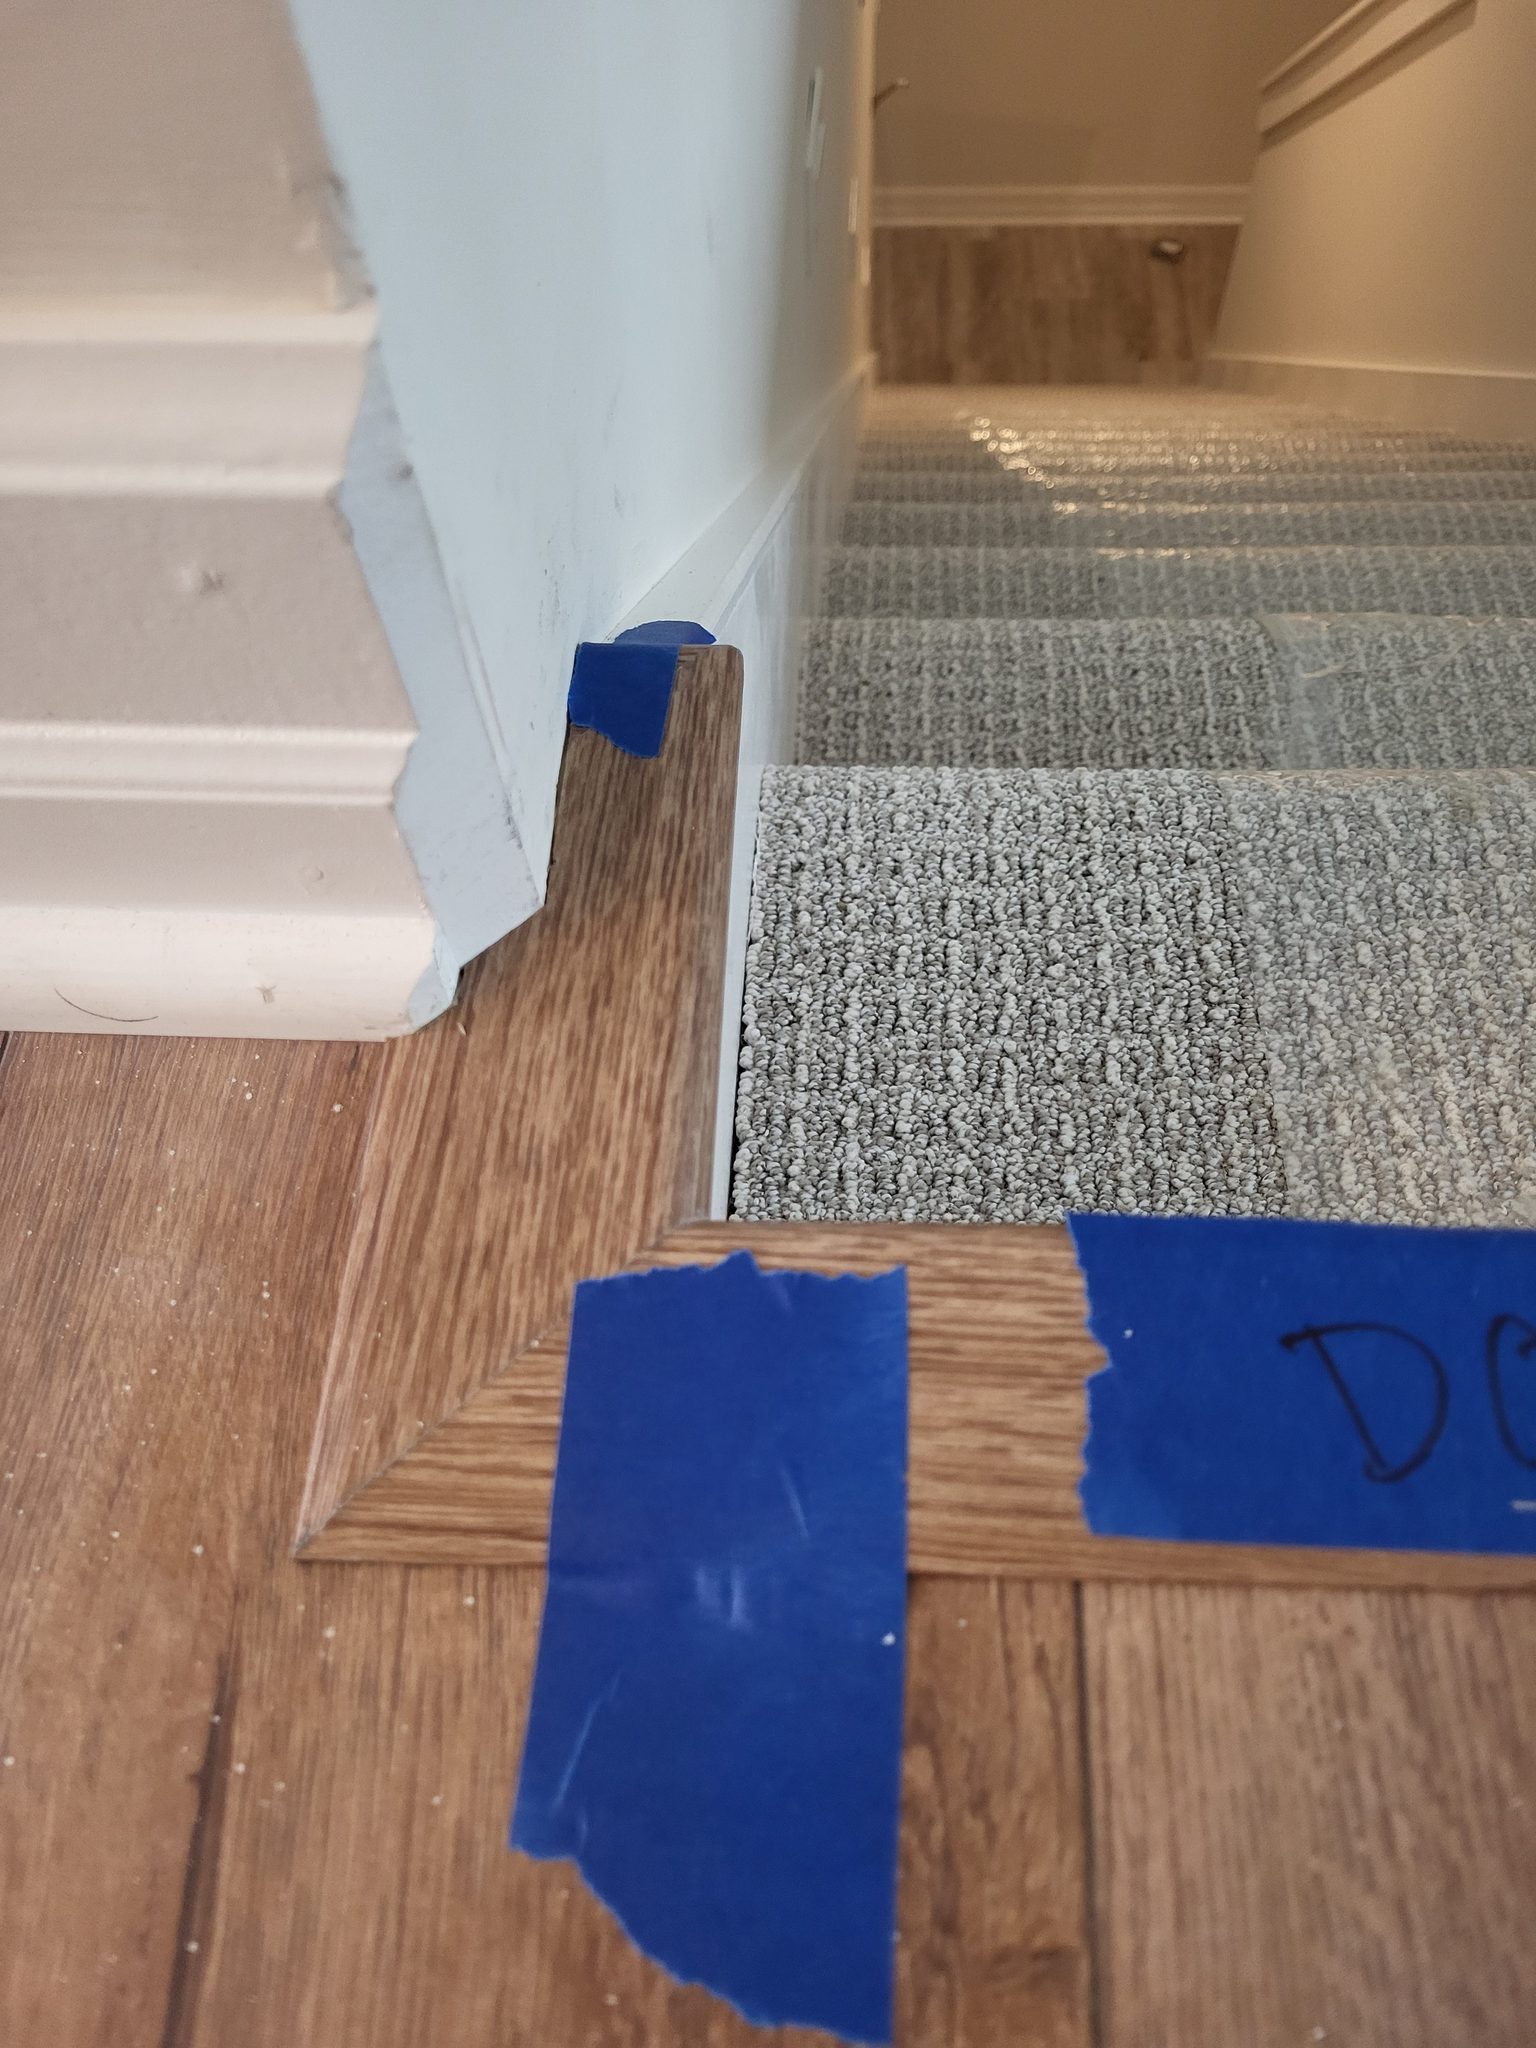
Floor transition trim mitered at a corner where wood-look flooring meets carpeted stairs, tape in place.
Carpeted stair treads with wood nosing caps, a glass panel railing visible along the stairwell
× ‹ ›

Written by David Hospodka, Sun’s Up Construction

David Hospodka learned finish carpentry from his father, alongside his brother Joel, and worked his way through college trimming houses. He then spent about ten years as a railroad bridge engineer, handling design, construction, maintenance and project management. He came back to finish carpentry full time in 2017.

About Let’s Build Stuff

Core Guide, Level 3
What are your Feelings

Share This Article :

  • Facebook
  • X
  • LinkedIn
  • Pinterest
Still stuck? How can we help?

Still stuck? How can we help?

Updated on September 26, 2026
How to Install a Wood Wall CapHow to Install a False Tread Stair End Cap

Leave a Reply Cancel reply

Your email address will not be published. Required fields are marked *

Table of Contents
  • Introduction
  • Before You Begin
    • Prerequisites
    • What You Need To Know
  • Tools
  • Materials
  • Installation Steps
    • Step 1. Measure and Cut Nosing
    • Step 2. Apply Adhesive
    • Step 3. Position and Secure Nosing
    • Step 4. Check for Level and Alignment
    • Step 5. Clean Up Excess Adhesive
  • Pro Tips
  • Common Mistakes
  • QC / Punch Checklist
  • Related Guides
  • Reference Photos
Let's Build Stuff
  • Glossary
  • Learn
  • Blog
  • About
  • Contact
  • Affiliate Disclosure
  • Privacy Policy

© 2026 Let's Build Stuff - Interior Finish Carpentry Experts

  • Home
  • Start Here
  • Glossary
  • Learn
  • Blog
  • About
  • Contact
  • Browse the guides