On this page
Introduction #
A knock-down hollow metal frame ships as three loose pieces, a head and two jambs, that wrap around a finished wall instead of going in before drywall like a welded frame. The Steel Door Institute sets the standards these frames are built to; this guide is the field sequence for a knock-down frame going on over a finished wall. This is a frame and slab job: the slab hangs at the same time as the frame so the margins can be set as the frame is tightened up, and hardware gets its own guide.
Knock-down and welded hollow metal frames are two different jobs with two different sequences. This guide covers the knock-down frame, installed after drywall is finished. For a frame that goes in before drywall, see How to Install a Welded Hollow Metal Frame.
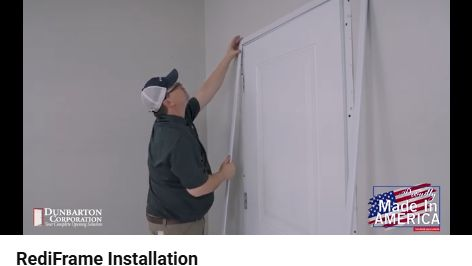
We follow the frame maker's own instructions for this install. The frames we set are Dunbarton RediFrame, and their RediFrame installation video demonstrates the sequence below; watch it once before your first one. Use the instructions supplied with your actual frame for its clearances, fastening schedule and hardware preparation. If those instructions differ from the demonstration, follow them. A different knock-down frame may need a different method.
Before You Begin #
Before you install a knock-down hollow metal frame, confirm that the following prerequisites are complete.
Prerequisites #
- Drywall at the opening is finished, taped, and ready. Knock-down frames wrap the finished wall instead of going in before drywall like a welded frame.
- Wall thickness at the opening matches the frame's throat size before you bring the pieces to the wall.
- Rough opening checked against the frame: RediFrame calls for an opening 5/8 inch taller than the frame's net length and 1 to 1-1/4 inch wider than its net width. A wall thicker than the frame throat will fight you the whole way.
- The opening is framed in wood studs. This guide is not for masonry: we do not set hollow metal frames into block or concrete, and there are no masonry anchors, concrete screws, or grout anywhere in this sequence.
- All three frame pieces, the head and both jambs, the slab, and the fasteners are on site and match the opening's schedule.
- Confirm the finished floor elevation and any required closer, exit-device or other hardware reinforcements before the frame goes on. If flooring is still missing, follow the supplied instructions for temporary support beneath the jamb ends at the future floor height. This is different from packing shims between the frame and wall.
If the opening needs framing changes, use Resize a Door Opening as a separate task reference. Resizing is not a required step for an opening that already matches the frame.
What You Need To Know #
- No shims: the frame wraps the wall and fastens directly, with no shim stack between the frame and the wall.
- The slab hangs at the same time as the frame, not after, so the margins get set as the frame is tightened up.
- This is a frame and slab job. It stops once the frame and slab are set with even margins all around. Door hardware installs under its own guide.
Tools #
- Tape measure, to check the opening and wall thickness against the frame throat. Use the known-thickness spacer to hold the door margin.
- 6-foot level, to check the jamb for plumb and the head for level.
- Drill/driver or screw gun, with a bit that fits the specified screw head, to drive the frame screws without stripping them.
- 3/32- or 1/8-inch temporary margin spacers, as shown in the RediFrame video. A small flat gauge of known thickness holds the gap between the door edge and frame while you fasten it; see the close-up in Step 6.
- Pry bar or wonder bar, to lift the slab just enough to align the hinges when working alone. Protect the floor and door edge at the contact points.
- Phillips and flat screwdrivers, sized to the actual hinge screws and the frame maker's casing-clip instructions. See their uses in Steps 5 and 7.
Materials #
- Knock-down hollow metal frame, head and two jambs, per the opening's door schedule.
- Slab, per the opening's door schedule.
- Hinges are needed to hang the slab while setting the frame. Install the lockset and strike afterward; follow How to Install a Lockset on a Door.
- 2-inch coarse-thread drywall screws for this wood-stud installation, subject to the fastener length, hole pattern and any fire-rating requirements supplied with the actual frame.
Installation Steps #
Step 1. Confirm the Wall and Opening #
Confirm the drywall at the opening is finished and that the wall thickness matches the frame's throat before you bring the pieces to the wall.
Step 2. Lay Out the Pieces #
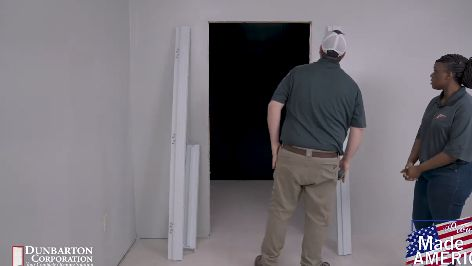
Open the package, check all three pieces for damage and check the dimensions against the opening. Stand the hinge jamb against the wall beside the opening, on the side the door will swing toward. Lay the head next to it, close to the opening, and the strike jamb on the other side, oriented the same way as the hinge jamb. Measure the hinge and strike locations on the pieces before anything goes on the wall so the frame is not built backwards.
Step 3. Sleeve the Head and Jambs Over the Wall #
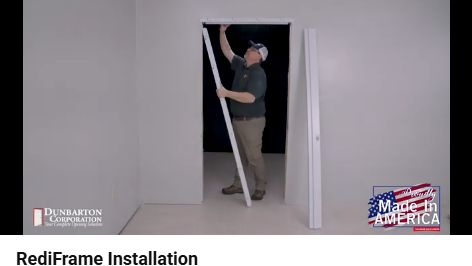
Standing inside the opening, take the head first and sleeve it over the wall into position at the top of the opening. Holding the head there, sleeve the hinge jamb over the wall and slide its top up into the head; the jamb now carries the head. Still steadying the head with one hand, set the strike jamb the same way. The corners lock by the jambs seating up into the head; there are no corner screws. Check that the jamb rabbets and stops line up with each other at both corners before any fastener goes in.
Step 4. Set the Hinge Jamb First #
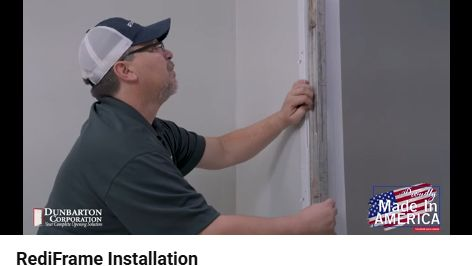
Fasteners always go in from the door side of the frame first, so the door can be used to align everything else. Push the hinge jamb toward the studs, leaving about 1/2 inch between the inside throat of the frame and the stud. Drive one 2 inch coarse thread screw through the top fastener hole in the face of the hinge jamb, put the level on the jamb and get it dead plumb, then drive the bottom hole. Add at least two more screws down the jamb, one per every two-hole pattern.
Step 5. Hang the Slab #
The slab goes on now, because it is the template for the rest of the frame. Working alone: if the hinge pins are removable, take them out to separate the leaves. Screw one leaf of each hinge to the frame and the mating leaf to the slab, using the supplied hinge screws and the matching screwdriver or driver bit. A Phillips screwdriver fits a cross-shaped screw recess; use the actual head type supplied. Keep the pins within reach, support and lift the slab with the pry bar until the hinge knuckles align, then reinsert the pins. If the pins are not removable, use the supported two-person method: attach the hinges to the slab, hold it in the opening, then screw the hinges to the frame. Close the door gently to check the fit. Install the lockset and strike after the frame and slab are set; follow the lockset guide.
Step 6. Use the Slab to Set the Head and Strike Jamb #
A margin spacer is a temporary gap gauge. Use a small flat piece of known, measured thickness between the door edge and the frame rabbet, the recessed surface beside the stop. The video uses a 3/32- or 1/8-inch spacer. Choose the clearance required by the instructions for your frame and door. This is not a tapered wall shim: it holds the visible door-to-frame gap while screws are driven, then comes out. Do not leave it trapped in the finished opening.
Close the door. Drive the head screw on the door side above the hinge jamb, pulling the head down tight onto the hinge jamb so the end of the head lines up with the edge of the jamb face. Slip the selected spacer between the top of the door and the head rabbet, then drive the head screw at the strike end. Move the spacer to the gap between the strike edge of the door and the strike jamb rabbet. Drive the top face screw on the strike jamb, then move the spacer beside each fastening position as you work down. The video recommends one screw per two-hole pattern, spaced 12-15 inches along the jambs and head; follow the supplied schedule if your frame differs. The door stays put; the frame moves to it. Remove the spacer and check the door swing and the head and strike-side margins.
Step 7. Fasten the Other Face and Finish the Frame #
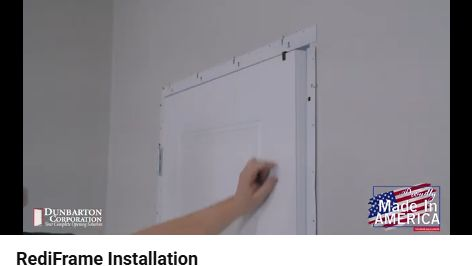
Repeat the same fastening sequence on the other face of the frame: pull the head down tight onto both jambs and align the head ends with the jamb faces. Keep the frame untwisted and follow its fastening schedule. For the snap-on metal casing shown in the video, insert the corner clips into both ends of the head casing, hook the head casing over the top of the center lance and snap it down. Slide the upright casing onto the corner clips. Check that the head casing is centered, then hook each casing length over the wall-side edge of the lances and roll it inward toward the door. Keep the miters tight. A flat screwdriver has a straight blade; use it only where the manufacturer calls for clip adjustment or casing removal, not to force the frame against the door. Frames ordered for wood casing have their own clearance holes and casing instructions. The frame is done when it is tight, plumb and untwisted, the slab swings freely, the top and side margins are even, and all temporary gap spacers are out.
QC / Punch Checklist #
- Wall thickness matched the frame throat before installation started.
- Frame is plumb and level, fastened tight to the wall with no movement.
- All 2 inch coarse thread screws are driven flush and solid.
- Slab swings freely. Top and side margins match the supplied door/frame clearance; the demonstration uses a 3/32- or 1/8-inch gauge. Head is pulled down tight onto both jambs, with its ends aligned to the jamb faces.
- No packing shims between the frame and wall. All temporary door-margin spacers have been removed.


