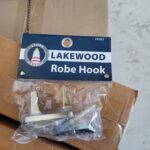
Hardware #
Skill Level: Beginner (Level 1) #
Estimated Time: 30-60 Minutes per Bathroom #
Introduction #
Knowing how to install bath accessories properly is the final finishing touch in a bathroom — towel bars, towel rings, toilet paper holders, robe hooks, and sometimes shelves or grab bars. While they seem simple, improper installation leads to accessories pulling out of the wall, especially towel bars that take daily pulling force every time someone grabs a towel.
The key to a solid installation is mounting method: when possible, mount into wall studs or blocking. When that’s not possible (which is often — accessories need to go where the design calls for them, not always where studs are), use proper wall anchors rated for the expected load.
In new construction, smart builders add blocking behind the wall at standard accessory locations BEFORE drywall and tile go up. In remodels (where most bath accessories are mounted on tile), you’ll need anchors to install bath accessories securely. This guide covers mounting on both tile and drywall.
📷 Photo Needed
Hero shot — a completed bathroom with towel bar, towel ring, TP holder, and robe hooks all installed. Clean, professional look. Shot from doorway angle showing the full room.
Before You Begin #
Prerequisites #
- Walls complete (painted and/or tiled)
- Accessories purchased and organized by bathroom
- Placement heights determined
What You Need To Know #
- Standard mounting heights: towel bar 48″ to center from floor, toilet paper holder 26″ to center and 8-12″ from front of toilet, towel ring 48″ to center, robe hooks 65-70″ to center
- These are guidelines — adjust for actual use and user height
- Always check for pipes and wires with a stud finder before drilling into walls
- On tile walls, use a carbide-tipped masonry bit and go SLOWLY to avoid cracking tiles
Tools Required #
Power Tools #
- Drill/driver
- Stud finder
Hand Tools #
- Tape measure
- Pencil
- Level
- Screwdriver
- Hammer (for plastic anchors)
- Masonry bit (for tile)
Supplies #
- Wall anchors (heavy-duty anchors for towel bars and accessories that take pulling force, standard plastic anchors for lighter items like TP holders)
- Screws (provided with accessory kits)
- Painter’s tape (to mark drill locations on tile)
Materials #
- Towel bars with brackets
- Towel rings
- Toilet paper holder
- Robe hooks
- Any other specified accessories
Install Bath Accessories: Step-by-Step Process #
Step 1: Plan Placement #
Before you install bath accessories, mark all locations before drilling anything. Use a tape measure and level to establish precise positions. Step back and visualize — are the towel bars centered on the vanity? Is the TP holder reachable from the toilet? Hold each accessory up to the wall and have someone check the position from a natural sitting or standing perspective.
Pro Tip: Use painter’s tape to mark accessory outlines on the wall before drilling. Live with the tape for a day if possible — this prevents “oh, that should have been 2 inches higher” moments after holes are drilled.
📷 Photo Needed
Painter’s tape outlines on a bathroom wall marking where towel bar, TP holder, and robe hook will be mounted. Show tape at standard heights with a tape measure visible.
Step 2: Check for Studs and Obstructions #
Use a stud finder at every mounting location. Scan for plumbing and electrical as well — bathrooms have plenty of both running through the walls. If you hit a stud, great — use screws directly into the framing. If not, plan for appropriate anchors based on the weight and force the accessory will need to support.
📷 Photo Needed
Using a stud finder on a bathroom wall before mounting. Show the stud finder against drywall or tile, close-up of hands and tool, real bathroom setting.
Step 3: Mount Brackets (Drywall) #
For drywall WITHOUT studs: drill a pilot hole, insert the wall anchor (heavy-duty anchor for towel bars, plastic anchor for lighter items), and mount the bracket with a screw through the anchor. For drywall WITH a stud behind it: drill a pilot hole into the stud and mount the bracket with the provided screws directly into the framing.
Pro Tip: For towel bars, ALWAYS use heavy-duty wall anchors when mounting into drywall without backing. Standard plastic anchors will pull out within months from the daily pulling force of grabbing a towel.
📷 Photo Needed
Mounting a bracket on drywall with a wall anchor. Show the anchor inserted in the wall, bracket being screwed into place. Close-up of hands and drill, real bathroom wall.
Step 4: Mount Brackets (Tile) #
Apply painter’s tape over the drill location — this prevents the bit from skating across the tile surface. Use a carbide masonry bit matching the anchor size and drill through the tile at medium speed with light pressure. Do NOT push hard or the tile will crack. Remove the tape, clean out the hole, insert the anchor, and mount the bracket.
📷 Photo Needed
Drilling into tile with masonry bit. Show painter’s tape on tile surface, carbide bit in drill, pilot hole being made. Real bathroom tile wall, not staged on a table.
Pro Tip: On tile, start with a small bit (1/8″) to create a pilot hole, then step up to the final anchor size. Going straight to a large bit on tile risks cracking.
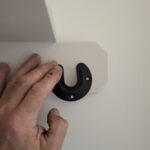
Step 5: Attach Accessories to Brackets #
The final step to install bath accessories is sliding the towel bar into its brackets and tightening the set screws. Snap hooks and rings onto their wall plates. Tighten any adjustment screws to lock everything in position. Test each accessory with a firm pull to verify it’s secure — if anything moves or feels loose, remove it and upgrade the anchor or re-mount into a stud.
📷 Photo Needed
Finished bathroom with all accessories mounted — towel bar, towel ring, TP holder, and robe hook. Show the complete look from a normal viewing angle, real bathroom.
Quality Check #
- All accessories level and properly aligned
- Accessories at correct heights
- All mounting points secure (pass pull test)
- Set screws tightened so nothing rotates or slides
- No damage to tile or wall surface
- Towel bar doesn’t flex or wobble
- TP holder spring mechanism works
- Consistent finish across all accessories
Common Mistakes When You Install Bath Accessories #
Even experienced DIYers make mistakes when they install bath accessories. Avoiding these common errors saves time, wall damage, and frustration.
Using the Wrong Anchors #
The most common failure happens when homeowners use the small plastic anchors included in accessory kits for towel bars. These anchors are rated for static loads of 10-15 pounds, but a towel bar endures dynamic pulling forces of 30+ pounds multiple times a day. Within months, the anchors loosen and the bar pulls free. Always upgrade to heavy-duty wall anchors for any accessory that takes daily pulling force — towel bars, robe hooks near showers, and grab bars.
Skipping the Level #
A towel bar mounted even 1/4 inch off-level is visually obvious, especially when a towel hangs from it. Always use a 4-foot level to mark both bracket holes before drilling. Measure from the floor at both bracket locations to confirm the marks are at identical heights — floors and countertops are not always level, so relying on them as a reference can introduce error.
Drilling Too Close to Tile Edges #
Drilling within 1 inch of a tile edge dramatically increases the chance of cracking. When you plan where to install bath accessories on tiled walls, position brackets so drill holes land at least 1.5 inches from any tile edge or grout line. If the ideal placement puts a hole near an edge, adjust the height slightly to center the hole within the tile face.
Not Testing Before Final Tightening #
Always give every accessory a firm pull test before tightening set screws. Mount the bracket loosely first, test the anchor hold, then attach the accessory and tighten everything. If an anchor feels loose during the pull test, remove it immediately and upgrade to a stronger mounting method. Discovering a weak mount after the bathroom is in daily use means another round of wall repair.
Install Bath Accessories Troubleshooting #
Accessory Pulls Out of Wall #
The anchor failed under load. Remove the accessory and the failed anchor, then upgrade to a larger or stronger anchor — heavy-duty wall anchors are the best option for drywall. Alternatively, relocate the bracket slightly to hit a stud for a direct wood-screw connection.
Tile Cracked During Drilling #
This usually means you were drilling too fast or applying too much pressure. Patch the cracked tile with color-matched epoxy if the crack is minor. If the tile is badly damaged, it may need to be replaced. For the new hole, re-drill at an adjacent location slowly with light pressure and a sharp carbide bit.
Accessory Not Level #
The bracket holes may be misaligned. Fill the old holes with spackle or epoxy (drywall) or color-matched caulk (tile), let it cure, and re-drill level holes using a spirit level to mark both bracket positions before drilling.
Set Screw Won’t Tighten (Bar Spins in Bracket) #
The set screw may be stripped or the wrong size for the bracket. Replace the set screw with a matching one from a hardware store. If the threads in the bracket are damaged, apply thread-locking adhesive (such as Loctite) to the set screw before tightening to create a permanent hold.
Can’t Find Studs Behind Tile #
Studs are harder to detect through tile because most stud finders can’t read through the dense material. Measure from a known reference point — an electrical box, a corner, or a doorway — to estimate stud locations at 16″ on center. If you can’t confirm a stud, plan to use wall anchors rated for the required load.
Related Guides #
- Carpenter Hand Tools
- Finish Trim Carpentry
- How to Trim a House
- How to Install a Lockset on a Door
- How to Install Baseboard
- How to Choose the Perfect Interior Door
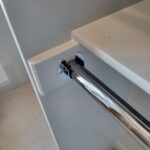
Reference Photos #
The following photos show examples of this type of work completed in the field. These serve as visual references for quality standards, proper installation techniques, and finished results.
Showing 3 of 3 photos