Introduction #
Installing an 8 foot solid core pre-hung door is the most demanding standard interior door job you’ll face. This is a supplemental guide for the 8 foot solid core pre-hung door variant, the heaviest and most challenging standard interior door variant there is. Before you start this guide, make sure you already know:
- How to Install a Pre-Hung Door Like a Pro - The core guide. Complete step-by-step process.
- 6’8″ Solid Core Supplement - Covers what changes because of the extra weight: structural screws, taking off the slab (the door itself, separate from the frame around it), construction adhesive, and shimming for the added mass. Shimming means wedging thin tapered wood pieces behind the frame to lock it tight and square.
- 8’0″ Hollow Core Supplement - Covers what changes because of the extra height: the 6-foot level, the 11 shim point schedule, ladder work, and shimming from the top down.
This guide covers only what’s new when both variables combine. If a topic is fully covered in one of the guides above, we’ll link to it rather than repeat it.
An 8 foot solid core pre-hung door is not just a taller version of the 6’8″ solid core door. It is not just a heavier version of the 8’0″ hollow core door either. The two problems combine and make the job harder than either one alone. Treat every 8 foot solid core pre-hung door as its own job. Plan for a helper. Clear floor space so you can lay the slab down flat. Read both linked supplements before you touch the rough opening (the framed hole in the wall that the door frame sits in).
8 Foot Solid Core Pre-Hung Door Weight at a Glance #
| Door Type | Approximate Slab Weight |
|---|---|
| 6’8″ Hollow Core | 25-35 lbs |
| 6’8″ Solid Core | 50-70 lbs |
| 8’0″ Hollow Core | 35-45 lbs |
| 8’0″ Solid Core | 70-100 lbs |
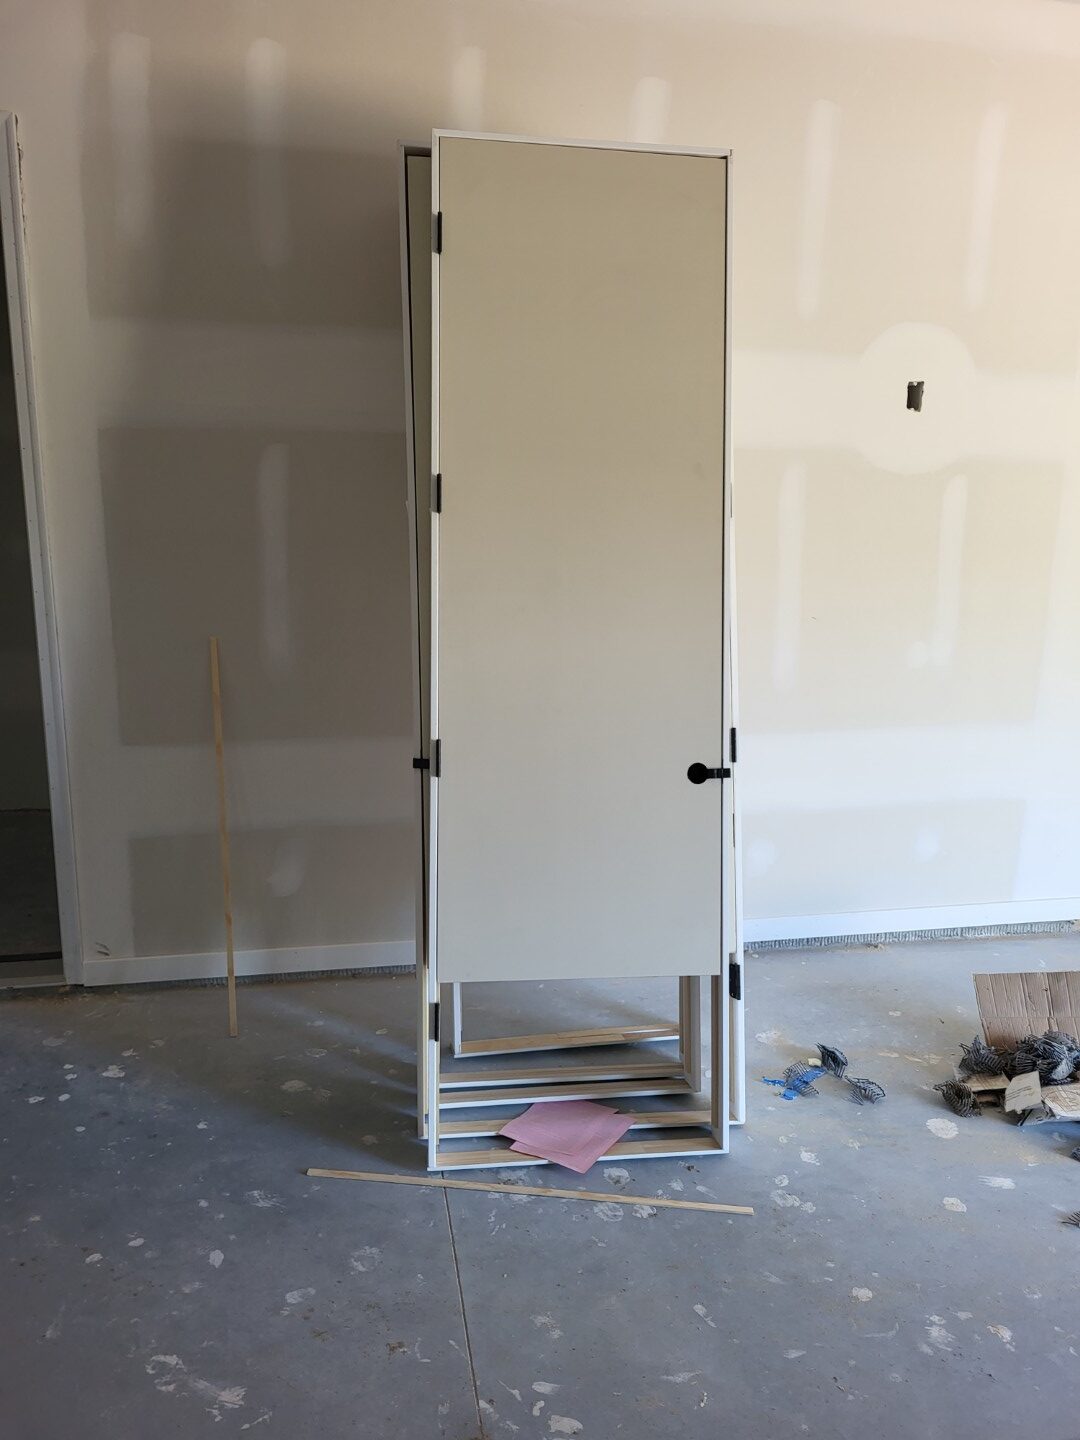
An 8 foot solid core pre-hung door means a 70-100 pound slab mounted on a 97-inch frame, with a center of gravity well above your waist. This changes the installation in ways neither weight nor height alone can prepare you for.
What’s Different With an 8 Foot Solid Core Pre-Hung Door #
You already know the individual challenges from the two supplementals above. Here’s what’s new when both hit at once:
- Slab removal is mandatory, not optional. For a 6’8″ solid core door, removing the slab is recommended but experienced installers sometimes work with it attached. With an 8 foot solid core pre-hung door at 70-100 lbs, you must remove it. The unit is unmanageable at full weight. Trying to shim it overhead while supporting that much weight risks damage to the door and injury to you.
- A helper is strongly recommended. Not mandatory, but a solo 8-foot solid core install takes roughly 50% longer and demands careful planning for every lift. The helper’s main value: holding the slab during rehanging and steadying the frame during initial positioning.
- Structural screws in every hinge. The 6’8″ solid core guide calls for 3″ screws in the top and middle hinge. At 8 feet, upgrade: replace one factory screw per hinge in all three (or four) hinges with a 3″ screw that reaches the framing. This Old House recommends structural screws as the primary fix for sagging heavy doors. The additional weight and leverage at this height make every hinge a structural connection.
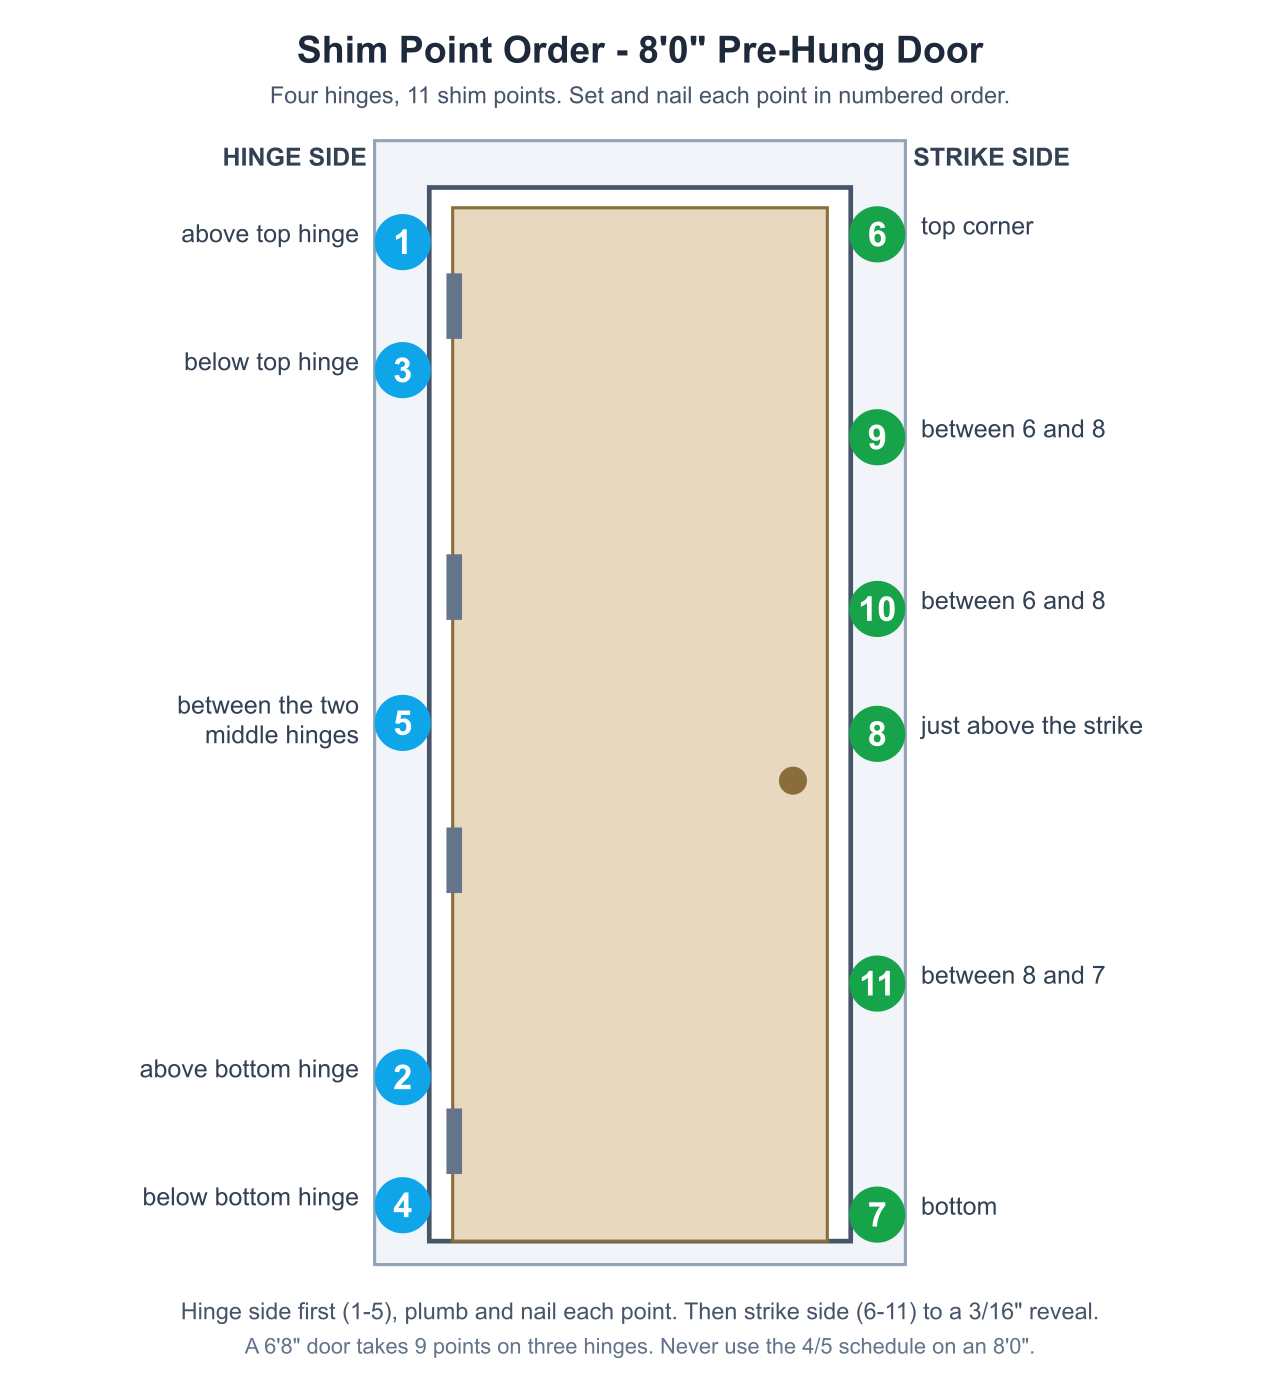
- More shim points, tighter shims, more adhesive. Combine the 11 shim point schedule from the 8-foot guide with the tighter shim compression and construction adhesive from the solid core guide. Every shim pair carries more load over a longer span.
- Fatigue is real. Climbing a ladder repeatedly while handling heavy components is tiring. This is a 45-60 minute install with a helper, 60-90 solo. Plan breaks and don’t rush overhead work when fatigued.
Step 0: Remove the Door Slab #
Follow the slab removal instructions in the 6’8″ solid core guide. Same process, heavier slab. Two additions for the 8-foot version:
- Have a helper or a furniture dolly nearby. An 8-foot, 70-100 lb slab removed from its hinges needs to go somewhere stable. Leaning it against a wall unsupported is risky - it can slide and damage flooring or itself.
- Support the slab from below while driving hinge pins out. The slab’s weight will clamp the hinge knuckles (the interlocking rounded joints on a hinge that the pin passes through) tight. With a helper, one person lifts slightly, taking the pressure off the knuckles, while the other drives the pins. Working alone? Use a flat pry bar under the bottom of the slab as a lever. Work the pins out with your other hand, starting at the bottom hinge.
Step 5: The Margin Problem #
This is the one challenge that is unique to the 8-foot solid core install. No other variant has it.
Normally, in Step 4, you close the door and check the strike-side margin. The strike side is the side with the latch, opposite the hinges. The margin is the gap between the door slab and that jamb, and it should look even from top to bottom. But your slab is removed right now, so you can’t close a door that isn’t hung yet.
How to handle it:
- Use the factory-inserted spacers (cardboard or foam strips) between the slab and jamb as your margin reference. If they’re still in place from the factory, great - shim the strike side until the margin matches the hinge side consistently.
- If factory spacers are gone, use playing cards or thin cardboard strips (about 1/8″ thick) as temporary spacers. Insert them at top, middle, and bottom of the strike-side gap.
- Fine-tune after rehanging. Once the slab is back on, you can still adjust strike-side shims before final nailing. The initial shimming gets you close. Rehanging the door confirms it.
Rehanging the Slab #
Rehanging an 8 foot solid core pre-hung door slab is the most physically demanding part. The basic process is in the 6’8″ solid core guide. At 8 feet, the added height introduces two changes:
With a Helper #
The helper holds the slab plumb and at the right height. You line up the hinges and drive the pins. At 8 feet, the top hinge knuckles sit at about 86-88 inches up. The helper should steady the slab from the middle while you work from a ladder at the top hinge. Start with the top hinge pin, then the middle, then the bottom. The top pin carries the most load and locks the slab’s position in place. Working from the top down lets gravity help seat the knuckles.
Solo Technique #
If you don’t have a helper:
- Position the slab in the opening, resting on shims or a thin block cut to your desired floor gap height.
- Align the bottom hinge first - it’s the easiest to reach and holds the slab upright while you work upward.
- Tap the bottom pin in just enough to hold (2-3 taps, not fully seated).
- Move to a ladder and align the middle hinge, tap its pin in.
- Align and pin the top hinge last.
- Return to each hinge and fully seat all pins.
Critical: Never leave a partially pinned 8-foot solid core slab unattended. One pin in the bottom hinge is not enough to hold 70-100 lbs if the slab swings. Work continuously until at least two pins are partially seated.
Time Estimates #
| Scenario | Estimated Time |
|---|---|
| With experienced helper | 45-60 minutes |
| Solo, experienced installer | 60-90 minutes |
| Solo, first time with this variant | 75-120 minutes |
An 8 foot solid core pre-hung door demands more time than any other standard variant. These estimates include slab removal, frame installation, slab rehanging, and final adjustments. They don’t include casing (the trim boards around the door frame) or hardware.
Troubleshooting - 8’0″ Solid Core Specific #
Sag Develops After Installation #
Most likely, structural screws weren’t installed in all the hinges, or the screws didn’t reach the framing. Remove the short factory screws. Replace them with 3″ screws. Make sure each one bites into the jack stud (the extra framing stud next to the rough opening that the door frame is screwed into). You’ll feel the resistance increase as the screw hits solid framing. Use one screw per hinge, in the hole closest to the barrel (the round part of the hinge that the pin passes through).
Hinge Knuckles Won’t Align During Rehanging #
The jamb has shifted since you removed the slab, or the slab isn’t at exactly the right height. Re-check hinge-side plumb with the 6-foot level. Adjust the shim under the slab bottom (floor gap block) up or down until the knuckles line up. Even 1/16″ off at the bottom compounds to 1/8″ off at the top over 8 feet.
Jamb Flexes When Door Slams #
The shims aren’t gripping tight enough for the weight of the slab. Remove the casing at the flex point, add construction adhesive behind the shims, and tighten the shim pairs. Also check that the nails at that point are 2-1/2″ or longer and are hitting framing, not just drywall.
Helper Dropped the Slab #
Inspect the slab edges and corners for damage. Solid core slabs can dent but rarely crack. If the drop dented or cracked the face or edges badly, replace the slab. A new solid core slab costs less than the callback. That callback is what you risk by hanging a damaged door.
Fatigue-Related Mistakes #
If you find yourself making errors (cross-threading screws, misreading the level, dropping tools), step down from the ladder and take a 5-minute break. Installing an 8 foot solid core pre-hung door overhead is physically demanding - follow OSHA ergonomics guidelines. Most installation damage happens in the last 15 minutes when the installer is tired and rushing to finish.
An 8 foot solid core pre-hung door is the one standard interior door where every shortcut catches up with you. Skip the helper, and the height alone turns it into a fight. Skip the structural screws, and the weight sags the door within months. Respect both the weight and the height, and this door hangs as clean as any other install, just on a longer timeline. Budget the extra time. Follow the sequence. Treat every 8 foot solid core pre-hung door as the two-person job it usually is. Rush it, and you are the crew coming back to fix a callback you could have avoided.
Related Guides #
- Core Guide: How to Install a Pre-Hung Door Like a Pro - Complete step-by-step process
- 6’8″ Solid Core - Weight-specific changes: structural screws, slab removal, construction adhesive
- 8’0″ Hollow Core - Height-specific changes: 6-foot level, more shim points, ladder work


